


12
1
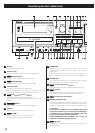
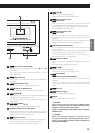
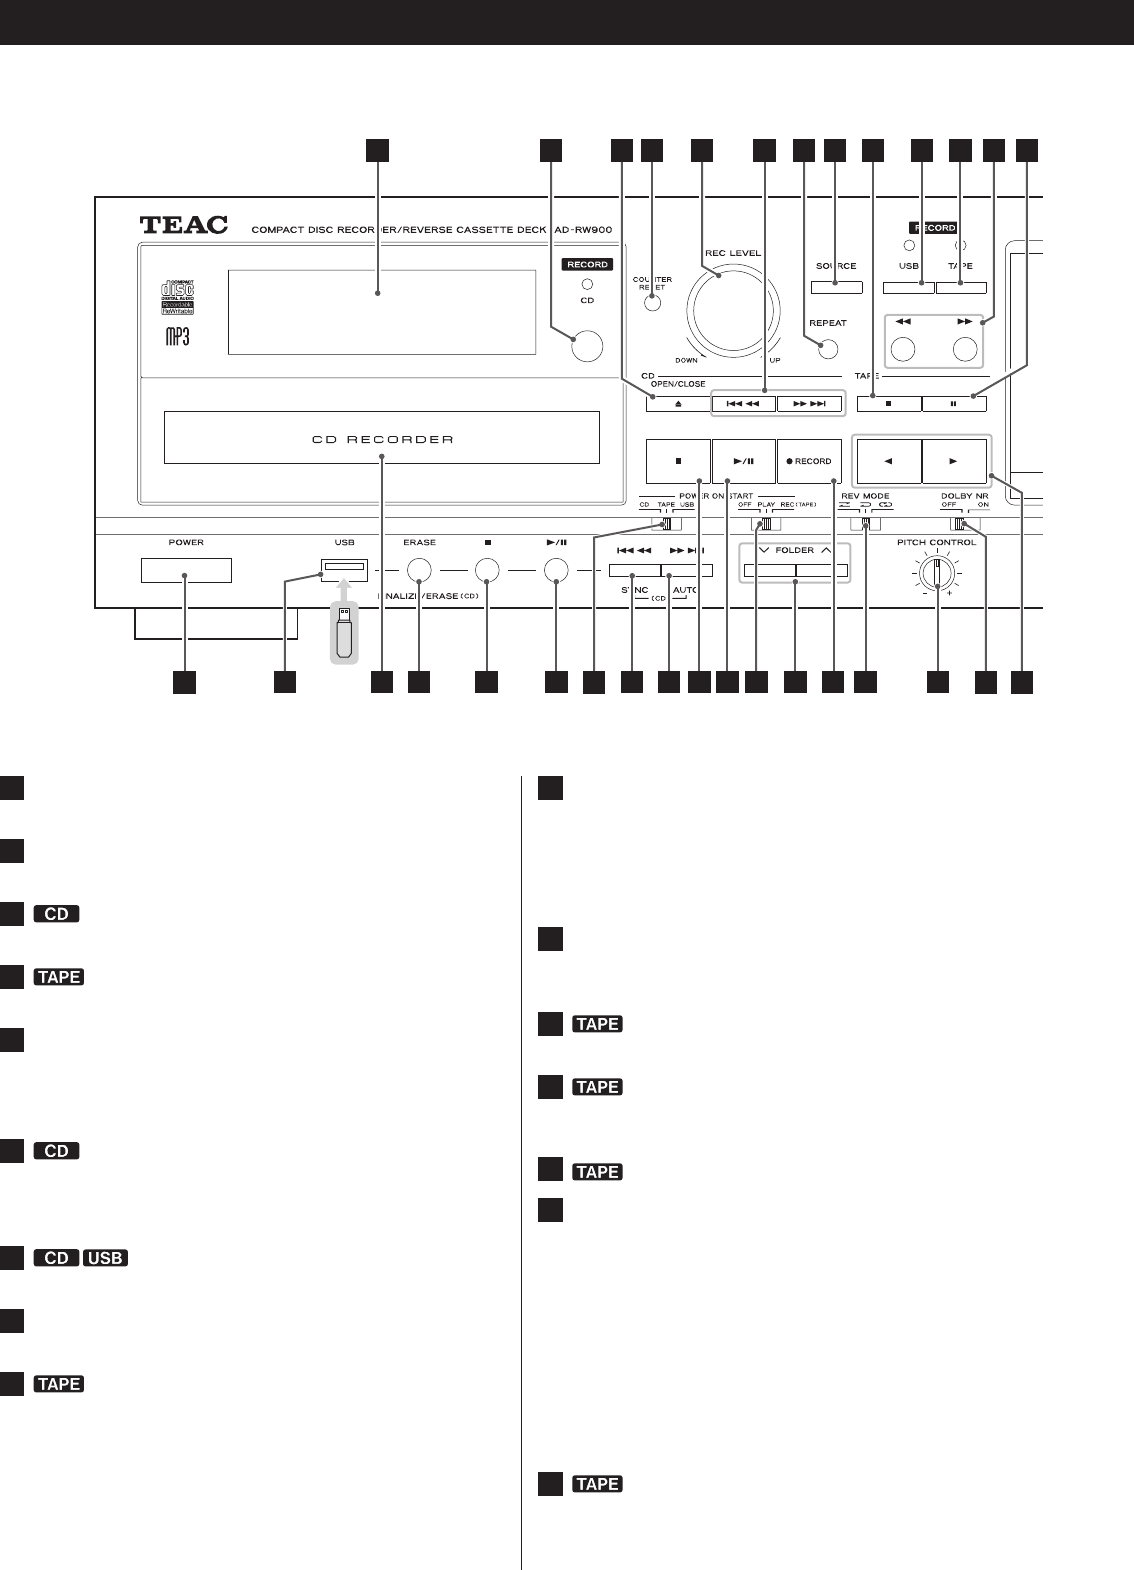
Display
See “Display” on pages16-18.
2
Remote sensor
When operating the remote control, point it towards here.
3
OPEN/CLOSE (
L
)
Press this button to open and close the disc tray.
4
COUNTER RESET
Press this button to reset the tape counter to “0000”.
5
REC LEVEL knob
Turn this knob to adjust the recording level.
< Use to adjust the sound level output to a connected computer
except when in recording standby or during recording.
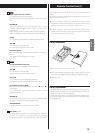
6
Skip (
.
/
/
)/Search (
m
/
,
)
Press these buttons to skip through tracks/files.
Hold down these buttons during playback to search for part of a
track/file.
7
REPEAT
Use this button to set the repeat function (page24).
8
SOURCE
Use this button to select the source (page
19
).
9
Stop (
H
)
Press this button to stop cassette tape playback.
Press this button to stop recording to a tape.
10
RECORD USB
Use to record to an external USB flash drive. Press it once to
enable recording standby, and press it again to start recording
(pages 39-41).
Press it during recording to divide the file at that point (page41).
(When recording from a CD, however, files cannot be divided.)
11
RECORD TAPE
Use to record to a tape. Press it once to enable recording standby,
and press it again to start recording (pages42-44).
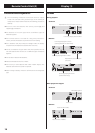
12
Fast-forward/Rewind (
m
/
,
)
Press these buttons to fast-forward/rewind the cassette tape.
13
Pause (
J
)
Press this button to pause cassette tape playback or recording.
Press this button again to resume playback or recording.
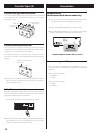
14
Cassette tape compartment
15
PHONES jack/LEVEL knob
To listen with headphones, turn the LEVEL knob to minimize the
volume level before connecting the headphones plug to the
PHONES jack. Then, adjust the volume after connecting the plug.
Q CAUTION
Do not connect headphones to the PHONES jack while
wearing them. Moreover, do not disconnect headphones
or turn the unit on or off while wearing them. Very loud
sound could be output from the headphones.
AVOID DAMAGING YOUR HEARING—Do not put on
headphones until after plugging them in.
16
EJECT (
L
)
When the tape is stopped, press this button to open the cassette
tape compartment.
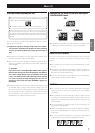
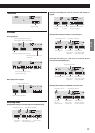
Identifying the Parts (Main Unit)
1 43 5 86 7
11
2034 2226
10 12 13
2
1819 17
24
9
2932 31 30 28 25 23 2133 2627