20
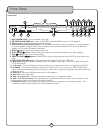
Front Panel
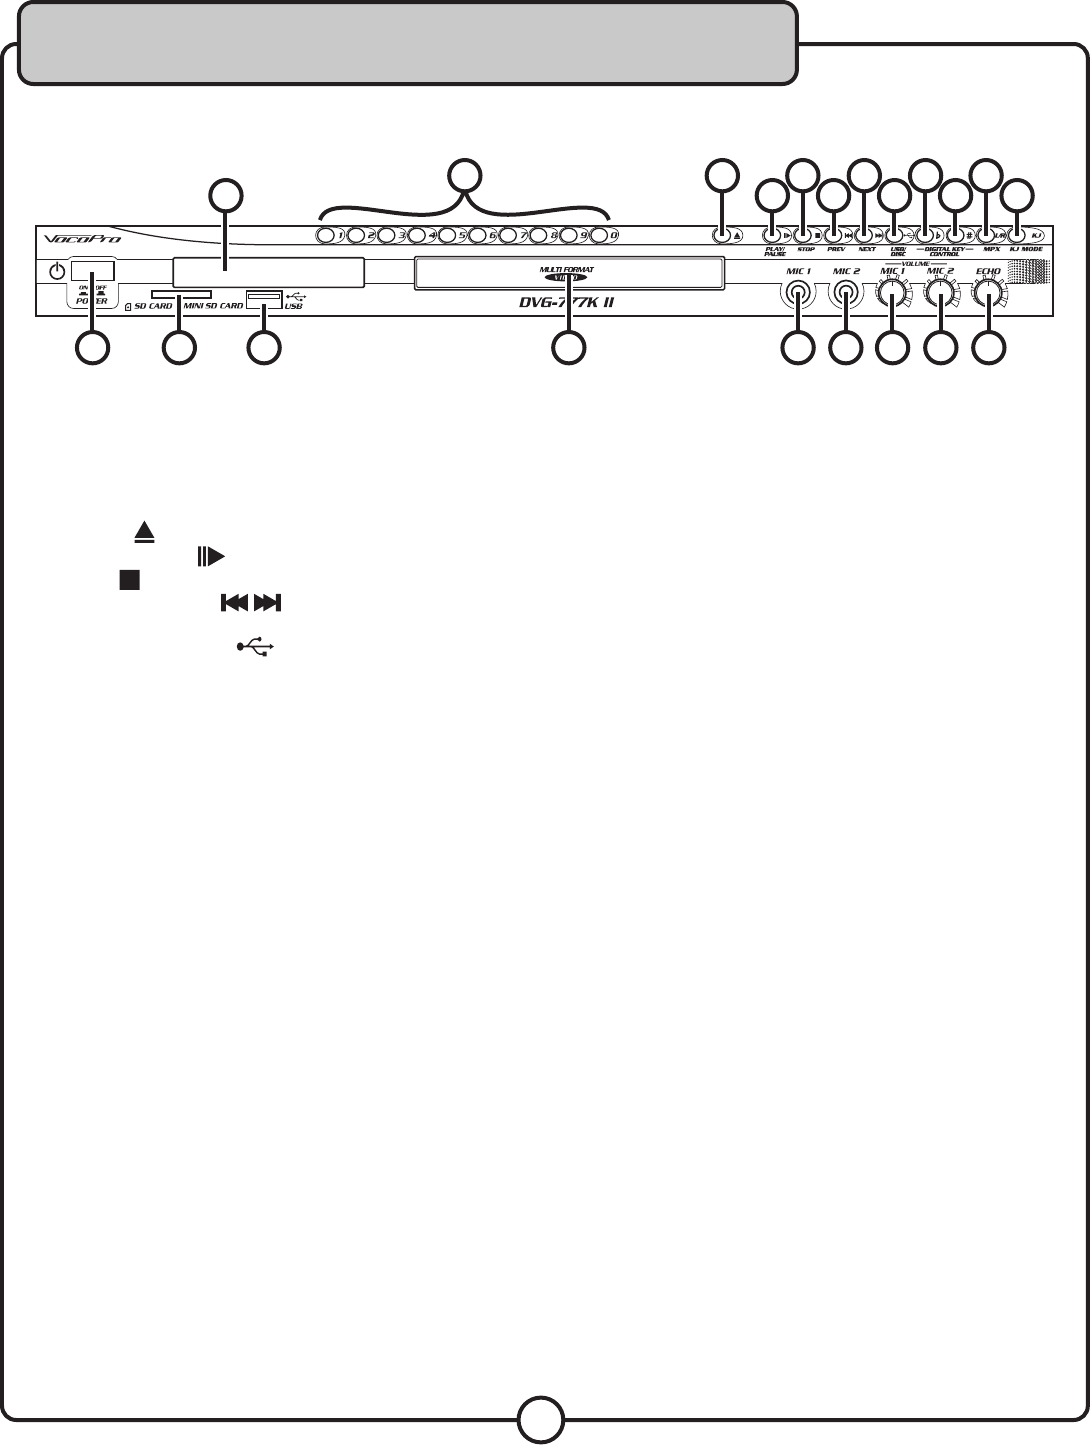
1. Main POWER button - Turns the power on and off.
2. SD CARD/MiniSD CARD slot - Insert an SD CARD or MiniSD CARD here for A/V file playback.
3. Display screen - Displays the player’s operating status.
4. Direct Track Access (number) buttons - For use whenever number input is necessary. i.e. Jumping directly
to tracks/chapters, programming tracks in program mode, parental password, etc. See the Operations
section in this manual for detailed instructions.
5. EJECT button - Opens and closes the disc tray
6. PLAY/PAUSE
button - Plays a disc that is stopped or paused and pauses a disc that is playing.
7. Stop button - Stops a disc that is playing.
8. PREV and NEXT buttons - Press PREV to jump to the previous track and NEXT to jump to the next
track.
9. USB/CARD/DISC button - Toggles between disc player, SD Card and USB input.
10. Digital Key Control - Adjusts the musical key to fit a singer’s vocal range. Press “b” to lower the key and
“#” to raise the key.
11. L/R button - Turns multiplexing on and off, allowing you to remove vocals from a multiplex-enabled CD+G.
12. KJ MODE - This function will pause a disc at the 1 second mark. This is for use on CD+G karaoke discs
with a song-title at the beginning of each song as it allows you to display the song-title for the audience before
playing the song.
13. USB input - Connect a USB device here for A/V file playback.
14. Disc Tray - Insert discs here.
15. MIC 1 & 2 Input jacks - Connect microphones here using ¼” microphone cables.
16. MIC 1 & 2 Volume controls - For adjusting each microphone’s individual volume. Turn clockwise to raise
the microphone volume and counter-clockwise to lower it.
17. ECHO level control
- For adjusting the amount of Echo that is present in the microphone vocals. Turn
clockwise to raise the Echo level and counter-clockwise to lower it.
Front Panel


