


110
110
CVP-98/96/600
MStop recording. ...................................................................................................
Press the [PLAY/STOP] button.
➔ Recording stops. When the recorded data has been written to
disk, the [REC] lamp goes out and the song play display appears.
You can also stop recording by pressing the [REC] button.
When pressing the [START/STOP] button, only the recording of the
Auto Accompaniment or rhythm will stop. You can continue recording
your keyboard performance, without the Auto Accompaniment and
rhythm. Press either the [PLAY/STOP] or [REC] button in order to
actually stop recording.
<Play back the recording............................................................................
Press the [PLAY/STOP] button.
➔ The recorded data will be played back. During playback you can
use the [REW], [FF] and [PAUSE] buttons to control the playback,
and use the TEMPO [–/+] buttons to change the tempo. You can
also play along on the keyboard.
Playback will stop automatically when the end of the recording is
reached, or you can press the [PLAY/STOP] button again to stop it at
anytime.
• The Clavinova may continue to write
data to the disk for a short time after
you stop recording. DO NOT eject the
disk while the DISK IN US
E
lamp of
the disk drive is lit.
• When a song has been recorded, a
temporary name
SONG ***
(*** is the
number) will automatically be given to
the song. You can change the name
as desired. (See page 120.)
• The [ACMP ON] and/or [HARMONY]
lamp(s) automatically go out when
recording of these parts has finished.
• When recording is finished, [ACMP/
SONG VOLUME] is automatically reset
to the default setting (MAX), regardless
of the current slider position.
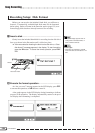
ZSet up the instrument for recording............................................
The first three steps in the Track Recording process are exactly the
same as those for Quick Recording. (See page 107.)
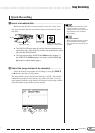
Track Recording (Multi-track Recording)
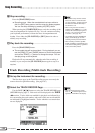
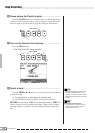
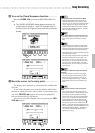
XSelect the TRACK RECORD Page ..................................................
Use the PAGE [<] [>] buttons to select the TRACK RECORD page
(RECORD display page 2). Each track will be displayed in the TRACK
< > section. Tracks which are enabled for playback are indicated by a
box surrounding the track number, and tracks which are record-enabled
are indicated by highlighted number. Tracks which do not contain data
are not displayed.
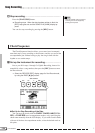
Song Recording
• When the Rhythm track(s) contain
data, an “
” indication appears at the
right below “RHYTHM” in the display.