


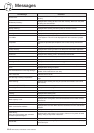
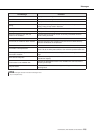
DGX-620/520, YPG-625/525 Owner’s Manual 117
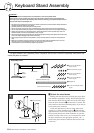
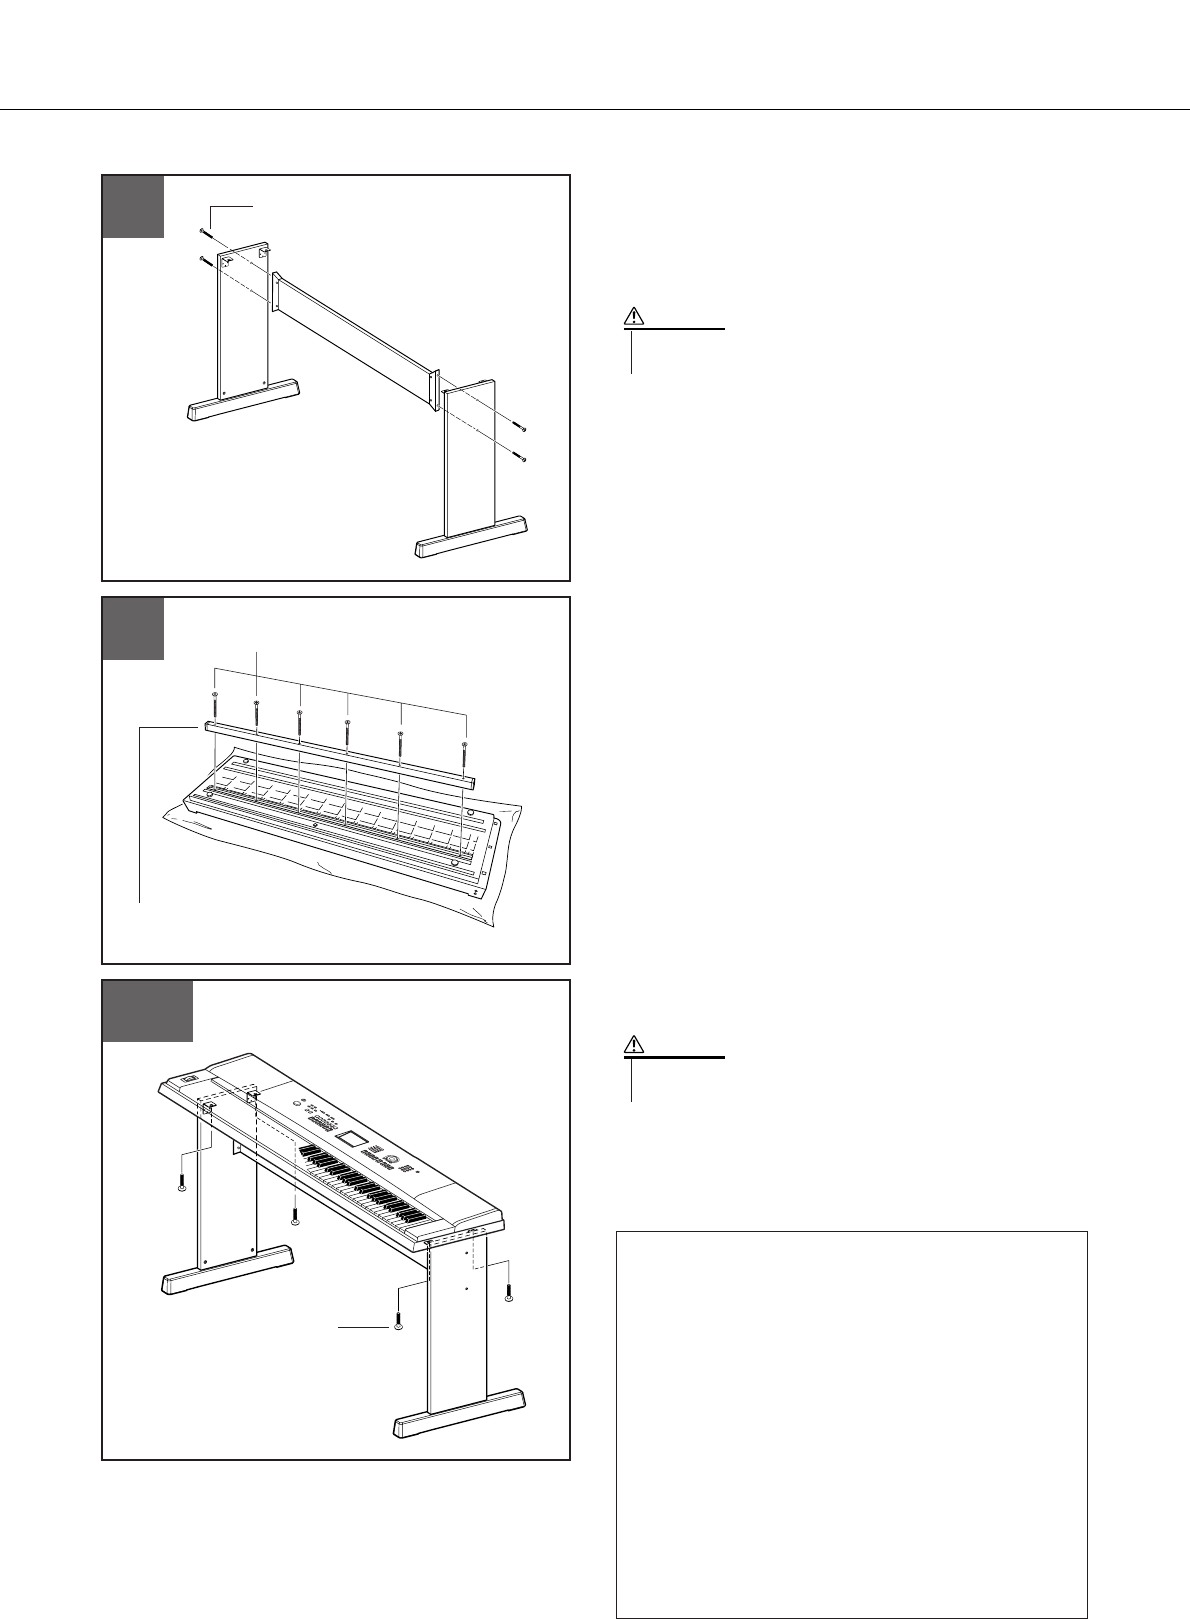
Keyboard Stand Assembly
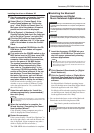
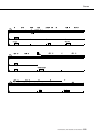
x Attach the back board.
Attach the back board, using the 6 x 30 mm roundhead
screws e. DGX-620 and YPG-625 owners : Check the
back-to-front orientation for the side boards.
Make sure the non-colored surface is facing down.
c DGX-620 and YPG-625 owners: please fol-
low these instructions.
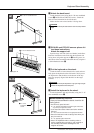
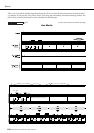
Attach the support rail.
Spread a large soft cloth (such as a blanket) on the floor.
Place the instrument on the cloth with the keyboard side
facing down. Align the support rail t into the groove on
the bottom of the instrument and attach the rail, using the 4
x 45mm flathead screws y.
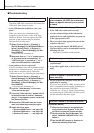
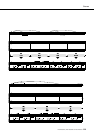
v Put the keyboard on the stand.
Check the back-to-front orientation for stand, and care-
fully place the keyboard on the side boards. Slowly move
the keyboard so that the holes on the bottom of the key-
board are properly aligned with the holes on the angle
brackets.
b Install the keyboard to the stand.
Fix the keyboard to the angle brackets, using the 5 x 16
mm roundhead screws r.
2
e 6 x 30 mm roundhead screw
3
y 4 x 45 mm flathead screws
t Support rail
4–5
r 5 x 16 mm
roundhead
screws
■ Post-assembly checklist
Once you’ve assembled the stand, check the fol-
lowing points:
• Are there any parts left over?
➔ If so, read the assembly instructions again and correct
any errors you might have made.
• Is the instrument clear of doors and other movable
fixtures?
➔ If not, move the instrument to an appropriate location.
• Does the instrument make a rattling noise when you
play it or move it?
➔ If so, properly tighten all screws.
• Also, if the keyboard makes a creaking noise or
seems unsteady when you play it, refer carefully to
the assembly instructions and diagrams and
retighten all screws.
• Be careful not to drop the back board or touch the sharp metal fit-
tings.
CAUTION
• Be careful not to drop the keyboard or to get your fingers caught
between the keyboard and the stand parts.
CAUTION