


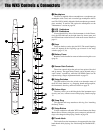

9
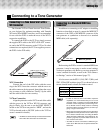
Connecting to a Tone Generator
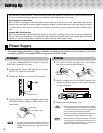
Setting Up
WX5 Connection
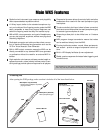
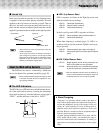
Connect the end of the WX cable with the screw
ring to the WX5. Insert the connector with the arrow on
the cable connector facing upward, then tighten the screw
ring to ensure a solid connection. Finally, clip the cable
into the cable holder for extra security.
VL70-m Connection
Align the protrusion on the VL70-m end of the cable
with the groove in the VL70-m WX IN connector, and
plug in firmly. Also be sure to set the HOST SELECT
switch on the VL70-m rear panel to “MIDI”, and set the
VL70-m breath mode to BC/WX (refer to the VL70-m
owner’s manual for details).
• The WX5 can also be directly connected to the Yamaha
WT11 Wind Tone Generator via the WX cable.
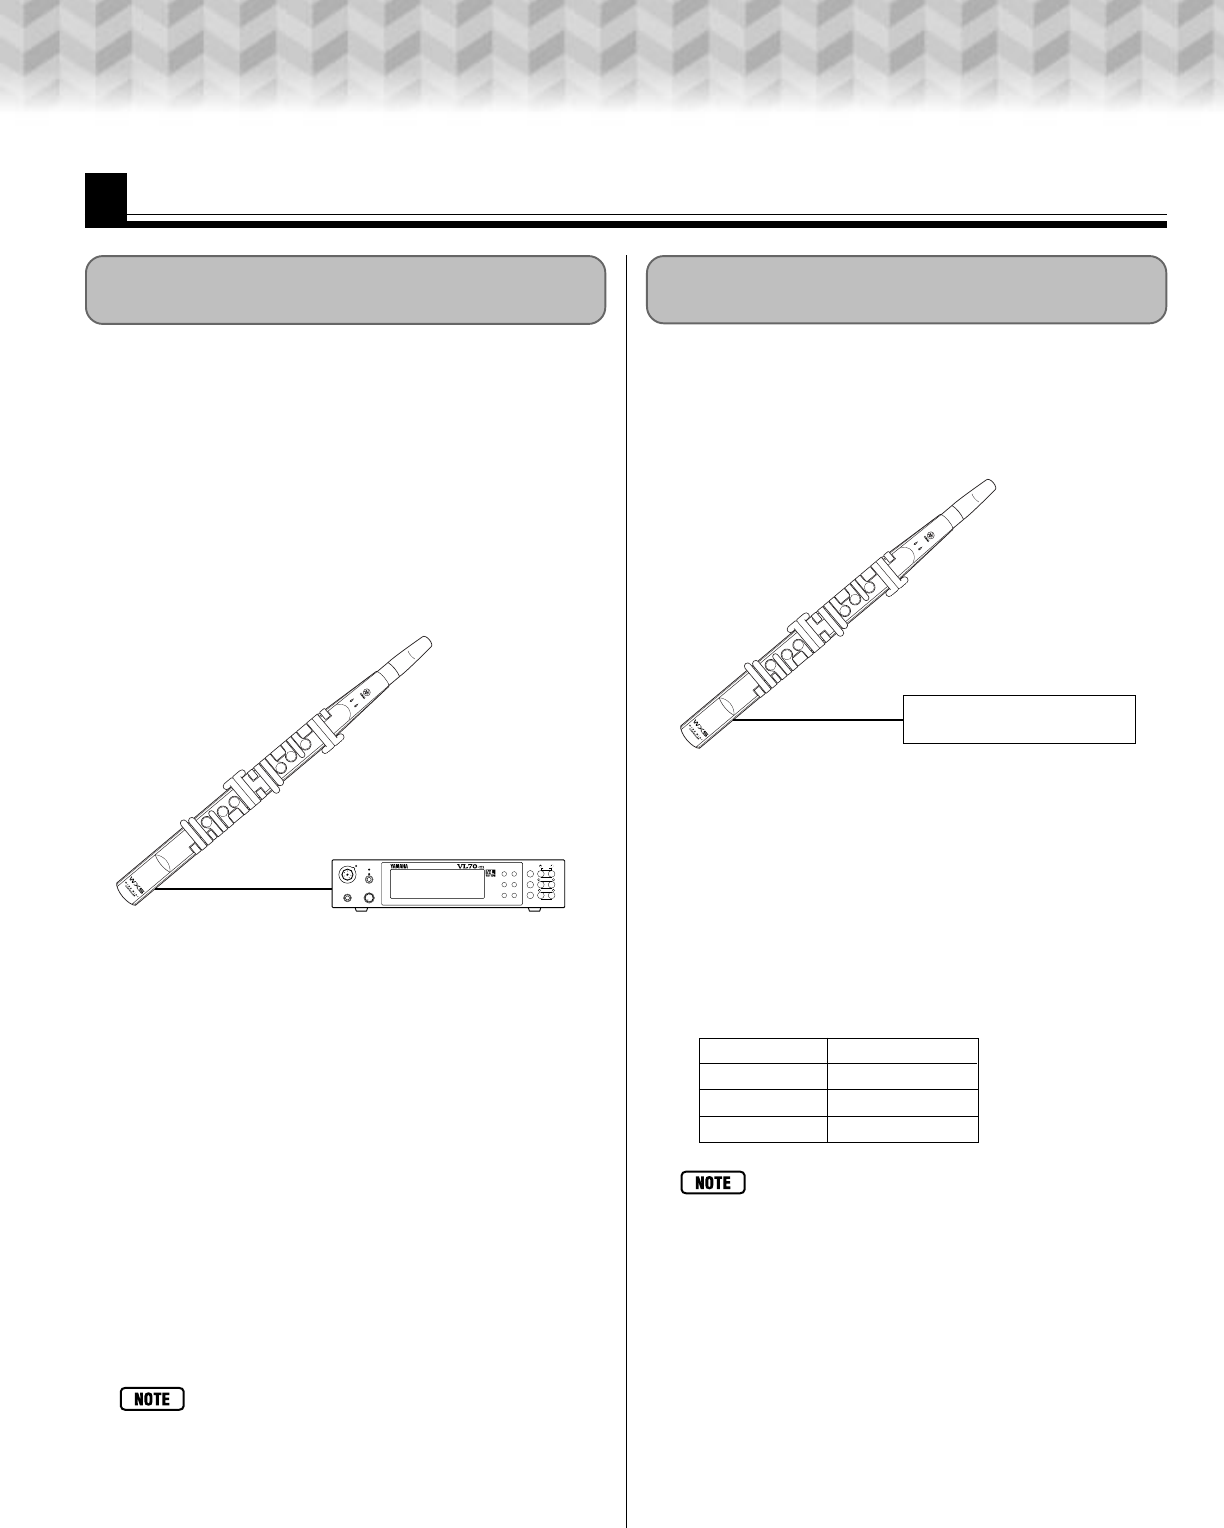
Connecting to a Tone Generator with a
WX Connector
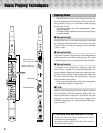
The Yamaha VL70-m Virtual Acoustic Tone Genera-
tor was designed for optimum matching with Yamaha
WX-series Wind MIDI Controllers, and is recommended
for use with the WX5 to make the most of the WX5’s
expressive capabilities.
To connect the WX5 to the VL70-m, simply connect
the supplied WX cable to the WX5’s WX OUT connec-
tor, and to the WX IN connector on the VL70-m. No other
connections are required (the VL70-m supplies power to
the WX5 via the WX cable).
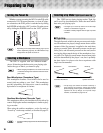
Connecting to a Standard MIDI Tone
Generator
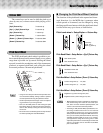
In addition to connecting an AC adaptor or installing
batteries as described on page 8, connect the MIDI OUT
connector of the WX5 to the MIDI IN connector of the
tone generator or synthesizer to be used via a standard
MIDI cable (sold separately).
PHONES
WX IN BREATH
POWER/VOL
PUSH ON/OFF
PART MIDI BANK/PGM#VOLEXPPANREV CHOVARKEY
BC/WX
VELOCITY
TOUCH EG
VOICE
VL-XG
PLAYEDIT
UTIL
EFFECT
BREATH
MODE
MIDI/
WX
ENTER
EXIT
PART
SELECT
VALUE
ALL
VIRTUAL ACOUSTIC TONE GENERATOR
WX5
WX cable
WX OUT
VL70-m WX IN connector
Before using the WX5 to control a standard MIDI tone
generator, it may be necessary to make several settings
on the tone generator side. Refer to your tone generator’s
owner’s manual for details, as well as the “Tone Genera-
tor Settings” section of this manual (page 27).
Also be sure to set the SW1-1(Vel), SW1-2(Win), and
SW1-3(Win) DIP switches (page 22) as shown below to
ensure smooth breath volume and timbre control.
WX5
MIDI cable
MIDI OUT
MIDI tone generator
HOST SLECT switch “MIDI”
• In order to make the most of the WX5’s expressive
capabilities, it is recommended that you use a tone
generator which is capable of receiving MIDI Breath
Controller control change data (control change num-
ber 2). Breath control is ideally suited to controlling
volume and timbre via breath pressure, as well as ap-
plying a range of other effects.
• When using an XG tone generator, the tone generator’s
Assignable Controller parameter is set to allow recep-
tion of breath controller data, but setting the WX5’s
“Wind Controller to MIDI Data” setup switches to “Ex-
pression” (page 22) can produce better results for vol-
ume control in some cases.
• The WX5 can also be connected to a MIDI tone gen-
erator via the WX cable and an optional Yamaha BT7
Power Box.
Switch Setting
SW1-1(Vel) ON
SW1-2(Win) ON
SW1-3(Win) OFF