724-746-5500 | blackbox.com
Page 29
Chapter 6: Web-Based Browser Management
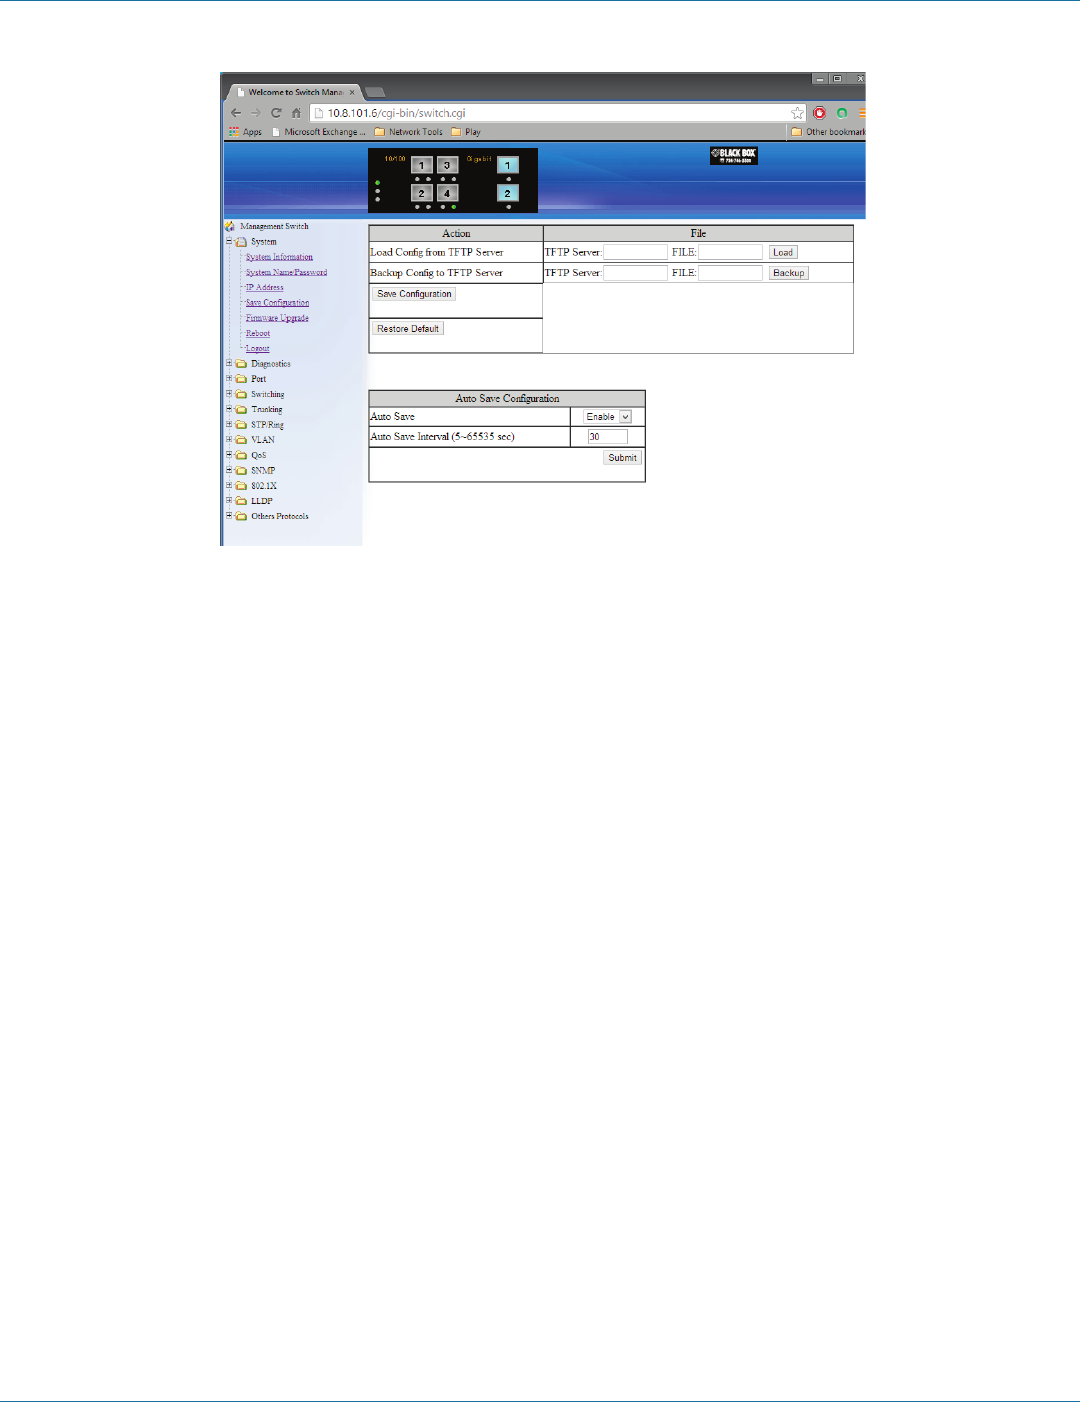
Figure 6-6. Save configuration screen.
Save Configuration
1. Load Config from TFTP Server:
Click in the “TFTP Server” text box and type the TFTP server IP address from where the file will be obtained.
Click in the “FILE” text box and type the name of the file that will be obtained.
Click the “Load” button to load the file from the TFTP server.
2. Backup Config to TFTP Server:
Click in the “TFTP Server” text box and type the TFTP server IP address to where the file will be backed up.
Click in the “FILE” text box and type the name of the file that will be backupped.
Click the “Backup” button to backup the file to the TFTP server.
3. Save Configuration: Click “Save Configuration” button to save your configuration settings.
4. Restore Default: Click “Restore Default” button to restore the default settings of the switch.
5. Auto Save: Click the “Auto Save” drop-down menu to choose “Disable” or “Enable” from the “Auto Save” drop-down list to
disable or enable Auto Save for the switch.
6. Auto Save Interval (5–65536 sec): Click in the “Auto Save Interval” text box and type a decimal number between 5 and 65536.
7. Submit: Click the “Submit” button when you finish the Auto Save configuration.
