53
The reminder banner
As many server screen layouts can appear very similar, the ServSwitch CX
provides a reminder banner option that indicates which server port you are
currently viewing. The banner is usually displayed at the top of the screen, using
blue lettering and transparent background. You can:
• Move the banner
• Change the banner colours, and/or
• Disable the banner
To move the reminder banner
1
While viewing a server port, press and hold and .
Note: The and hotkeys may have been changed. If the combination
fails to work, then please contact the system administrator for details.
2 Press the , , and keys to move the banner to the required
position.
To change banner colours or disable the banner
1
Select the on-screen menu in one of three ways:
• By simultaneously pressing and then releasing .
• By pressing the middle and right buttons of a three button mouse, or
• By selecting port using the front panel buttons
If you are not already logged in, do so now.
2 Press to select ‘More menus’.
3 Highlight the ‘User Preferences’ option and press to select.
4 Select the required option:
• To disable the banner – highlight ‘Reminder Banner’ and press
until ‘DISABLED’ is shown.
• To change colours – highlight ‘Reminder Colour’ and press until
the desired colour combination is displayed.
5 Press to save the settings. Press twice more to return to the server port
and view your changes.
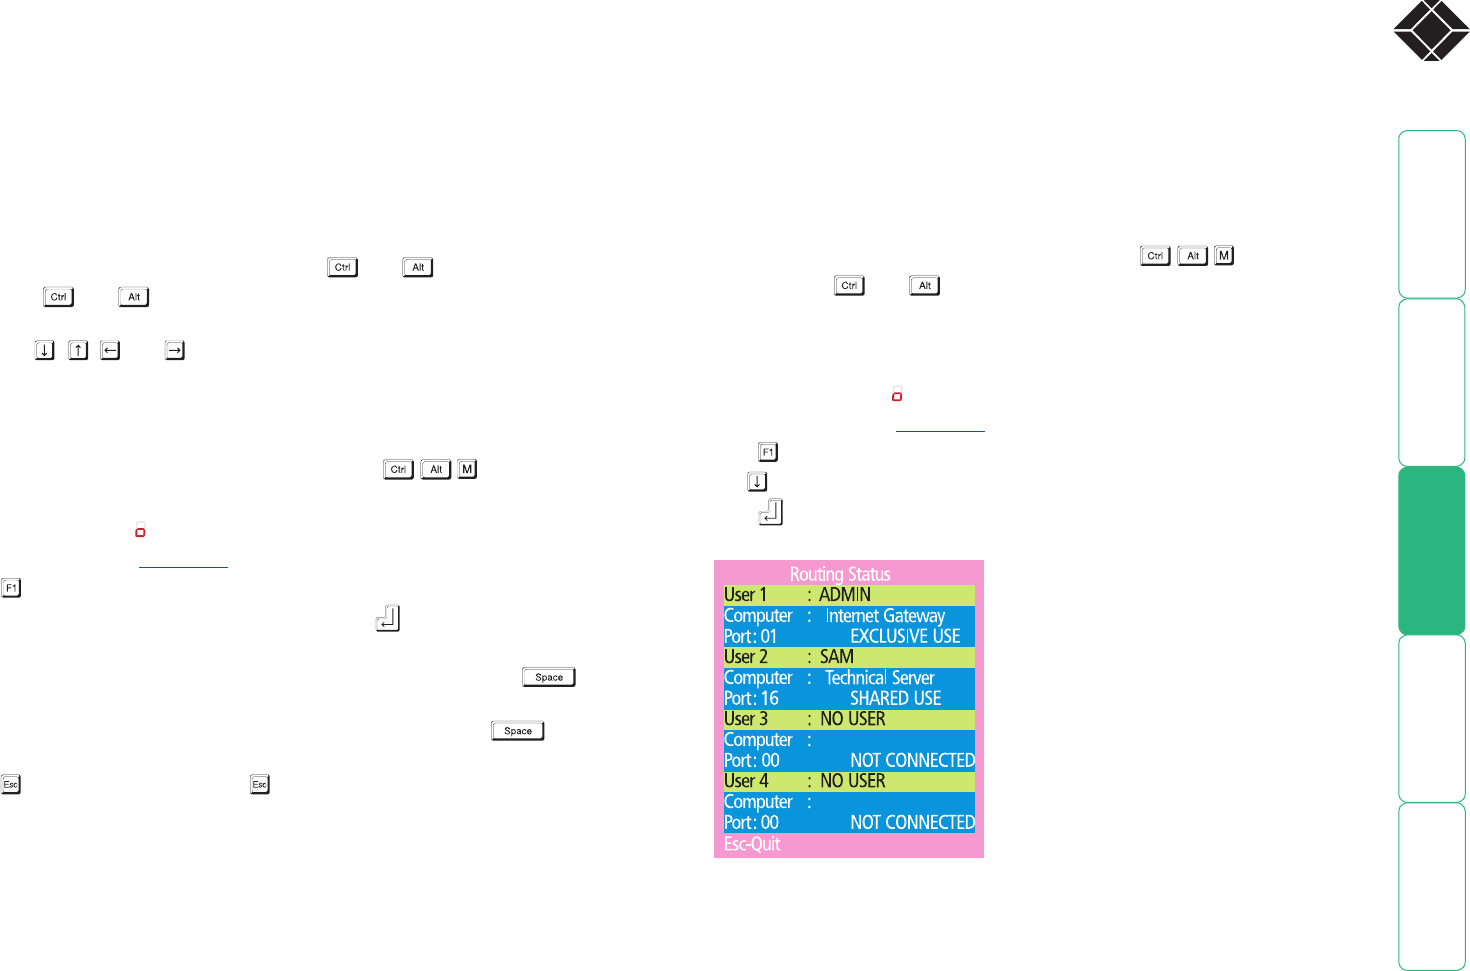
Routing status
On occasions it may be useful to know which servers are being accessed, in
which modes and by whom. The most common reason for this would be if you
were denied access to a server port and needed to find out if another user has
selected ‘Exclusive’ access. For this purpose the ServSwitch CX provides the very
handy Routing status feature which provides an ‘at a glance’ view of all current
user connections.
To use the Routing status feature
1
Select the on-screen menu in one of three ways:
• By simultaneously pressing and then releasing .
Note: The and hotkeys may have been changed. If the
combination fails to work, then please contact the system administrator
for details.
• By pressing the middle and right buttons of a three button mouse, or
• By selecting port using the front panel buttons
If you are not already logged in, do so now.
2 Press to select ‘More menus’.
3 Use or your mouse scroll wheel to highlight the ‘Routing status’ option.
4 Press or the left mouse button to select. The Routing status screen will
be displayed:
Here you can instantly see which server ports are being accessed and by
whom. The screen will be displayed for ten seconds.
