


6
V-AMPIRE LX110
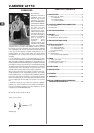
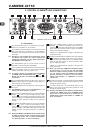
2.1 Front panel
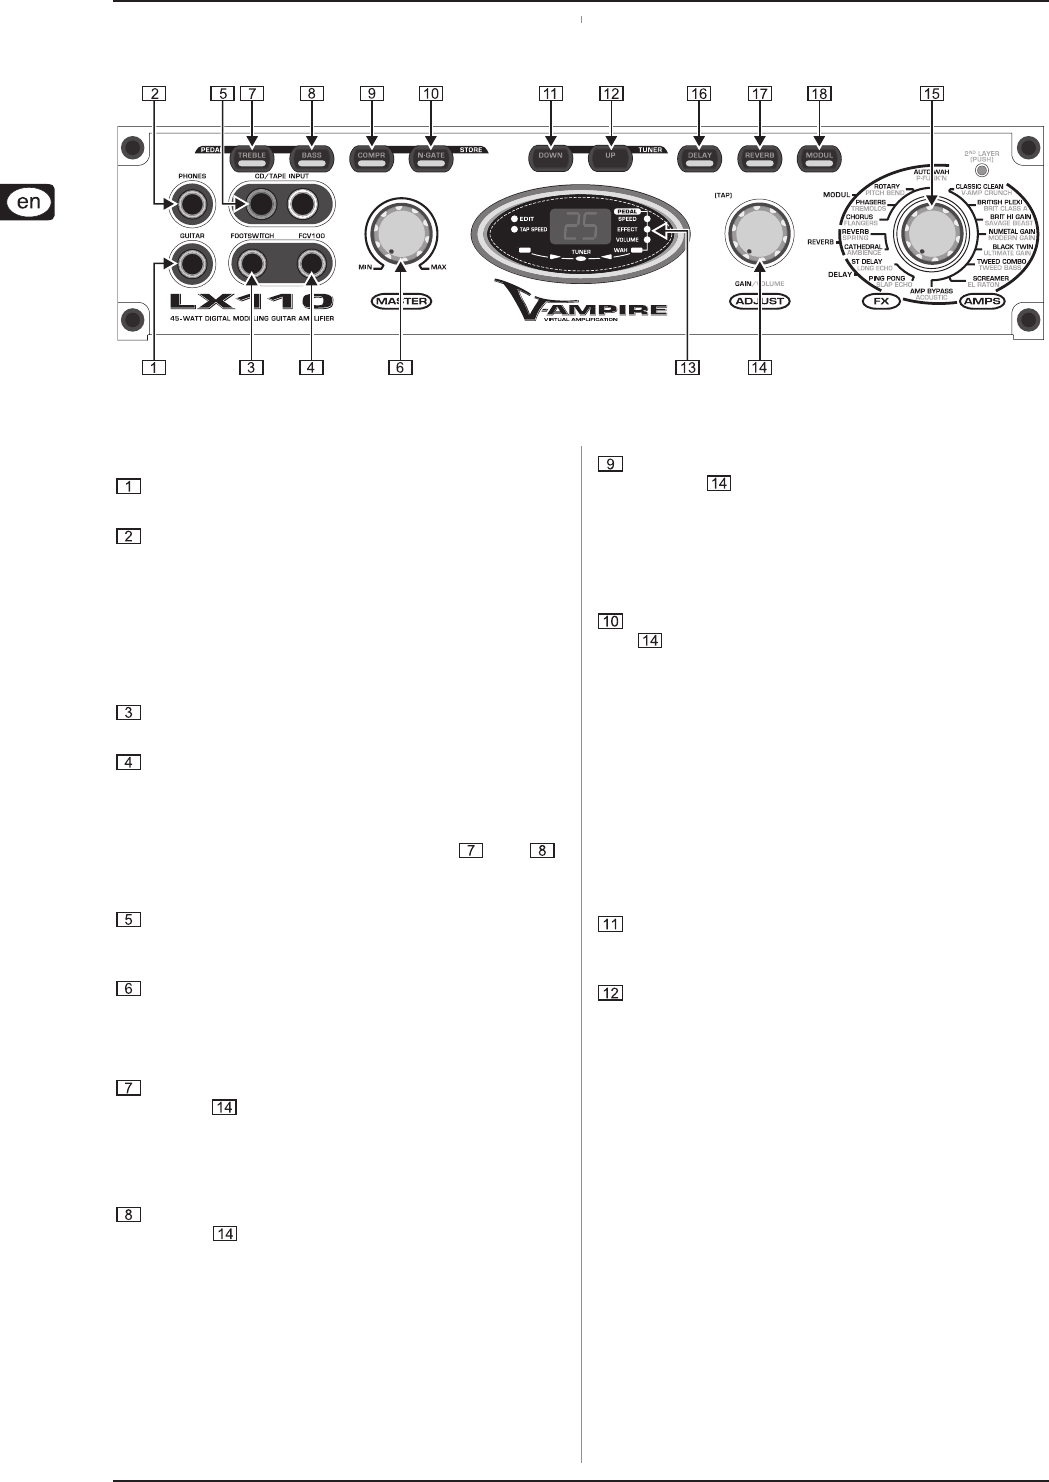
The GUITAR socket is the 1/4" connector for your guitar.
Please use a standard 1/4" TS connector.
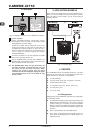
The PHONES connector allows you to monitor the audio
signal with standard headphones (e.g. BEHRINGER
HP Series). This connector can also be used as a stereo
line output.
Plugging in the headphones automatically mutes
the power amp signal. So, before pulling the
headphones connector from the socket, please turn
the MASTER control fully left.
The FOOTSWITCH jack is used to connect an FS112
footswitch for preset selection (UP/DOWN).
The FCV100 jack is used to connect an FCV100 expression
pedal (not included), which can control various functions
(effects parameters, wah-wah, volume, etc.).
To assign a function to the pedal, press the TREBLE
and BASS button simultaneously (see and ).
Please read Chapter “6.3 Pedal Function” for more
information.
The CD/TAPE INPUT RCA inputs allow you to feed in an
additional stereo signal, for example, to play along to a
drum computer or music playback.
Use the MASTER control to adjust the overall volume of
the LX110.
The MASTER control is not programmable, i.e. its
setting cannot be stored in a preset.
After pressing the TREBLE control you can use the ADJUST
control to raise or lower the high-frequency range.
Press and turn the control to change the frequency range
you are modifying. The TREBLE button lights up when this
function is active and flashes while you are editing its
settings.
After pressing the BASS control you can use the ADJUST
control to raise or lower the low-frequency range.
Press and turn the control to change the frequency range
you are modifying. The BASS button lights up when this
function is active, and flashes while you are editing its
settings.
Press the TREBLE and BASS buttons simultaneously
to assign a specific function to the expression pedal
(the display shows “PA”). Please read Chapter
“6.3 Pedal Function” for more information.
Press the COMPR control to adjust the compressor.
ADJUST controls the sensitivity. Press and turn the
control to adjust the attack and release times. The COMPR
button lights up when this function is active and flashes
while you are editing its settings.
Chapter “6.1.3 Special Effects” explains in detail how the
compressor works.
Press the N-GATE button to adjust the noise gate. ADJUST
controls the sensitivity. Press and turn the control to
adjust the attack and release times. The N-GATE button
lights up when this function is active and flashes while
you are editing its settings.
Chapter “6.1.3 Special Effects” explains in detail how the
noise gate works.
When you press the COMPR and N-GATE buttons
simultaneously, you can use the UP and DOWN
buttons to select a memory location for the preset
you are editing. Keep the COMPR and N-GATE
buttons pressed for a while to store the preset.
Please read Chapter “4. PRESETS” for more
information.
To select a preset (99 – 00, decremental), press the DOWN
button once quickly. Keep the button pressed to scroll
through the presets quickly.
To select a preset (00 – 99, incremental), press the UP
button once quickly. Keep the button pressed to scroll
through the presets quickly.
Pressing the DOWN and UP buttons simultaneously
activates the TUNER mode of the V-AMPIRE. Press
either one of the two buttons to deactivate the
TUNER mode. Please read Chapter “7. TUNER” for
more information.
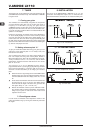
2. CONTROL ELEMENTS AND CONNECTORS
2. CONTROL ELEMENTS AND CONNECTORS
Fig 2.1: V-AMPIRE control elements (front view)