


19
EUROLIGHT LC2412
+ Attention: Storing data on a storage location that
already contains some data automatically replaces
this data. Similarly, the data on the consoles memory
is replaced when you transmit the data from the
memory card. If you wish to keep this data, make
sure to first store it to a memory card.
+ Since the LC2412 uses its own data format, once
you format a memory card on it, you can no longer
read this card on a PC!
7.7 Adjusting differing illumination levels
The EUROLIGHT LC2412 lets you adjust illumination levels of
various lighting elements to one another so they better match
each other. This lets you increase illumination levels of lighting
elements whose illumination is insufficient for a specific fader
position. In that case, the lighting element whose illumination
level was insufficient shines sufficiently brightly.
Program this setting by doing the following:
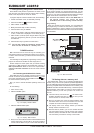
1. Press UTILITY 1.
2. Select the MORE option using SOFT B.
3. Select SELECT CURVE using SOFT A.
4. The display now shows in its upper left portion the channel,
to its right the status LINEAR (standard setting) or CURVE
(increase). You can now set up the desired setting for this
channel by using SOFT A or SOFT B.
5. By using the DATA wheel you can select the desired channel.
6. Complete the programming procedure by pressing QUIT.
7.8 Erasing all settings/
displaying software version
To erase all programmed settings and start from scratch,
do the following:
1. Press and keep pressed the SOFT A and SOFT B keys. Then
press the FLASH 1 key. The software version is shown in
the display.Die Software-Version wird im Display angezeigt.
Turn the DATA wheel to get to additional menus and displays
(erase memory, lock programming functions, free memory,
internal A/D converter condition, self-test).
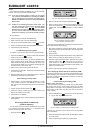
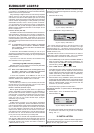
2. DELETE ALL appears in the display, along with the YES
option. Select this option with SOFT B.
Fig. 7.5: Display erase all settings
3. We have created an additional step for your safety. Use the
Soft A (NO) or Soft B (YES) keys located under the
respective options to select one or the other. Selecting YES
erases all memories and stored chases. In doing so, all settings
relevant to the consoles functions are reset to their factory
settings (SOLO ALL ENABLED, CURVE ALL LINEAR).
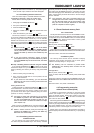
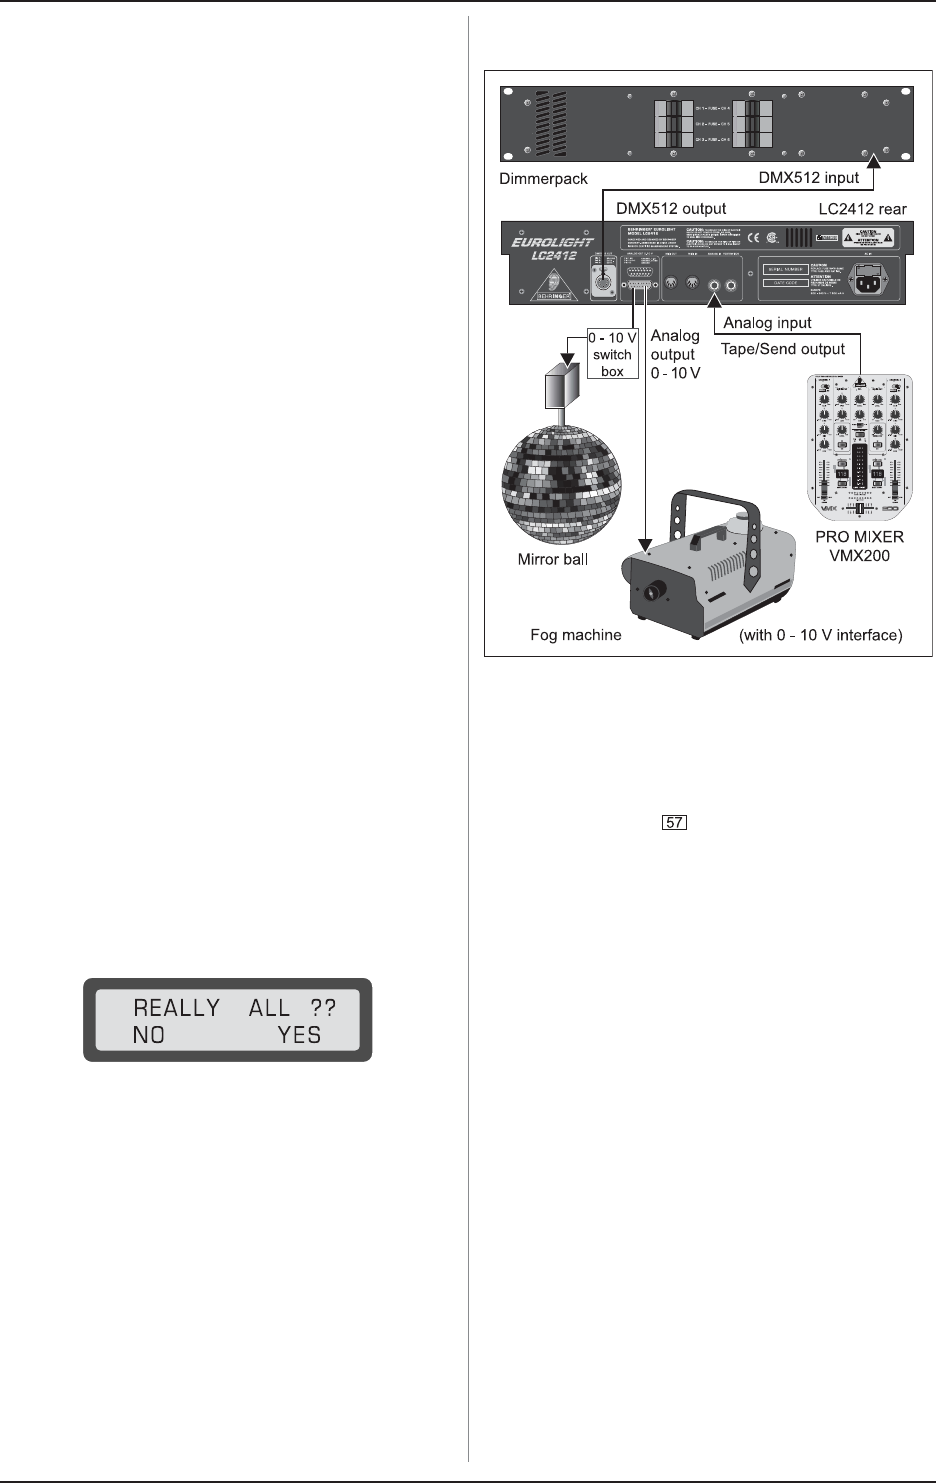
8. DIMMER CONTROL
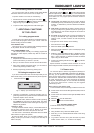
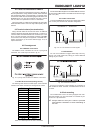
Fig. 8.1: Standard wiring in combination with a dimmer
(analog and/or digital control)
8.1 Analog control
In addition to the modern DMX512 interface, you can control
your EUROLIGHT LC2412s dimmers using the conventional analog
outputs (ANALOG OUT , 0 - 10 V DC). However, this lets
you control only twelve dimmer channels plus two special
channels (only 0 Volts or 10 Volts).
+ Whenever possible, use a multicore cable to
connect your LC2412 to the dimmer rack, and
apportion the cable to individual dimmer packs only
once the cable reaches the rack.
8.1.1 Controlling analog dimmers via DMX512
What at first seems like an error is in reality a very useful
feature: By using a so-called demultiplexers (demux), you can
convert digital commands into analog and therefore control your
analog dimmer packs.
The advantage of such a configuration is apparent: you can
address the demultiplexer freely, that is, it can for example begin
with channel 12 and therefore convert control commands from
console channels 13 - 24 into analog signals (DMX channel 0 is
controlled one-to-one by console channel 1 and so on, hence
the numbering offset). Furthermore, you need only short
multicores for analog control, since you can arrange the
demultiplexer near the dimmers and send control commands via
a single DMX line.
8.2 Digital control via DMX512
8.2.1 Digital control features
The EUROLIGHT LC2412 features a modern digital interface
according to the DMX512 Digital Data Transmission Standard For
Dimmers And Controllers, that was established in April 1990 by
the USITT Engineering Commission (United States Institute for
Theatre Technology, Inc.). Since virtually all modern equipment
8. DIMMER CONTROL