


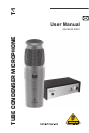

TUBE CONDENSER MICROPHONE T‑1
Warranty
5
controls in the microphone channel should be set to mid-travel position
to start with; low-cut lter and signal level attenuation should be switched
off. To get the sound you want, try changing the mic position relative to
the sound source or even move the microphone around in the recording
room of your studio. Adjusting the angle at which walls face the sound
source can also be helpful. Only when the desired basic sound has been
achieved, you should start to use equalizers and signal processors, if any
at all. Remember: less is often more!
Directivity5.
Your T-1 features a capsule with a cardioid pickup pattern and is ideal
for recording individual instruments, vocals and speech. Cardioid pickup
pattern means that the sound produced by sources located in front of the
mic is strongly picked up. It is often used in recording situations, since this
directivity pattern tones down the pickup of sounds located to the back of
the microphone.
To place the microphone correctly, the BEHRINGER logo needs to face the
sound source being recorded.
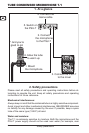
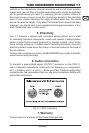
Audio connection6.
To transmit a preamplied signal (OUTPUT connector on the PSU-T),
use a balanced microphone cable with the following pin assignment:
pin 1 = shielding; pin 2 = +; pin 3 = -. Since your PSU-T features gold-plated
contact points, we recommend that you use only microphone cables with
gold-plated connectors.
XLR connectorsFig. 6.1:
Warranty7.
Find our terms of warranty at http://www.behringer.com.