


English
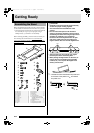
Getting Ready
E-33
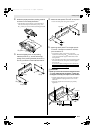
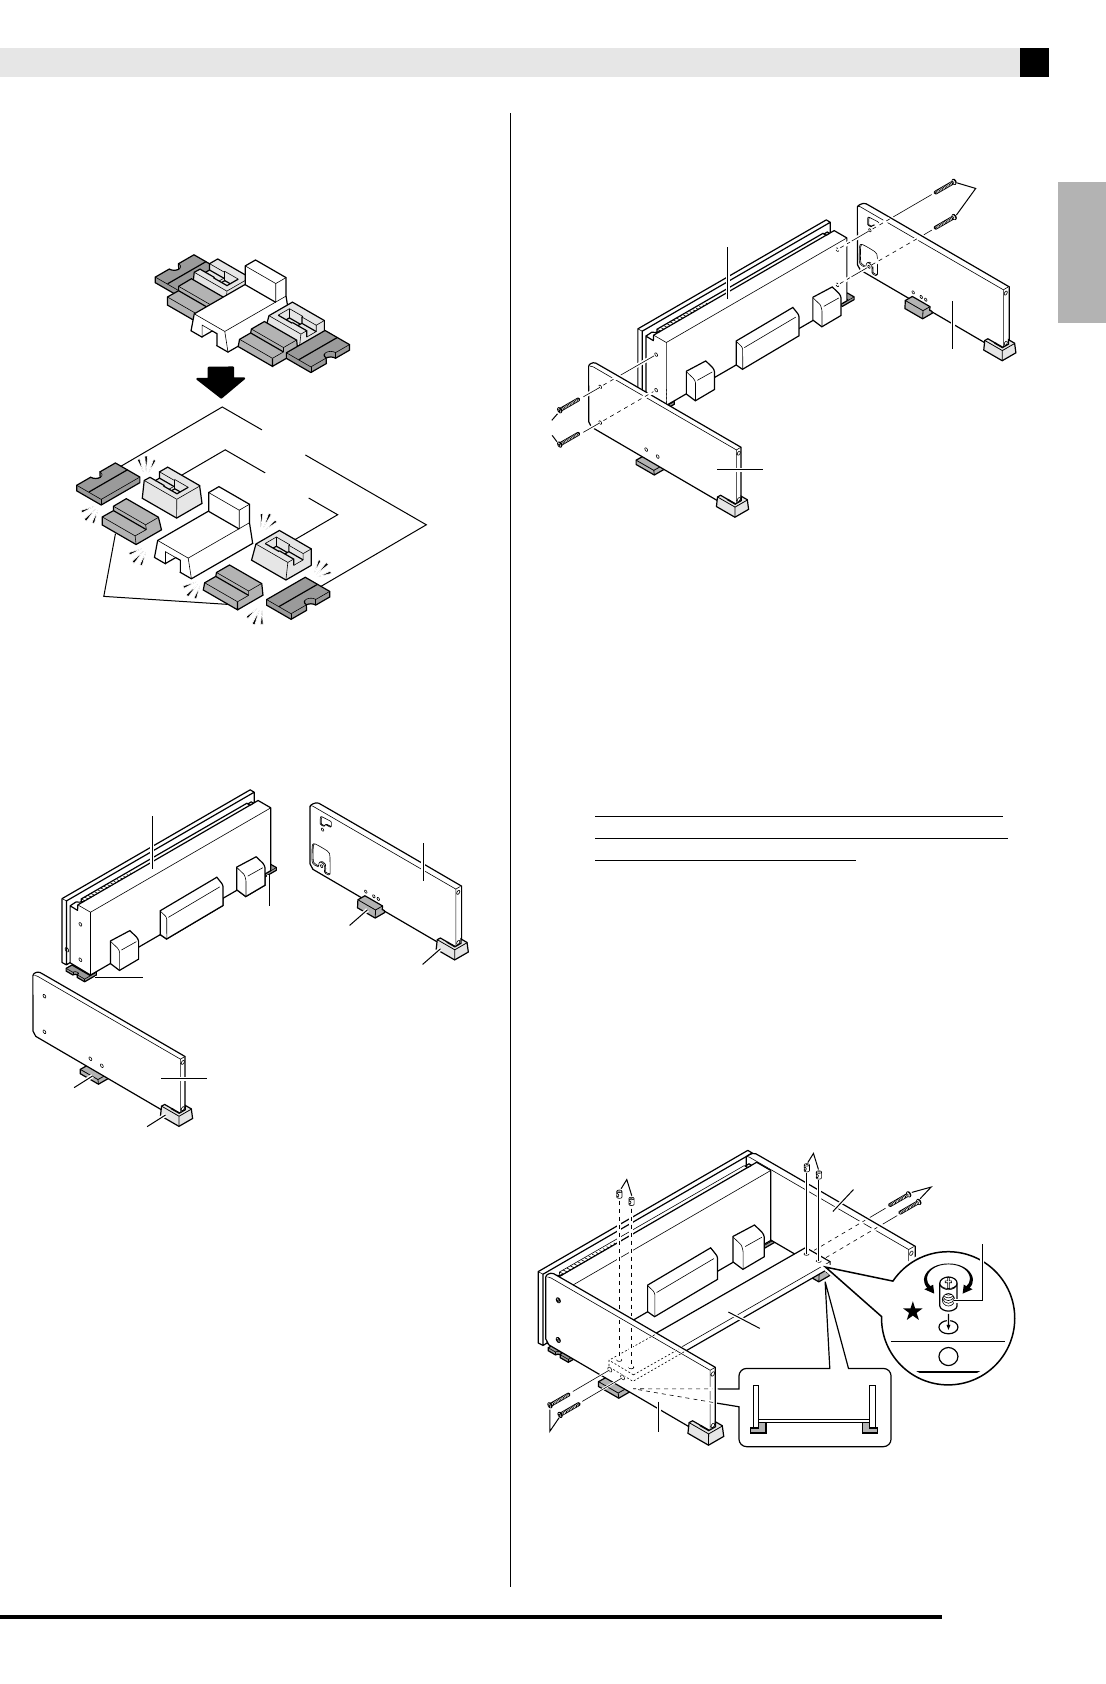
2.
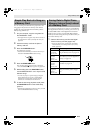
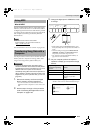
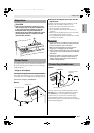
Divide the polystyrene foam packing material
as shown in the nearby illustration.
• After dividing up the material, you should end up
with a total of six pieces named
Q
-(a),
Q
-(b), and
Q
-(c), which you will use while assembling the stand.
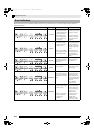
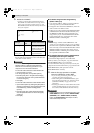
3.
Place the Digital Piano on the packing
material pieces
Q
-(a), and the stand side
panels on the packing material pieces
Q
-(b)
and
Q
-(c) as shown in the illustration below.
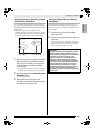
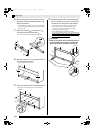
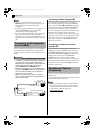
4.
Attach the side panels
A
and
B
to the piano.
• Secure the side panels using four screws
F
.
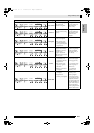
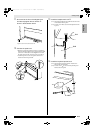
5.
Attach the back panel
C
to the side panels
A
and
B
. Use the four screws
F
and four
joint connectors
P
.
• Insert the four joint connectors
P
at the four
locations on the back panel
C
. The holes in the joint
connectors should be aligned with the holes in the
back panel
C
.
• Lift up the back panel
C
so its screw holes align with
the screw holes in the side panels, and then tighten
the screws
F
.
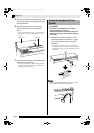
If you have trouble inserting the screws
F into the
joint connector P holes, use a screwdriver to rotate
the joint connector (
in Figure).
*
CAUTION
• Never try to force the screws! Forcing the screws
F
to turn while the joint connector
P
holes are
not aligned correctly can strip the screw threads.
• Partially tighten the screws on one side of the back
panel
C
and then fully tighten the screws on the
other side.
• Next, fully tighten the screws that you partially
tightened.
Q
-(c)
Q
-(a)
Q
-(b)
B
Q
-(c)
Q
-(b)
Q
-(c)
Q
-(a)
Q
-(a)
Q
-(b)
A
Digital Piano
F
B
A
F
Digital Piano
F
P
B
P
C
F
A
Screw hole
PX830_03_e.fm 33 ページ 2009年7月13日 月曜日 午後7時20分