


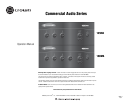
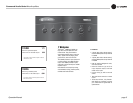

Commercial Audio Series Mixer-Amplifi ers
Operation Manualpage 8
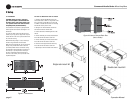
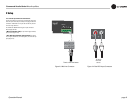
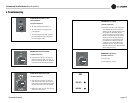
Figure 2.2 How to Connect Rack Ears
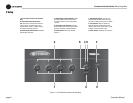
(Not to Scale)
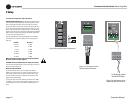
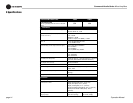
Figure 2.1 Dimensions
2.1 Installation
CAUTION: Before you begin, make sure
your mixer-amplifi er is disconnected from
the power source, with power switch in the
“off” position and all level controls turned
completely down (counterclockwise).
Use a standard 19-inch (48.3 cm) equipment rack
with an optional rack-mount kit. See Figure 2.1 for
dimensions.
You may also stack mixer-amps without using a
cabinet, or you may place a single mixer-amp on a
surface with 12 inches of air space around the unit
for convection cooling.
NOTE: When transporting in a rack, mixer-amps
should be supported at the front and back.
When using an equipment rack, do not mount units
directly on top of each other. Allow 2 rack units
(3.5 inches) between units for convection cooling.
The side walls of the rack should be a minimum of
two inches (5.1 cm) away from the mixer-ampli-
fi er sides, and the back of the rack should be a
minimum of four inches (10.2 cm) from the mixer-
amplifi er back panel.
2.2 How to Attach the Unit to a Rack
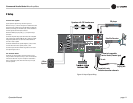
1. Order the optional Rack-Mount Kit from your
Crown dealer. Part no. RM1 is a “single rack mount
kit” for mounting a single MA unit in a rack. Part
no. RM2 is a “double rack mount kit” for mounting
two MA units side-by-side in a rack.
2. See Figure 2.2. Remove the two screws from
each side of the chassis near the front.
3. Place a rack ear fl ush with the right front of the
chassis.
4. Insert a screw that you removed into the bottom
hole of the rack ear and chassis. Screw it in.
5. Insert a screw that you removed into the center
hole of the rack ear and chassis. Screw it in.
6. Insert one of the supplied screws into the top
hole of the rack ear and chassis. Screw it in.
7. Repeat steps 3-6 for the left side of the chassis.
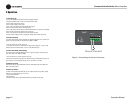
2 Setup
Single rack mount kit
Double rack mount kit