


14
ZENTERA-MANUAL
Turn
W
TYPE until FOOTSWITCH ASSIGN appears in the display.
Select UP, DWN or TGL using the
W
PARA 1 or
W
PARA 2 knobs.
If you opt for the TOGGLE function, see section 6.5 above for
further instructions.
7.13 VOLUME PEDAL
This menu lets you determine at which point in the signal chain a
connected volume pedal or the volume pedal of the optionally
available Z-Board regulates the amp’s level.
Turn
W
TYPE until VOLUME PEDAL appears in the display. Using
W
PARA 1 or
W
PARA 2, select the desired mode from the
following options:
AMP VOLUME: With this option, the pedal controls the amp
section’s Volume knob, meaning that it adjusts the pre-effect
section volume level. The volume value programmed in the
preset has priority when you change a preset, and it is activated
first. The level will not change until you operate the pedal.
GLOBAL: With this option, the pedal controls the amp’s Master
knob, meaning that it adjusts the overall output level. Even if you
change a preset, the level is still determined by the pedal, or
more accurately, its current value.
7.14 VOLUME PEDAL RANGE MINIMUM,
VOLUME PEDAL RANGE MAXIMUM
If you have connected an expression pedal to the jack on the
rear panel of the zenTera
®
, you can define the desired volume
control range for the pedal in these submenus. The same of
course holds true for the volume pedal on the optionally
available Stageboard.
Turn
W
TYPE until the appropriate menu appears in the display.
Select values between 0.0 and 9.9 using the
W
PARA 1 or
W
PARA 2 knobs.
7.15 CV PED TYPE
This menu lets you select a linear or a logarithmic action for your
foot pedal's control range (linear = uniformly increasing volume,
logarithmic = at first a steep and then a flatter rise in the volume
curve).
Turn
W
TYPE until CV PED TYPE appears in the display. Select
LINEAR TYPE or LOG TYPE using
W
PARA 1 or
W
PARA 2.
7.16 CV PED CALIB MIN/MAX
You can calibrate a connected expression pedal here. Turn
W
TYPE until the CV PED CALIB SET TO MIN menu appears in the
display. Set your foot pedal so that it rests at its minimum position
(MIN, with the heel all the way back and the toe pointing up)
and confirm by tapping
r
PARA 1 or
r
PARA 2. The display
automatically pages to the next menu, CV PED CALIB SET TO
MAX. Floor the pedal so that it rests at its maximum position and
tap
r
PARA 1 again. Your pedal is now calibrated and ready to
“rock”.
7.17 Z-BOARD BANK CHANGE
This menu lets you define how the zenTera
®
responds to bank
change commands sent from the Z-Board. This command can
either access a preset of the next bank directly, meaning that
the preset is activated immediately along with the bank change.
Note that in this case the Z-Board switches in increments of five.
This means that if you are currently using preset 23, a bank chan-
ge command automatically activates preset 28. If you do not
want presets to be switched in this manner, you can opt for pure
bank change functionality. In this case, the next bank is always
called up without accessing a preset directly. You then have to
activate one of this bank's presets separately by stepping on the
appropriate switch on the Z-Board.
Turn
W
TYPE until the menu appears in the display. Use
W
PARA 1
to select DIR for the former, BNK for the latter option.
Note: For an in-depth explanation of the workings of the Z-Board,
please consult the Z-Board owner's manual.
7.18 Z-BOARDCALIB
As described above in section 7.16 for a connected expression
pedal, you can also calibrate the optional Z-Board.
Proceed as follows:
Turn
W
TYPE until the Z-BOARDCALIB SET WAH MIN menu appears
in the display. Set the wah-wah pedal of the Z-Board so that it
rests at its minimum position (with the heel all the way back and
the toe pointing up) and confirm by tapping
r
PARA 1 or
r
PARA 2. The display automatically pages to the next menu,
SET WAH MAX. Floor the pedal so that it rests at its maximum
position and tap
r
PARA 1 again.
The display automatically pages to the next menu, SET VOLUME
MIN, which lets you calibrate the volume pedal. The procedure is
the same as for calibrating the wah-wah pedal. Set the volume
pedal so that it rests at its minimum position and confirm by
tapping
r
PARA 1 or
r
PARA 2. The display automatically
pages to the next menu, SET VOLUME MAX. Floor the pedal so
that it rests at its maximum position and tap
r
PARA 1 again.
7.19 VERSION
This menu tells you which software versions the individual
modules of your zenTera
®
are running.
Turn
W
TYPE until the menu appears in the display. Then you can
call up the versions with
W
PARA 1 or
W
PARA 2.
8.0 MAINTENANCE AND CARE
The zenTera
®
does not require service of any type. There are
however a few basic rules that will extend the service life of your
amp enormously:
• Make sure all peripheral devices, cords and cables are in a
state of good repair! Defective speaker cables are the most
common cause of power amp failure. Poor-quality cables will
cause hum and undesirable noise.
• Ensure plenty of air can circulate around your amp's ventilation
ducts at all times.
• Definitely avoid exposure to mechanical shocks and extreme
heat, dust and particularly moisture.
• Be picky about the kind of peripheral devices you connect to
your amp and always check out their specs before you plug
them in. Never connect speaker cabinets with an ohm rating
lower than the zenTera
®
is designed to handle. Under no
circumstances should you connect devices with high output
signal levels (e.g. power amps) to your amp's input.
• Be sure the AC power source delivers the current that your
amp is designed to handle before you plug it in. When in
doubt about the local rating, ask the venue's sound technician
or a stage hand.
• Refrain from DIY repairs! To be on the safe side, you should also
have a qualified technician replace internal fuses.
9.0 POSSIBLE ERROR SOURCES/
TROUBLESHOOTING
E1) The zenTera
®
won't power up when you switch it on:
• It's not getting AC power. Check the mains cable to see if it is
connected properly!
• The mains fuse is defective. Replace the fuse with another
identical fuse. If this fuse also blows, be sure to talk to your
local Hughes & Kettner dealer.
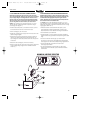
W
: TURN KNOB
r
: CLICK
s
: DOUBLE-CLICK
t
: CLICK AND HOLD BRIEFLY
Zentera Manu 2.0 E-D 28.08.2001 15:00 Uhr Seite 14