Panels
9
88
88
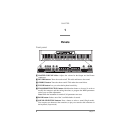
TEMPO slider:
Adjusts the metronome tempo.
99
99
METRONOME button:
Turns the metronome click on/off.
00
00
DEMO button:
Turns the demo mode on/off, to listen to the demo songs. Select the
songs with the sound selection buttons (see number 7 above).
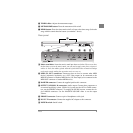
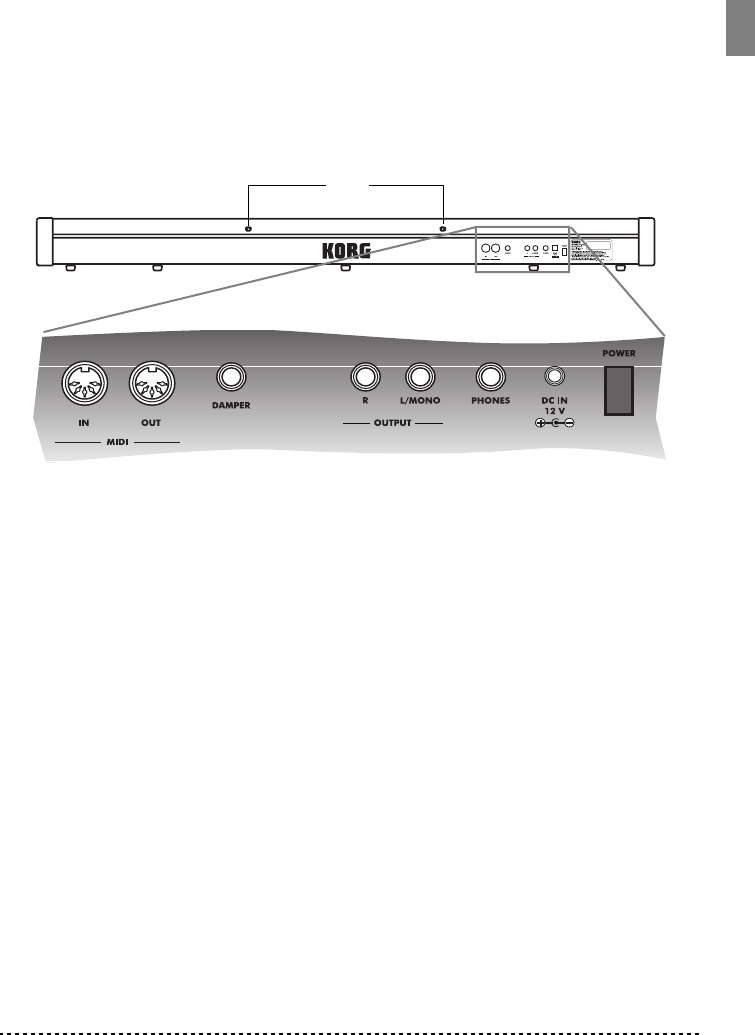
Rear panel
11
11
Music stand holes:
Insert the music stand into these two holes.
Please note that,
the first times you use the music stand, you will need to apply some force to insert or
remove it. Later, the rubbery plastic material of which the holes are made will adapt
to the music stand, making the operation easier to carry on.
22
22
MIDI (IN, OUT) connectors:
Connectors that are used to connect other MIDI
devices (sequencer, keyboards, etc.). OUT: Data output (to be connected to the
MIDI IN connector of another MIDI device). IN: Data input (to be connected to the
MIDI OUT connector of another MIDI device).
33
33
DAMPER connector:
Connect the supplied pedal to this connector.
44
44
OUTPUT (L/MONO, R) connectors:
Audio output. Connect these connectors to
an external amplifying system. (With a hi-fi system use the AUX or TAPE connec-
tors, not the PHONO connector). To amplify the SP-200 in mono, connect the sin-
gle L/MONO connector. Use the MASTER VOLUME slider to set the output
volume.
55
55
PHONES connector:
Connect a pair of headphones to this jack.
66
66
DC 12V IN connector:
Connect the supplied AC adapter to this connector.
77
77
POWER switch:
On/off switch.
22
22
33
33
44
44
55
55
77
77
66
66
11
11


