


2
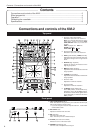
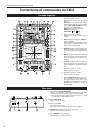
Connections and controls of the KM-2
Contents / Connections and controls of the KM-2
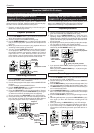
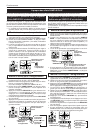
Top panel
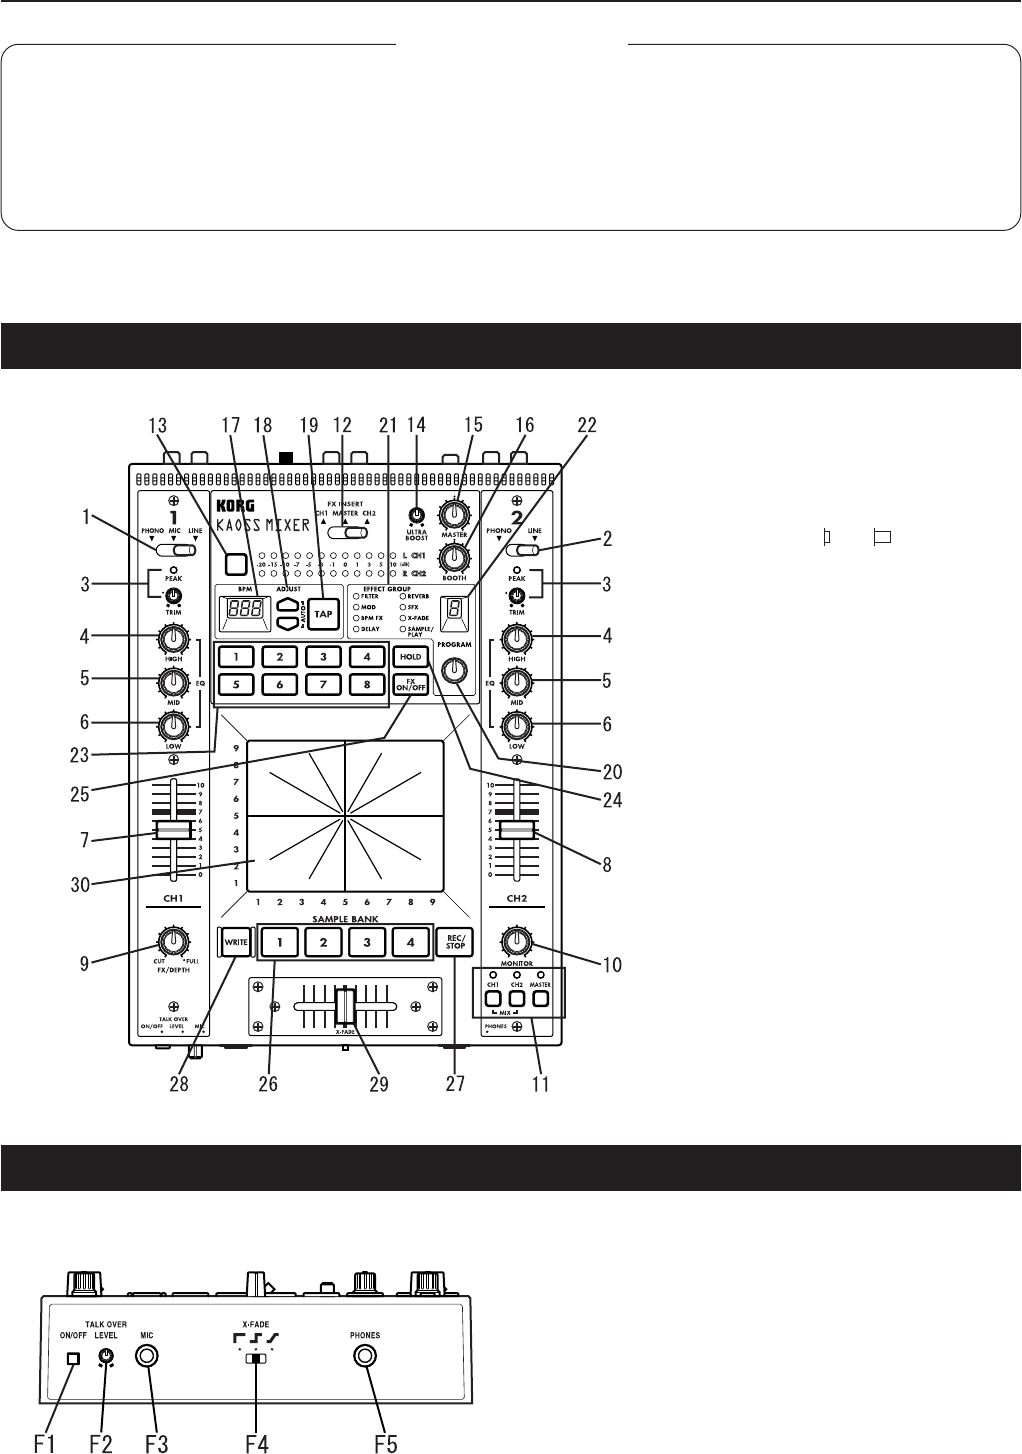
Front panel
1. Channel 1 input select switch
Selects the input source for channel 1.
Note: If you wish to select the mic as the
input source, set the front panel TALK
OVER ON/OFF switch (F1) to the OFF
position.
LINE: CD player, etc. MIC: mic
PHONE: turntable
TALK OVER
:ON :OFF
2. Channel 2 input select switch
Selects the input source for channel 2.
3. PEAK (peak indicator), TRIM (trim knob)
Adjust the trim knob so that the peak indi-
cator does not light even for high volume
levels.
4. HIGH EQ (high equalizer)
Adjusts the amount of boost/cut for the
high range equalizer.
5. MID EQ (middle equalizer)
Adjusts the amount of boost/cut for the mid
range equalizer.
6. LOW EQ (low equalizer)
Adjusts the amount of boost/cut for the low
range equalizer.
7. Channel 1 fader
Adjusts the volume of channel 1.
8. Channel 2 fader
Adjusts the volume of channel 2.
9. FX DEPTH (effect depth) knob
At the CUT position, no effect will be ap-
plied to the sound. At the FULL position,
the maximum effect will be applied to the
sound. Normally you will leave this in the
FULL position.
F1. TALK OVER ON/OFF switch
When this switch is ON (pressed in), the audio from the mic input
will be mixed into the master output.
✩ If you are using the mic as the input for channel 1, set the TALK
OVER switch to OFF.
F2. MIC LEVEL knob
Adjusts the volume level of the mic.
F3. MIC input jack
Connect a mic to this jack.
Note: The mic input is an unbalanced input.
F4. X-FADE (cross fade curve switch)
Selects the curve of the cross-fader.
F5. PHONES (headphone) jack
Connect a set of headphones to this jack.
Contents
Connections and controls of the KM-2 .................................................................................... 2
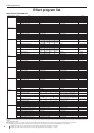
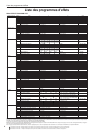
Effect program list .................................................................................................................... 4
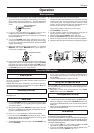
Operation ................................................................................................................................. 5
Calibrating the crossfader........................................................................................................ 7
Specifications........................................................................................................................... 8