


10
ONYX 80 SERIES
ONYX 80 SERIES
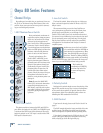
Onyx 80 Series Features
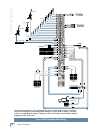
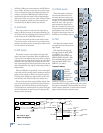
Channel Strips
Depending on the model that you purchased, there are
24, 32, 40, or 48 channel strips. Each channel has a mic
and line input connector and an insert jack for connect-
ing an external signal processor.
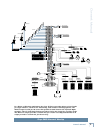
1. 48V Phantom Power Switch
Most professional condenser mi-
crophones require phantom power,
which is a low-current DC voltage
delivered to the microphone on
pins 2 and 3 of the XLR microphone
connector. Push in the 48V button
if your microphone needs phantom
power. An LED lights just above the
button to indicate that phantom
power is active on that channel.
Dynamic microphones, like
Shure’s SM57 and SM58, do not
require phantom power. However,
phantom power will not harm most
dynamic microphones should you
accidentally plug one in while the
phantom power is turned on. Be
careful with older ribbon micro-
phones. Check the manual for your
microphone to fi nd out for sure
whether or not phantom power can
damage it.
Note: Be sure the MAIN MIX
faders [60] are turned down when
connecting microphones to the
MIC Inputs, especially when phan-
tom power is turned on, to prevent
pops from getting through to the
speakers.
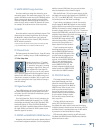
2. MIC/LINE Switch
This button switches between the MIC and LINE in-
puts. When the button is out (MIC), the XLR MIC input
is used and the LINE input is disconnected. When the
button is pushed in, the 1/4" input is used and the XLR
MIC input is disconnected.
3. Low-Cut Switch
The Low-Cut switch, often referred to as a high-pass
fi lter, cuts bass frequencies below 100 Hz at a rate of 18
dB per octave.
We recommend that you use the Low-Cut fi lter on
every microphone application except kick drum, bass
guitar, bassy synth patches, or recordings of earth-
quakes. These aside, there isn’t much down there that
you want to hear, and fi ltering it out makes the low stuff
you do want much more crisp and tasty. Not only that,
but the Low-Cut fi lter can help reduce the possibility
of feedback in live situations and it helps to conserve
amplifi er power.
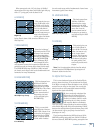
Another way to use the Low Cut fi lter
is in combination with the LOW EQ on
vocals during live performances.
Many
times, bass shelving EQ can really ben-
efi t voices. Trouble is, adding LOW EQ
also boosts stage rumble, mic handling
clunks, and breath pops. Low Cut removes all those prob-
lems so you can add LOW EQ without losing a woofer.
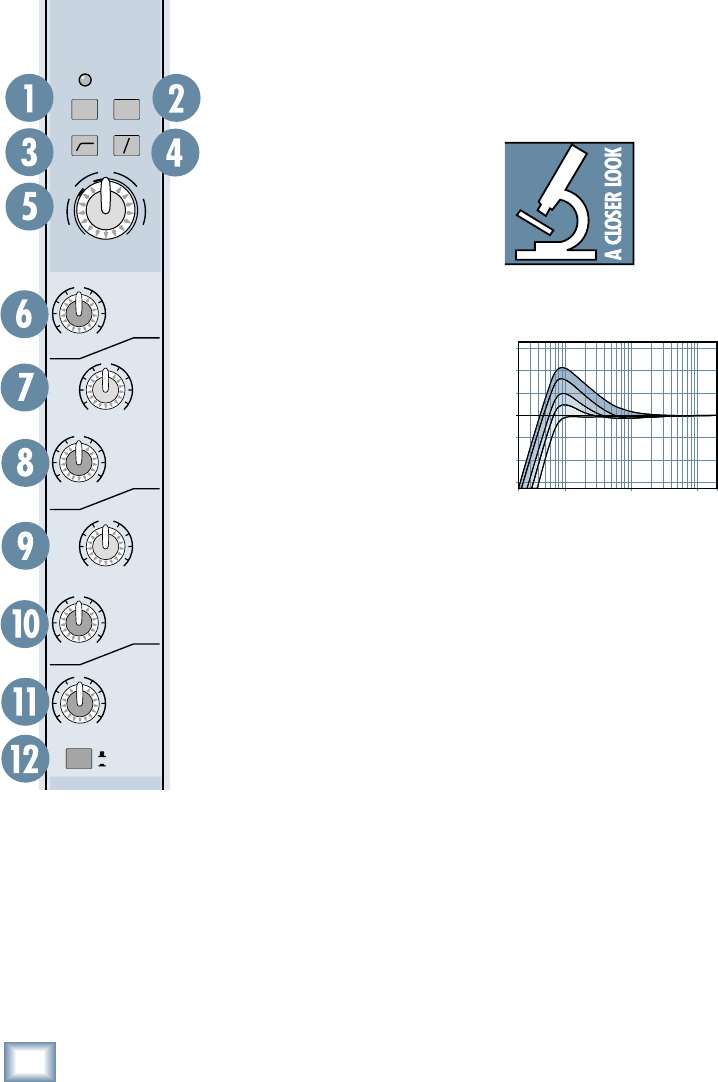
Here’s what the
combination of LOW EQ
and Low Cut looks like
in terms of frequency
curves.
4. Polarity Switch
Pushing in this switch simply reverses the polarity of the
signal. This provides an easy way to correct a microphone
or line source whose polarity is opposite from the other
microphones, either from a miswired cable or from not
following the AES standard for Pin 2/Pin 3.
5. GAIN Control
If you haven’t already, please read “Set the Levels” on
page 5.
The GAIN control adjusts the input sensitivity of the mic
and line inputs. This allows the signal from the outside
world to be adjusted to optimal internal operating levels.
If the signal is plugged into the XLR jack, there is 0 dB
of gain (unity gain) with the knob turned all the way
down, ramping up to 60 dB of gain fully up.
FREQ
U
+15-15
U
+15-15
U
+15-15
U
+15-15
HIGH
12 kHz
HIGH
MID
LOW
80 Hz
FREQ
LOW
MID
100Hz
GAIN
+40dB
U
-20dB
U
20
30
40
60
1
OUT
IN
2k
8kHz400Hz
400
2k100
EQ
LINE
0
EQ
48V48V
20Hz 100Hz 1kHz 10kHz 20kH
z
–15
–10
–5
0
+5
+10
+15
Low Cut with Low EQ Boosted