


6
Control Map Guide
If you’re using Digital Performer, make the following settings.
The explanation here uses Digital Performer 7 as an example. The procedure might differ if you’re using a different version.
1
Choose PLAY mode (see “Performing (Play
mode)” in the owner’s manual.)
2
Press the [ ] button or [ ] button to move
the cursor to “CTRL MAP” in the display.
The display shows the number of the currently selected control map.
3
Turn the [VALUE] knob to select number 9.
4
Start up Digital Performer 7.
5
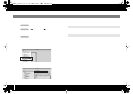
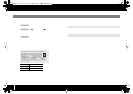
In the [Setup] menu, click [Control Surface Setup...].
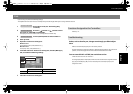
6
In the “Control Surface” dialog box, click the [+] box, and make the
following settings.
Refer to p. 10.
Values, such as that for pan, change even though you didn’t adjust
them
Make sure that knobs [R1]–[R9] are in the center position.
Encoder Simulate is assigned to Knobs [R1]–[R9]. If knobs [R1]–[R9] are not at the center
position, control messages will continue to be transmitted from the A-PRO.
You can control PLAY or STOP, but not Volume or Pan
Check the track that is set to “channel 1.”
Pressing the [B1] button or [B2] button will switch the tracks that are assigned to sliders
[S1]–[S8] and knobs [R1]–[R8]. It is not necessarily the case that [R1] and [S1] are
assigned to track 1.
Digital Performer
Driver
Mackie Control
Unit
Mackie Control
MIDI
A-PRO 2-1
Operation of the A-PRO
Operation of the A-PRO
Operation of the A-PRO
Functions Assigned to the Controllers
Troubleshooting
A-PRO_g_e.book 6 ページ 2010年5月26日 水曜日 午後3時46分