


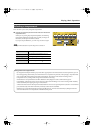
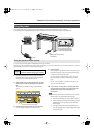
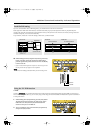
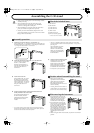
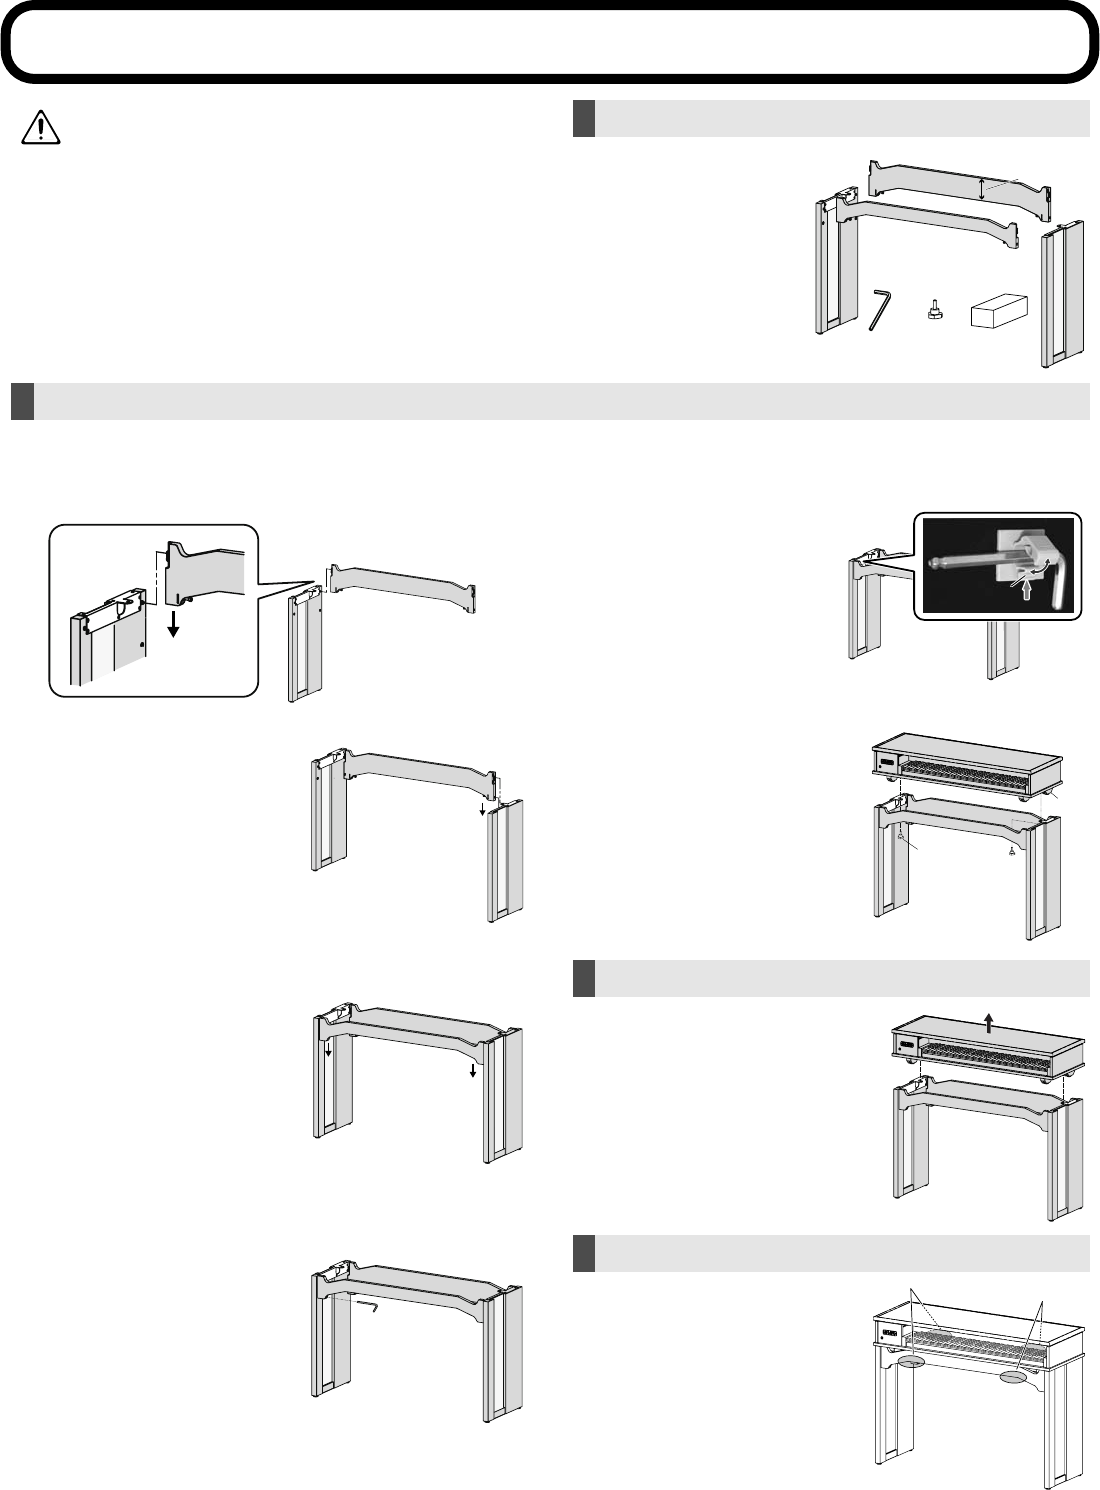
Assembling the C-30 stand
(1) Side board A
(2) Side board B
(3) Center board C
(4) Center board D
(5) Allen wrench
(6) Knob bolts (2 pcs.)
(7) DP-10 (Accessory pedal)
* refer to C-30 owner‘s manual
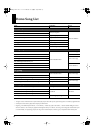
1.
Attach one end of center board “C” to side board “A.”
Orient center board “C” so that the hardware is on the inside, and
hook the hardware of center board “C" onto the pins of side board
“A,” and press center board “C” downward.
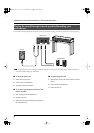
2.
Attach the other end of center board “C” to side board “B.”
Use your hand to support center
board “C,” and hook the
hardware of center board “C”
onto the pins of side board “B,”
and press center board “C”
downward.
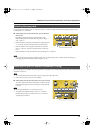
3.
Attach center board “D.”
Orient center board “D” so that
the hardware is on the inside,
and hook the hardware at each
end of center board “D” onto the
pins of side boards “A” and “B”
and press center board “D”
downward.
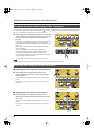
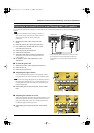
4.
Using the included Allen wrench, tighten the bolts that are
already installed in the center boards.
First, lightly tighten the bolts at
the four locations, and then
tighten the bolts firmly so that
the stand does not rock or
wobble.
* If you will be replacing the decorative panels, do so before placing the
instrument on the stand. For details on how to replace them, refer to the
instructions included with the decorative panels.
* After you’ve finished assembling the stand, attach the included Allen
wrench to the holder located on the inside of side board “A” to prevent it
from being lost.
Unlock the holder, place the
Allen wrench in position,
and then re-lock the holder.
When you unlock the holder,
push up the parts marked (a)
in the illustration.
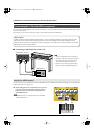
5.
Align the main unit with the stand.
Place the main unit on the stand
so that the four feet on the
bottom of the unit fit within the
inside of the stand, and then
firmly tighten the two knob bolts
to fasten the unit onto the stand.
* Be careful not to pinch your hands.
• Remove the two knob bolts,
separate the main unit from the
stand, and then loosen the four
bolts of the center boards to
disassemble the stand in the reverse
order of assembly.
* Loosening the bolts until their heads are
visible will allow you to disassemble the
stand. Do not remove the bolts entirely.
• If the instrument is to be moved
within the same room, it must be
carefully moved by two people
holding the instrument at the
locations shown in the diagram.
• If the instrument is to be moved
out of the room or into a different
room, you must separate the main
unit from the stand and carry
them separately. The portion that
connects the main unit and stand
may be damaged if you attempt to
transport the instrument without
separating the main unit and
stand.
• When moving the main unit and stand, carry them in a horizontal
position.
• Make sure that another person is on hand to help with the
assembly and setup.
• When assembling the stand, be careful not to apply
excessive force to any part. Doing so may deform the
hardware or damage the wooden parts.
• When assembling or moving the stand, be careful not to
pinch your hands or drop the unit on your feet.
• Should you remove the knob bolts, keep them in a safe
place out of children’s reach, so there is no chance of them
being swallowed accidentally.
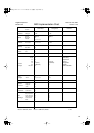
Check the included items
((
2
)
(
3
)
(
2
)
(
3
)
(
4
)
(
5
)(
6
)(
7
)
(
1
)(
1
)
Wider
Assembly procedure
A
C
A
C
A
C
A
C
B
A
C
B
A
C
B
D
A
C
B
D
Allen wrench
Caution when disassembling the stand
When moving the instrument
(a)
Knob bolt
Foot
C-30_e.book 29 ページ 2008年3月10日 月曜日 午前10時31分