


6
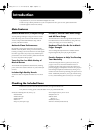
Introduction
Assembling the F-50
• Make sure that another person is on hand to help with the assembly and setup.
• To move the piano, lift it carefully—all the while keeping it level. Be very careful, when you assemble and move
the piano, to make sure that you do not drop it on your hands or feet.
• Always carry out this procedure with the F-50 lying horizontally, with the rear panel facing down.
• Should you the screws used in assembling the stand or those used for attaching the music stand, make sure to
put them in a safe place out of children’s reach, so there is no chance of them being swallowed accidentally.
■
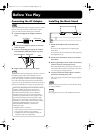
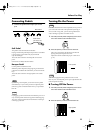
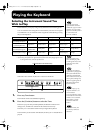
Check the Parts
Before you begin assembling the F-50, check that all the parts
were supplied.
You will also need to have a Phillips screwdriver.
fig.st1
■
Assembly Procedure
• At first, assemble the entire unit in a temporary fashion,
without really tightening the screws.
Then, after checking the overall alignment of the boards
(and gently shifting certain parts where necessary), go
around and tightly fasten each of the screws.
• Be careful when assembling the F-50, so as to avoid
scratching the side panels.
When securing the screws, lay the entire unit sideways
with the rear side of the F-50 at the bottom.
1.
To avoid scratching the instrument, remove the F-
50’s packing sheet and spread it out where the
stand is to be assembled.
If you do not have the packing sheet on hand, then use
any soft, non-scratching sheet instead.
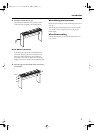
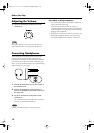
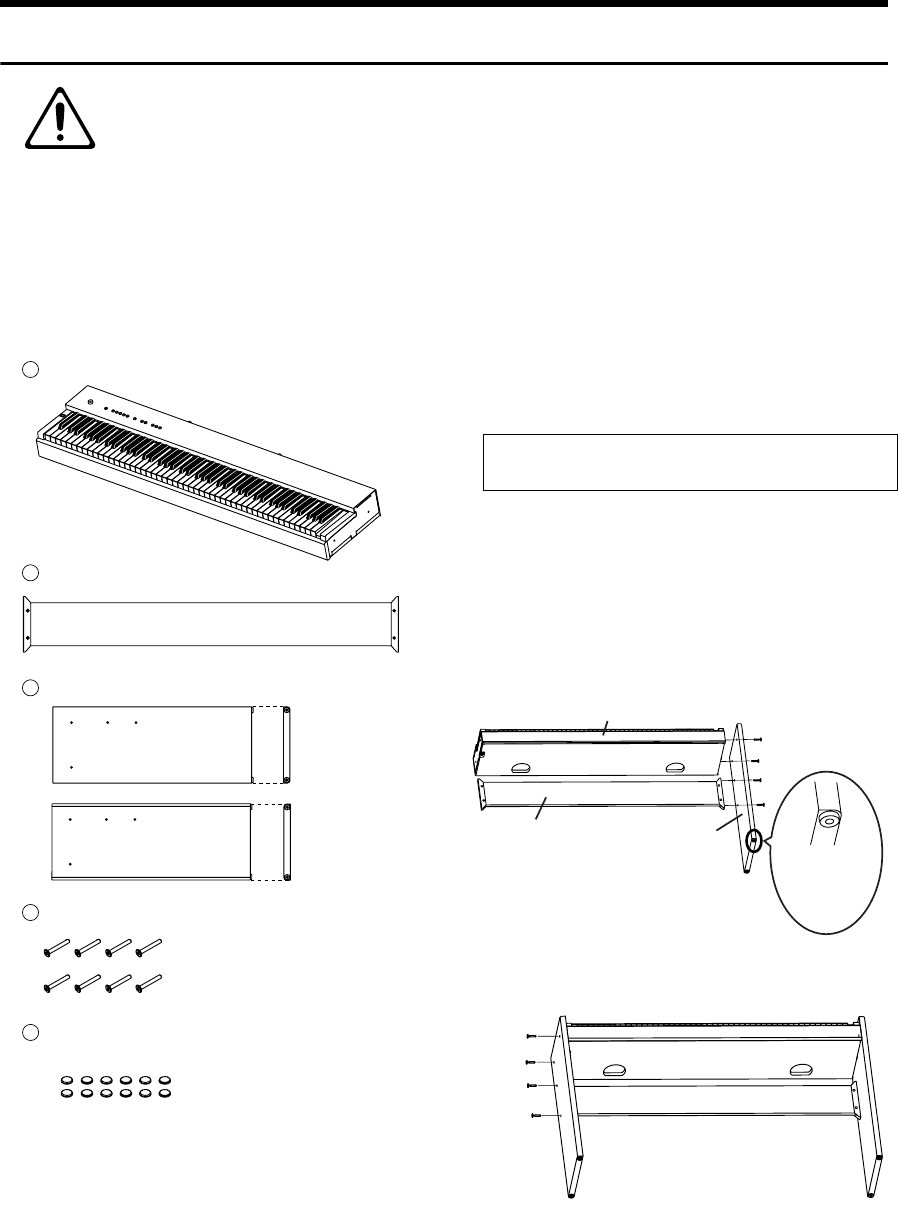
2.
Using the screws, secure one of the side panels to
the F-50 and the center board (four locations).
fig.st02-2
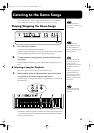
3.
Use the screws to secure the other side panel to
the F-50 and the center board (four locations).
fig.st03-2
1
F-50
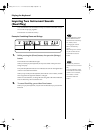
2
Center Board
3
Side panel right and left
4
Screw x 8
5
Cap x 8
(and 4 spare caps)
Front
Rear
Front
Rear
Cross section
(Right)
(Left)
F-50
Side panel
(Right)
Center Board
Screws
Side with
rounded
corners
facing out
Screws
F-50_e.book 6 ページ 2005年2月2日 水曜日 午後5時11分