


Editing sounds | 10. SYSTEM parameters
68
r
FR-7/FR-5 V-Accordion
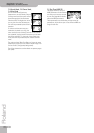
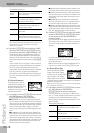
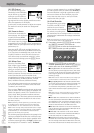
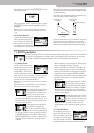
10.1 LCD Contrast
(1~7, Default setting: 5) The
information in the LCD display
may be difficult to view after
turning on your FR-7/FR-5 or
after extended use. Your view-
ing angle and the current lighting conditions can also
affect the appearance of the display.
In such cases, use this parameter to adjust the contrast.
The smaller the value, the darker the “background”
becomes.
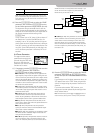
10.2 Parameter Access
This function was already dis-
cussed on page 19: it allows you
to specify how many MENU
parameters should be accessible.
“Full” mode is ideal for in-depth
programming of your FR-7/FR-5. “Easy” mode appears a
sensible choice for quick adjustments during a concert,
performance, etc.
Note that the FR-7/FR-5 also provides functions you
can set without even entering its MENU structure (see
p. 31). They have the advantage that you do not need
to specify whether or not to save them (so that you
won’t have to keep your audience waiting). If you do
want to save those settings, press the [WRITE] button.
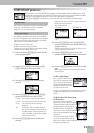
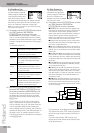
10.3 Bellows Curve
(Fixed Low, Fixed Med, Fixed
High, X-Light, Light, Standard,
Heavy, X-Heavy) This parameter
allows you to specify how the
FR-7/FR-5 should react to the
bellows’ movements. You may remember that there are
several functions that can be controlled via the
strength/speed with which you push or pull the bellows
(2.7 Bellows Detune, 3.6 Bellows Detune, 3.5 Reed
Growl, 4.6 Bellows Detune, 6.3 Bellows Detune).
If you think those parameters do not respond the way
you would like them to, try another curve that better
“translates” your movements.
There are three “Fixed” curves that always use the same
value, no matter how hard or lightly you push/pull the
bellows (no dynamic control). “Low” means that a low
value is used, “Med” represents a medium value and
“High” a high value. These three options also mean that
you do not need to move the bellows in order to hear
the notes you play.
Note: By selecting a “Fixed” option here, you effectively switch
off the bellows sensor. This also means that any setting that
includes “Bellows” for “10.11 Orchestra Touch” or “10.12 Orch.
Bs&Ch Touch” no longer works, because the FR-7/FR-5 no longer
“listens” to the bellows’ movements. Moreover, “Fixed L+Bellows”,
“Fixed M+Bellows”, or “Fixed H+Bellows” is deactivated alto-
gether (even the “Fixed” part is ignored).
The remaining settings do depend on the strength with
which you push/pull the bellows, but in different ways:
“Light” means that you do not need to push/pull hard
to achieve a meaningful effect. “X-Light” requires even
less strength (the “X” stands for “extra”). “Standard”
refers to a normal response (or so we believe). “Heavy”
provides a greater variety of nuances and “X-Heavy” is
even more detailed. It would be a good idea to select
each curve without the “Fixed” addition, play a few
notes, select the next curve, etc. until you find the
response that feels just right.
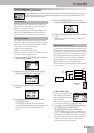
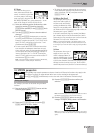
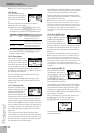
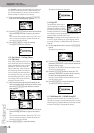
10.4 Pedal Controller
This page allows you to assign
functions to the FBC-7’s foot-
switches. As you will notice
below, there are also functions
for remotely controlling exter-
nal instruments, like an arranger module or any other
sequencer that understands the messages transmitted
by the FBC-7.
Note: The assignments you program here are only meaningful if
you connect the FR-7/FR-5 to the supplied FBC-7.
(1) If necessary, press the [DATA÷ENTER] knob to select
the “SWITCH” parameter, then rotate the
[DATA÷ENTER] knob to select the footswitch on the
FBC-7 whose function you wish you define.
(2) Press the [DATA÷ENTER] knob to select the
“ASSIGN” parameter, then rotate the [DATA÷ENTER]
knob to select one of the following functions:
■ Set Up/Set Down—The footswitch allows you to select
the next (Down) or previous (Up) Set memory. After select-
ing Set 01 (or 40), pressing the footswitch again takes you
to Set 40 (or 01). These are the default functions of foot-
switches [1] and [2].
Note: There is also a function that allows you to assign a spe-
cific Set number to a footswitch (see “Set 1~40” below).
■ Regist Up/Regist Dwn—The selected footswitch allows
you to select the next (Down) or previous (Up) Treble regis-
ter. If you combine this with the “2.12 Bass Link” and
“2.13 Orchestra Link” parameters, this allows you to recon-
figure almost all sections simply by pressing this foot-
switch.
Note: There is also a function that allows you to assign a spe-
cific register number to a footswitch (see “Register 1~14”
below).
■ Treble Sust—The footswitch can be used to hold the Tre-
ble notes (accordion) transmitted via MIDI whose keys you
are holding down when you press the footswitch. You can
then release the keys – the notes go on sounding until you
release the footswitch. This is for MIDI control only.
■ Bass Sust—The footswitch can be used to hold the bass
notes of the Bass section transmitted via MIDI (but not the
chords). This is for MIDI control only.
■ Chord Sust—The footswitch can be used to hold the
chord notes of the Bass section transmitted via MIDI (but
not the bass notes). This is for MIDI control only.
■ Orch Sust—The footswitch can be used to hold the
orchestral notes of the Treble section. This also applies to
the note messages transmitted via MIDI. At the same time,
the internal orchestral notes are held (if that section is on).