


Archiving your settings via MIDI (Bulk Dump)
V-Accordion
r
89
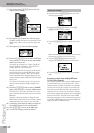
■AfterT (only for the Treble and Orchestra
sections)
The Treble keyboard also generates aftertouch mes-
sages. Aftertouch is usually used for temporary
changes to a sound’s volume, timbre or pitch (this
needs to be set on the receiving instrument). Used
right, it can be a very powerful expressive tool.
The downside is, however, that aftertouch messages
usually represent a massive amount of data, which
makes it a lot harder to find the MIDI messages you
want to edit on an external sequencer, not to men-
tion the fact that your song files become a lot
heavier than they need to be.
Besides, many sounds/parts on external MIDI instru-
ments are set to ignore these messages by default, so
that you would end up sending a lot of information
for nothing. That is why we recommend setting this
parameter to “Off” and only select “On” if you really
mean to take advantage of the Treble keyboard’s
aftertouch capability.
Archiving your settings via MIDI (Bulk Dump)
MIDI can also be used for transmitting parameter and memory settings from the FR-7/FR-5 to an external MIDI device
and back.
Archiving your settings with a sequencer
The Bulk Dump parameters allow you to transmit the
contents of one or all Set memories to a second FR-7 or
FR-5, an external sequencer, computer or data filer.
Sending these data to other instruments (a digital
piano, synthesizer, etc.) does nothing at all. That’s
because the setting data are special MIDI messages only
one model (or model family) understands. They are
called “system exclusive messages” – or “SysEx” for
short. By transmitting them to a second FR-7/FR-5,
however, you can “copy” the settings of your V-Accor-
dion to that of a friend, colleague or student.
A sequencer or data filer does not know what the mes-
sages mean and so does not use them in any way. It
merely records them. Afterwards, you only need to start
playback on your sequencer or data filer to transmit the
settings back to the FR-7/FR-5.
Note: The FR-7/FR-5’s SysEx data are fully compatible with the
FR-7b/FR-5b (button versions).
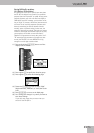
(1) Connect the FBC-7’s MIDI OUT socket to the
sequencer’s/computer’s MIDI IN socket.
See page 79 for a connection diagram. Obviously, you
also need to connect the FR-7/FR-5 to the FBC-7.
Note: Your computer needs to be equipped with (or connected
to) an appropriate MIDI interface.
(2) If you are working with a computer, launch the
sequencer program.
(3) Create or select an empty song.
(4) Create (or select) an empty track.
The track’s MIDI channel is of no importance here.
You need to ensure, however, that the sequencer/
program accepts SysEx data. If necessary, switch off
the MIDI filter in question (see the manual of your
sequencer or software).
(5) Switch off the sequencer’s MIDI Echo (or Soft Thru)
function.
If that’s too tedious, disconnect the MIDI cable from
the sequencer’s/computer’s MIDI OUT socket. This is
to ensure that the sequencer doesn’t transmit the
SysEx data back to the FR-7/FR-5 right away, which
might cause problems.
(6) Activate the record-ready mode of the track you
selected/created.
Note: It would be wise not to change the tempo on your
sequencer/in the software. By default, most sequencers/pro-
grams use the tempo value = 120. Leave it that way (or else
do whatever is necessary to ensure that the new tempo value
is stored along with the data).
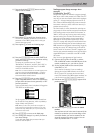
(7) If you want to archive the settings of just one Set
(11.8 Bulk Dump SET), select it on the FR-7/FR-5
using the SET [√][®] buttons.
(8) On the FR-7/FR-5, press and hold the [EXIT÷JUMP]
button, then press register [11].
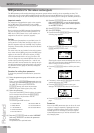
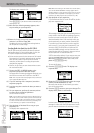
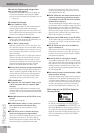
Depending on whether you want to archive all Sets
or just the settings of one Set, either press register [7]
(Bulk Dump ALL) or [8] (Bulk Dump SET). The display
now responds with:
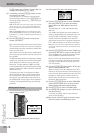
Before going on tour, etc., select “ALL” to make a
backup copy of your Sets. Select “SET” to transmit
only the settings that are actually needed for the
song in question. This transmits the settings of the
Set you are currently using.
(9) Start recording on your sequencer/computer.
Wait until the count-in (one or two measures) is fin-
ished, then…
(10) Press [MENU÷WRITE] on the FR-7/FR-5 to start the
transmission of the bulk data.
–OR–