


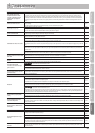

Various Settings (Function Mode)
Indication Value Explanation
VC Ch
Specifying the Visual Control Channel (Visual Control Channel)
Here’s how to specify the channel on which messages used to control video will be sent.
(Visual Control Channel).
1–16 Species the MIDI channel used to transmit MIDI messages to the Visual Control device.
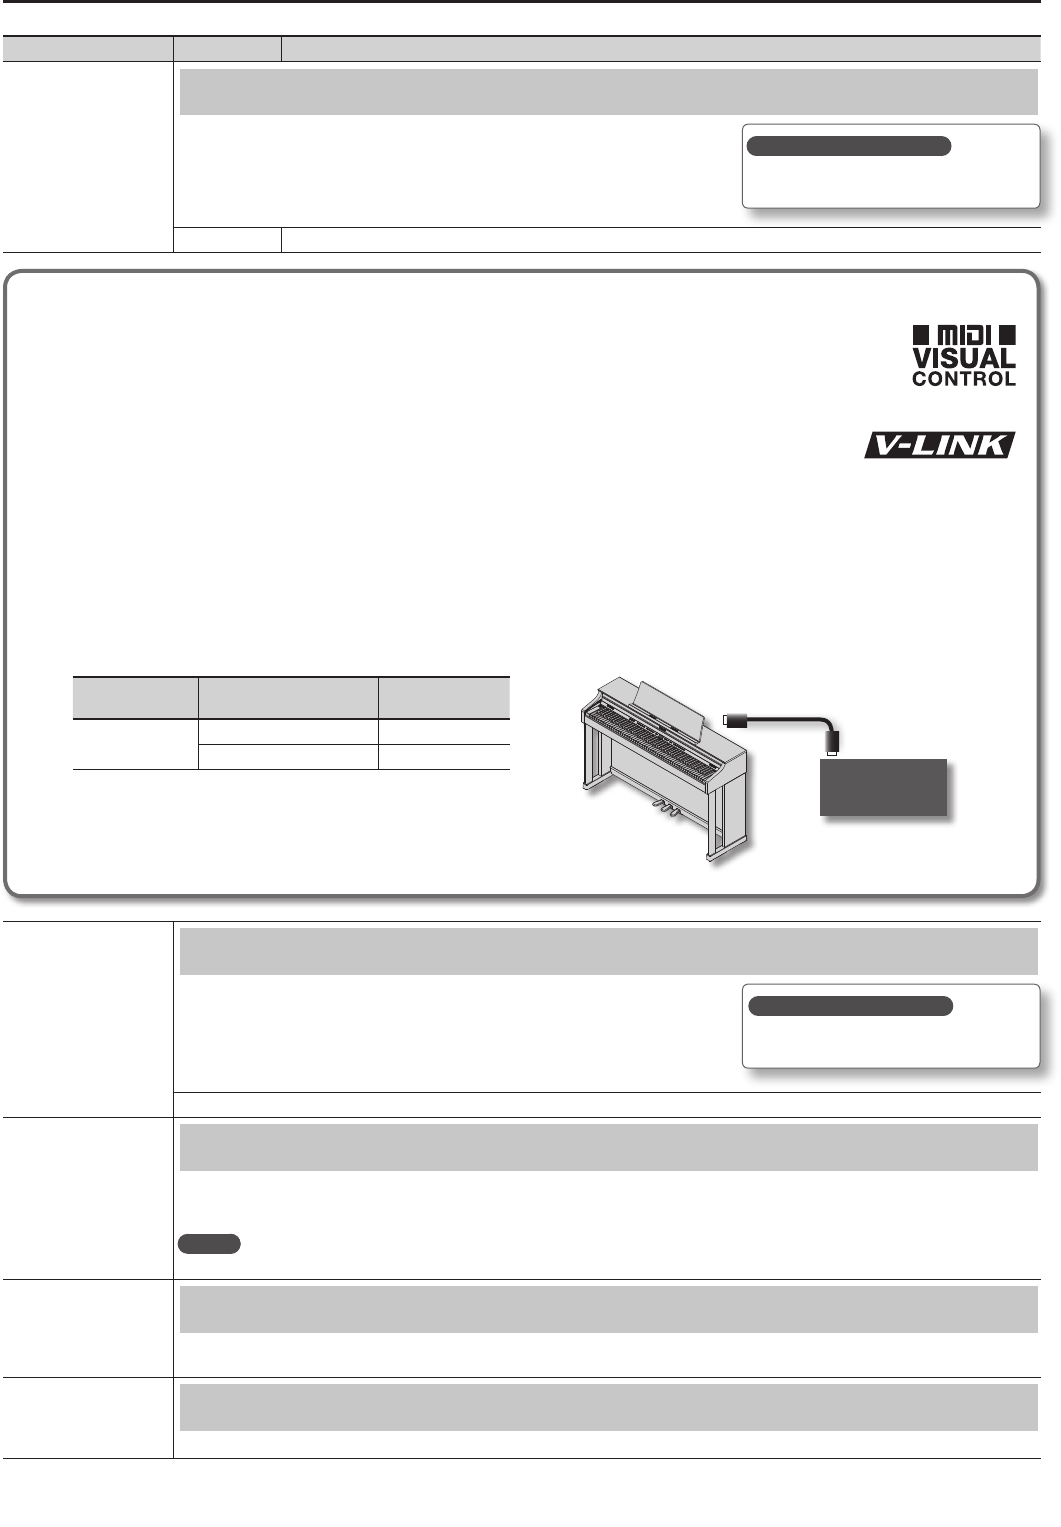
What is MIDI Visual Control?
MIDI Visual Control is an internationally-used recommended practice that was added to the MIDI specication so that visual
expression could be linked with musical performance. Video equipment that is compatible with MIDI Visual Control can be
connected to electronic musical instruments via MIDI in order to control video equipment in tandem with a performance.
What is V-LINK?
V-LINK is Roland’s proprietary specication that allows visual expression to be linked with musical performance.
Video equipment that is compatible with V-LINK can be connected to electronic musical instruments via their MIDI
ports, making it easy to enjoy a variety of visual eects that are linked with the performance.
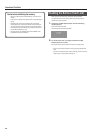
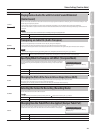
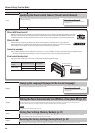
Connection examples
Connect a MIDI cable from this unit’s MIDI Out connector (p. 11, p. 12) to the MIDI In connector of your Visual Control compatible device.
* You’ll need a MIDI cable (sold separately) in order to connect this unit to a device that supports Visual Control.
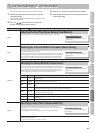
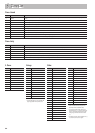
Visual control function chart
Playing the lowest 12 keys of this unit (A0–G#1) will transmit the following MIDI messages.
Visual Control
function
Transmitted MIDI message Unit’s operation
Switch images
CC 0 (Bank Select): 0–4 Play black keys
Program Change: 1–7 Play white keys
Visual Control
compatible video
equipment
MIDI In connector
MIDI Out connector
Language
Changing the Language Displayed in the Screen (Language)
You can change the language that is displayed in the screen.
ENG, JPN
Auto O
Making the Power Automatically Turn O After a Time (Auto O) (p. 41)
With the factory settings, the unit’s power will automatically be switched o 30 minutes after you stop playing or operating the unit.
If you don’t want the power to turn o automatically, change the “Auto O” setting to “OFF” as follows.
MEMO
This setting is automatically saved in the unit.
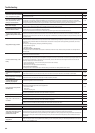
Backup
Storing Your Settings (Memory Backup) (p. 41)
The unit’s settings will return to their default settings when you turn o the power, but you can store these settings so that they will retain the
changes you made even after the power is turned o, then on again.
FctReset
Restoring the Factory Settings (Factory Reset) (p. 42)
When you execute the “Factory Reset” function, the settings you’ve edited in Function mode will be restored to their factory-set state.
How to save your settings?
Save your settings as described in “Memory
Backup” (p. 41).
How to save your settings?
Save your settings as described in “Memory
Backup” (p. 41).
50