


8
Panel Descriptions
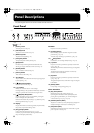
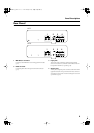
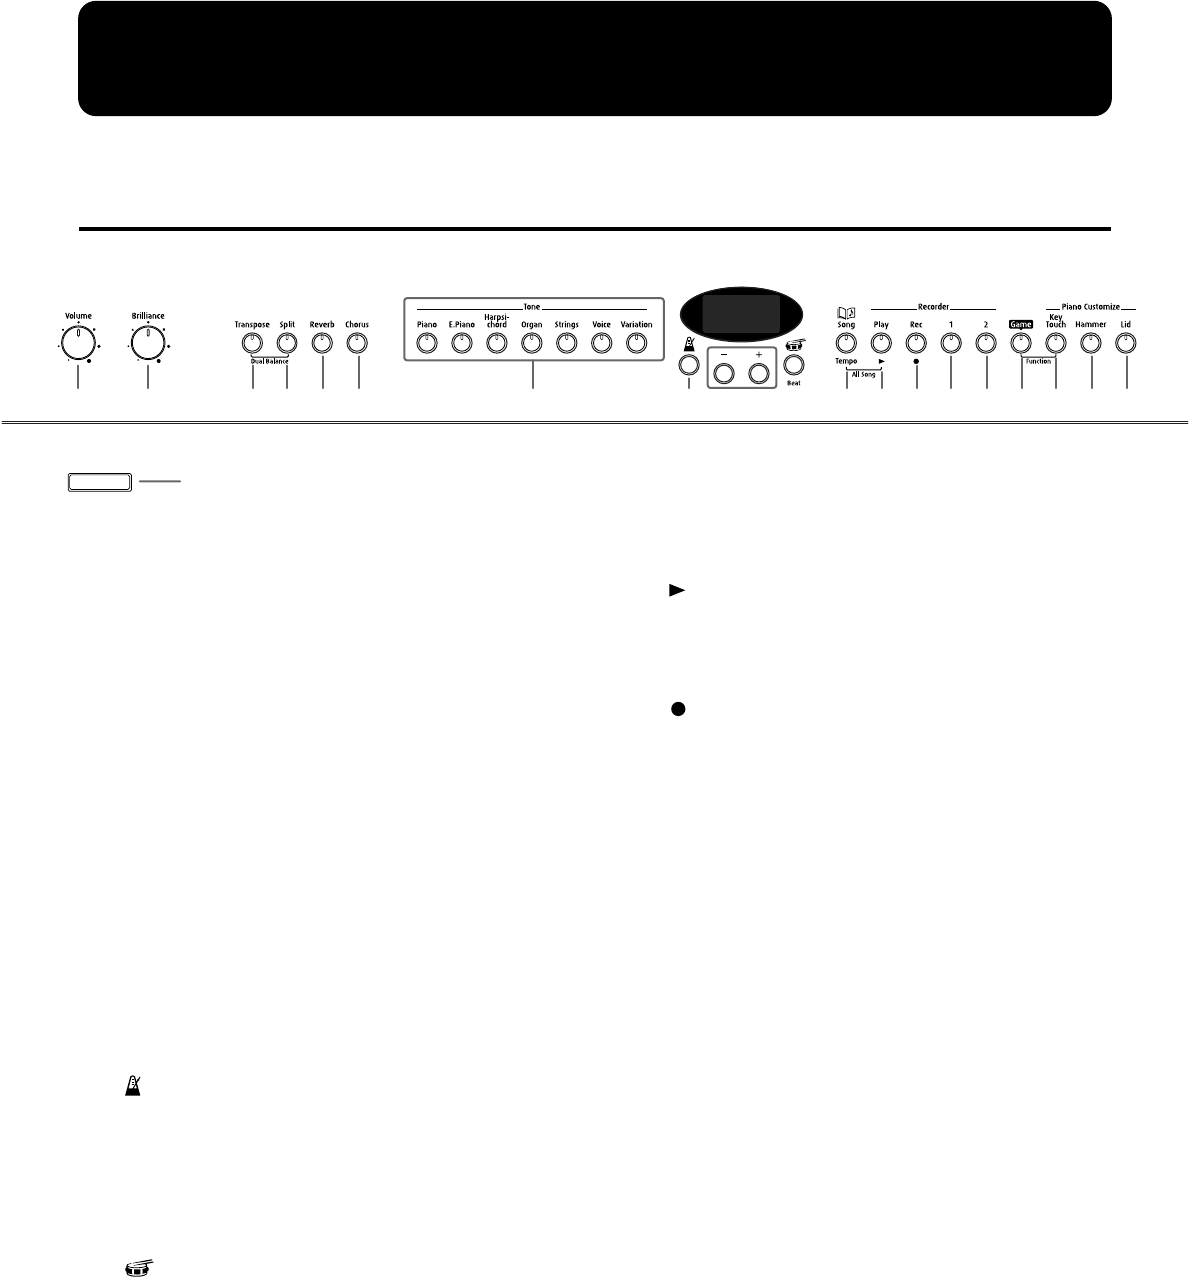
* The panel diagrams shown in this owner’s manual are those of the HP-7.
Front Panel
1
[Power] switch
Turns the power on/off (p. 12).
2
[Volume] knob
Adjusts the overall volume level (p. 12).
3
[Brilliance] knob
Adjusts the tone brightness (p. 12).
4
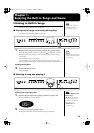
[Transpose] button
Transposes the pitch of the keyboard (p. 22).
5
[Split] button
Divides the keyboard into right-hand and left-hand areas,
allowing you to play a different sound in each area (p. 17).
6
[Reverb] button
Adds reverberation to the sound (p. 21).
7
[Chorus] button
Adds richness to the sound (p. 21)
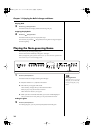
8
Tone buttons
They are used to choose the kinds of tones (tone groups) played
by the keyboard (p. 15).
9
[ (Metronome)] Button
Turns the metronome on/off (p. 18).
10
[+] [-] buttons
Allow you to select the value of various settings.
Pressing both the [+] and [-] buttons simultaneously returns the
setting of a particular item or function to its original value.
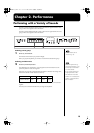
11
[ (Rhythm)/Beat] button
Switches the rhythm on/off (p. 20). In addition, pressing this
button will display the rhythm number.
Hold down this button and press the [+] or [-] button to specify
the time signature (beat) (p. 19, p. 20).
12
Display
Displays information such as the song number, rhythm number,
tempo, beat, and parameter settings values.
13
[Song/Tempo] Button
Used to select from the built-in songs (p. 13, p. 25).
Each time you press this button, the song number and the
tempo will be displayed alternately.
Recorder
Plays back or records a performance.
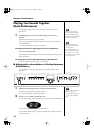
14
[ (Play)] button
Starts and stops playback of built-in songs and recorded
performances (p. 13, p. 25).
Also starts/stops recording of a performance (p. 28–p. 31).
15
[ (Rec)] button
Puts the HP-7/3 in recording-standby mode (p. 27–p. 32).
16
[1] button
Plays back or records a performance separately for each hand.
(p. 26, p. 30–p. 32).
The left-hand performances of the built-in songs are assigned to
this button.
This button and the following [2] button are collectively
referred to as the “track buttons.”
17
[2] button
Plays back or records a performance separately for each hand
(p. 26, p. 30–p. 32).
The right-hand performances of the built-in songs are assigned
to this button.
18
[Game] Button
Lets you enjoy a note-guessing game (p. 14).
Piano Customize
19
[Key Touch] button
Modifies the playing feel of the keyboard (p. 23).
By holding down this button and the [Game] button, and
pressing other specified button, you can make settings for
various functions (p. 33–p. 35, p. 37–p. 38).
20
[Hammer] button (HP-7)
Adjusts how variations in your keyboard playing strength will
modify the timing at which notes are sounded (p. 24).
21
[Lid] button (HP-7)
Simulates the tonal changes that occur when the lid of a grand
piano is opened or closed (p. 24).
2 3 4 5 6 7 8 910
12
11 13 14 15 16 17 18 19 20 21
1
HP-7
Power
HP-7/3_e.book 8 ページ 2004年1月26日 月曜日 午後5時1分