26
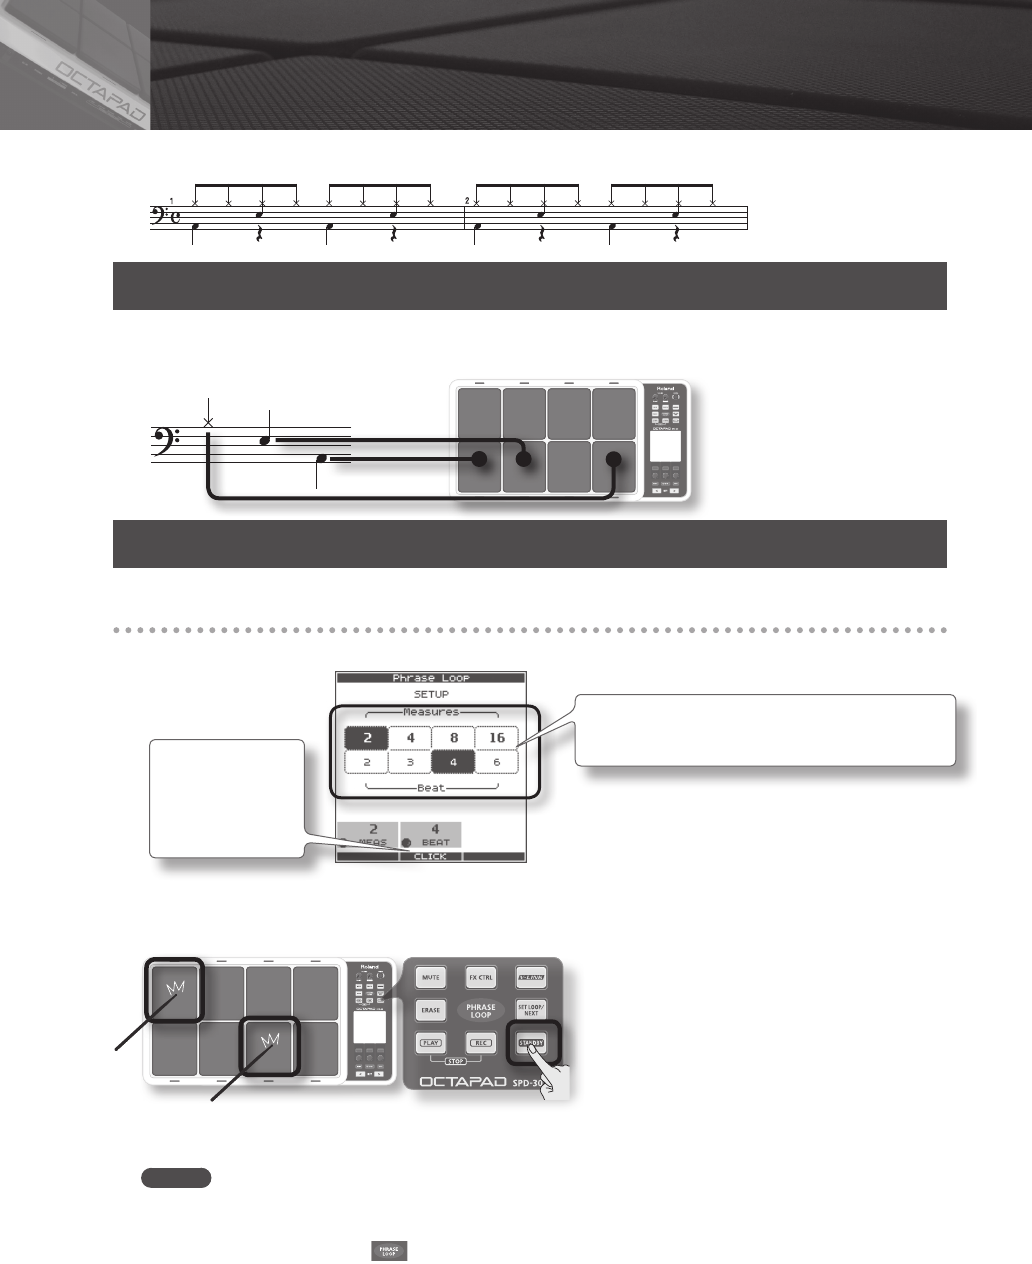
To simply explain the Phrase Loop function we will use the basic 8-beat phrase shown below.
Step 1: Select a Kit
1. Use the [KIT] buttons to select the acoustic kit “50: Tutorial.”
In kit “50: Tutorial,” instruments are assigned to pads as follows. Start by practicing this phrase.
Hi-hat cymbal
Snare drum
Kick (bass drum)
Step 2: Make Settings Before Recording
Measures, Time Signature (Beat) and Metronome (Click) Sound settings
Hold down the [STANDBY] button and the PHRASE LOOP SETUP screen appears.
The screen you will see here will indicate, in the top row, the
length of the phrase (Measures). The time signature (Beat) is
indicated in the lower row.
Press [Button 2]
(CLICK); a bar
appears above the
button, and the click
(Metronome) will
start.
1. Hold down the [STANDBY] button and make your choice by hitting the relative pad or by turning
[Knob 1] (MEAS) or [Knob 2] (BEAT).
As shown in the illustration, please select (2 measures, 4 beats) for this recording.
2. Press [Button 2] (CLICK).
You’ll hear the click (Metronome).
MEMO
• The click sound can also be turned on/o from the PHRASE LOOP screen by choosing the Quick Menu “Click ON/OFF”
command.
• The blinking tempo indicator (
) also shows the rhythm. If you don’t want to hear a click (such as in a live
performance), you can turn o the click sound and record while watching the blinking tempo indicator.
• As described in “Metronome (Click) Sound Settings (PHRASE LOOP SETUP-CLICK)” (p. 51), you can make settings such as
“sounding the click only on the rst pass of the loop,” changing the type of click sound, or adjusting the click volume.
05 Recording a Phrase Loop (PHRASE LOOP)


