


CVP-509/505/503/501 Owner’s Manual 89
Mixing Console – Editing the Volume and Tonal Balance –
8
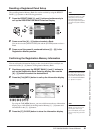
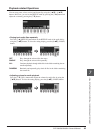
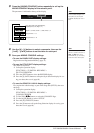
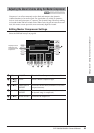
3 Press the [MIXING CONSOLE] button repeatedly to call up the
MIXING CONSOLE display for the relevant parts.
The part name is indicated at the top of the display.
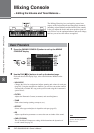
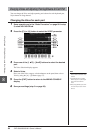
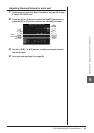
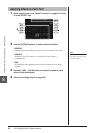
4 Use the [A] – [J] buttons to select a parameter, then use the
[1 ▲▼] – [8 ▲▼] buttons to set the value for each part.
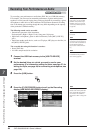
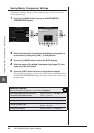
5 Save your MIXING CONSOLE settings.
• To save the PANEL PART display settings:
Register them to Registration Memory (page 79).
• To save the STYLE PART display settings:
Save them as Style data.
1. Call up the operation display.
[FUNCTION]
→ [F] DIGITAL REC MENU →
[B] STYLE CREATOR
2. Press the [EXIT] button to close the RECORD display.
3. Press the [I] (SAVE) button to call up the Style Selection display for sav-
ing your data, then save it (page 68).
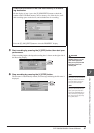
• To save the SONG CH 1-8/9-16 display settings:
First register the edited settings as part of the Song data (SETUP), then save
the Song.
1. Call up the operation display.
[FUNCTION]
→ [F] DIGITAL REC MENU →
[A] SONG CREATOR
2. Use the TAB [EE
EE
][FF
FF
] buttons to select the CHANNEL Page.
3. Use the [A]/[B] buttons to select “SETUP.”
4. Press the [D] (EXECUTE) button.
5. Press the [I] button to call up the Song Selection display for saving your
data, then save it (page 68).
NOTE
The Style/Song part components are
the same as those that appear in the
display when you press the panel
[CHANNEL ON/OFF] button once or
twice.
Song, Style, MIC (CVP-509/505/503),
Keyboard parts (Left, Right 1, 2)
Rhythm 1, 2, Bass, Chord 1, 2, Pad, Phrase 1, 2
Song channels 1 – 8
Song channels 9 – 16
NOTE
If you simultaneously hold down one
of the [A] – [J] buttons and use the [1
▲▼] – [8 ▲▼] buttons (or the
DATA ENTRY dial), you can instantly
set the same value to all other parts.