9
General Operating Instructions
1. Connect the AC power cord to a 120Volt AC grounded power outlet (220 to 240
Volts in export units).
2. Switch on the Power and turn the Main and Monitor Master controls to Off for now.
3. Connect low, or high impedance microphones to either the 3-pin XLR or ¼-inch
segments of the Mic1, 2, and/or 3 inputs.
4. Connect stereo sources to Channels 1, 2, and 3 with RCA-ended patch cords. Now
set the input selector buttons for the inputs you are using.
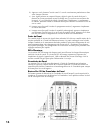
5. Using heavy-gauge speaker cables (see under Speaker Connections) connect one
4-ohm, or two 8-ohm speakers to each channel on the back panel.
6. During a sound check, set the Mains master at “7” (a good getting-started
setting) then adjust the channel Gain and EQ controls, also the level faders as
required for the right basic mix and sound level. See under Gain Control and Cue
Button for tips on setting the Gain.
7. Still during the sound check, connect your headphones to the Phones jack and turn
up the Phones level. Now you are ready to listen to the main mix or check out Cue’d
channels or effects (see under the Channel Cue and Effects Cue sections).
8. Turn up the EFX send controls on those channels you wish to have effects (see
under Effects Clip LED for more on this). Now you can kill the effects sound through
the main speakers by punching the Main Effects button into the “up” position, then
listen to the effects through the headphones by sliding the Headhone Crossfader to
Cue and depressing the Effects Cue button (the LED will come on). Now Select and
Modify the effects via those controls then punch in the Main Effects button when you
wish to insert effects into the main program.
9. Adjust the graphic EQ as required. Always use an EQ sparingly. Remember, exagger-
ated EQ settings cost you power headroom and clarity when the volume gets pumped.


