6Ć26 Removal and Replacement
C4699Ć90000
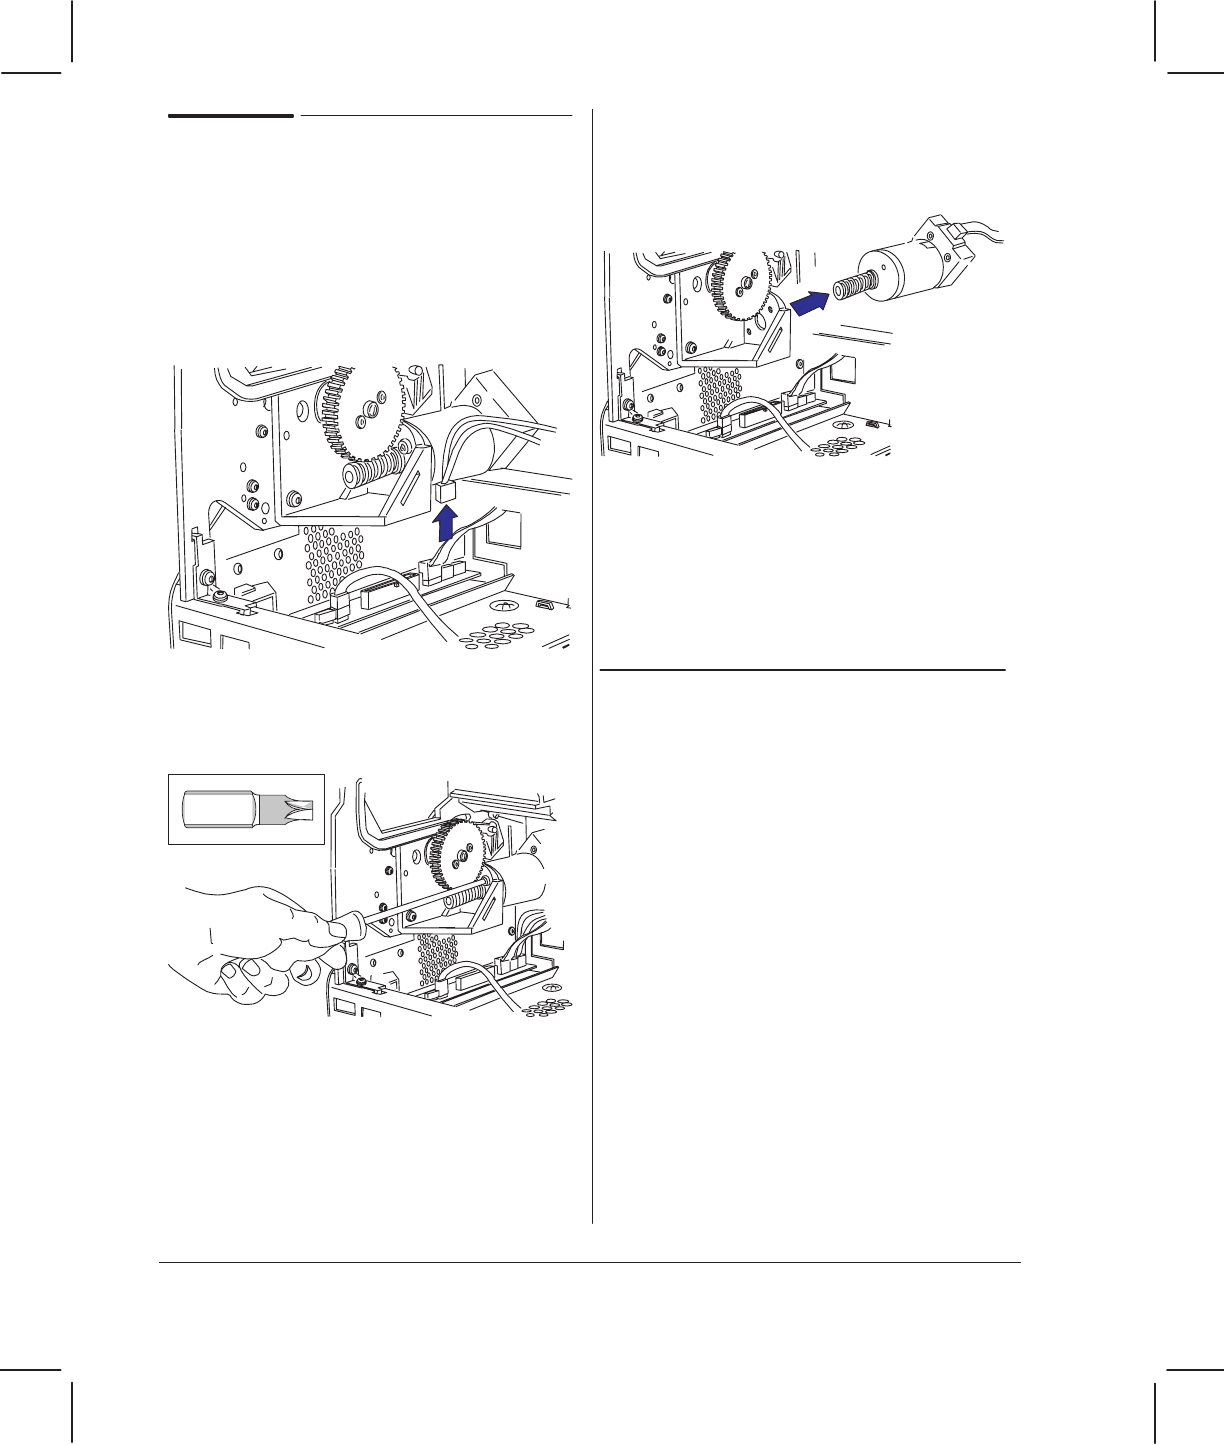
Removing the Media Motor
1 Remove the spittoon ' page 6Ć23/6Ć24.
2 Disconnect the mediaĆmotor cable and the
flat mediaĆaxisĆencoder cable from the
main PCA (connectors labeled
MOT X and
ENC X respectively), and from the clip at
the back of the plotter.
3 Remove the two screws that secure the
media motor to the mediaĆmotor mount.
Torx-15
4 Pull the media motor out through the
back of the plotter.
Reassembling: The worm pinion and
driveĆroller gear mesh slightly during use.
Don't install a new motor and an old gear, or
vice versa: install the gear that comes
with the motor. Apply the grease that comes
with the new motor to the worm pinion and
driveĆroller gear.
Calibration: After having reassembled the
plotter, perform the accuracy calibration
(Details ' chapter 7.)
