Maintenance/replacement
ENGLISH - 149
Maintenance
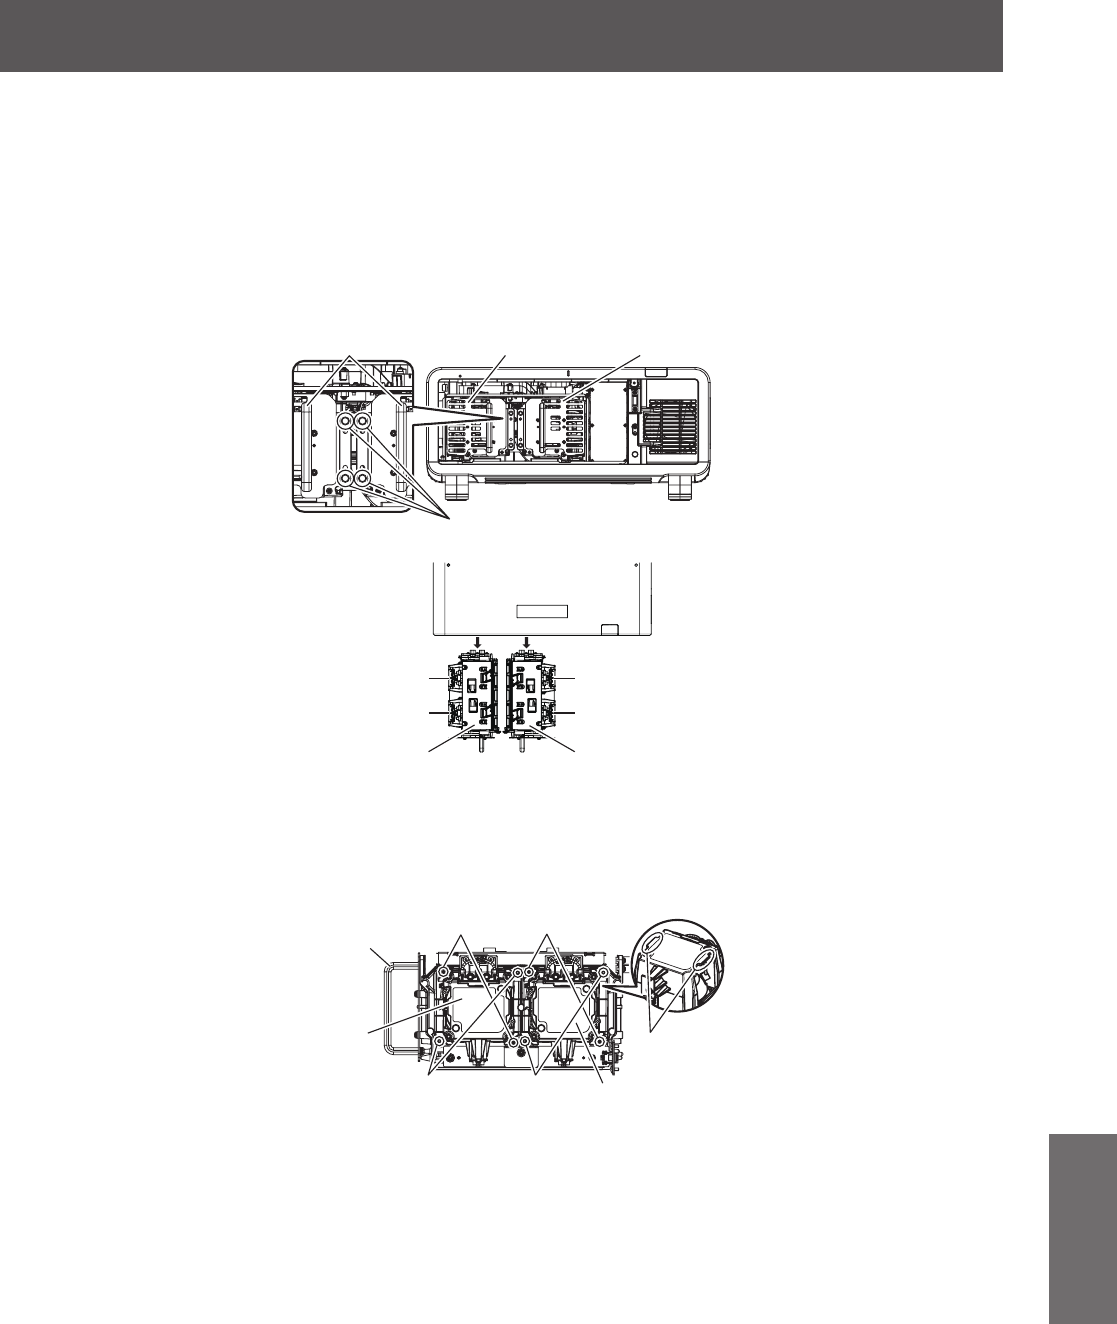
3) Pull out the lamp case.
z
Use a Phillips screwdriver to turn the lamp case xing screws of the lamp unit to be replaced (two screws
each) counterclockwise until they turn freely, and then hold the lamp case handles to be replaced and pull
out backward.
z
Do not remove the black screws other than the lamp case xing screws.
z
When you loosen the lamp case xing screws with the projector installed upward in the vertical direction,
the lamp case may drop off on its weight. Be sure to hold the lamp case handle when you loosen the lamp
case xing screws.
z
When removing the lamp case, make sure that the projector is stable and remove it in a safe place where
the lamp case is dropped off.
Lamp case handles
Lamp case L
Lamp case R
Lamp case fixing screws
/DPSXQLW
/DPSXQLW
/DPSFDVH5
/DPSFDVH/
/DPSXQLW
/DPSXQLW
4) Remove the lamp unit.
z
Use a Phillips screwdriver to turn the lamp unit xing screws (two screws) counterclockwise until they turn
freely, and then remove the lamp unit from the lamp case.
z
Hold the handles of the lamp unit and remove it.
z
Do not remove the screws other than the lamp unit xing screws.
Lamp unit fixing screws
Lamp unit
Lamp case handle
Lamp unit
handles
Guide pins and guide holes
Lamp unit
5) Attach the lamp unit.
(i) Gently push the new lamp unit into the lamp case. Install the new lamp unit carefully so that the guide
pins on the lamp case are inserted into the guide holes on the lamp unit.
If the lamp unit is not installed properly, remove it and then gently install it again. Pushing it in forcibly
or exerting excessive force may break the connector.
(ii) Use a Phillips screwdriver to rmly tighten the lamp unit xing screws (two screws each).
z
Make sure to attach the lamp unit properly.
