


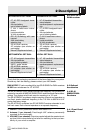


4 Microphon Technique
31WMS 40 SINGLE/DUAL
Note:
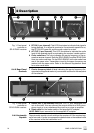
4.3 C 444 L Head-
worn Microphone
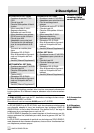
4.3.1 Putting On the
Microphone
Refer to fig. 15 on
page 4.
Note:
4.3.2 Windscreen
4.3.3 Moisture
Shield
Refer to fig. 16 on
page 4.
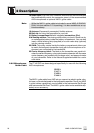
5.1 Surfaces
5.2 Handheld
Transmitter Internal
Windscreen
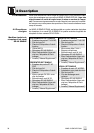
Remember that gain-before-feedback will be the higher the closer the
microphone sits to the user's mouth!
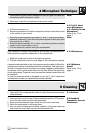
3. Make sure to aim the microphone at the user's mouth.
1. Put the microphone on.
2. Bend the gooseneck so that the microphone will sit to one side in front
of the corner of your mouth.
• Should you hear excessive pop noise ("p" and "t" sounds are overem-
phasized unnaturally), move the microphone capsule further away from
your mouth (up or back).
• If the microphone sounds "thin" or flat, move the microphone capsule
closer to your mouth (refer to fig. 3).
• Find the optimum position during the soundcheck.
If (for instance, in outdoor use) excessive wind or pop noise becomes au-
dible, attach the supplied windscreen to the microphone.
1. Slide the windscreen onto the microphone capsule.
2. Pull the windscreen over the outer edge of the microphone capsule.
A special moisture shield on the microphone capsule makes it difficult for
moisture and makeup to penetrate into the microphone. This barrier pre-
vents the microphone sound entries from being clogged by perspiration
or makeup, which would make the sound dull and reduce the sensitivity
of the microphone. Therefore, never remove the moisture shield from the
microphone!
In case the moisture shield is damaged or lost, the C 444 L head-worn
microphone includes two replacement moisture shields.
• Use a soft cloth moistened with water to clean the receiver and trans-
mitter surfaces.
1. Unscrew the wire-mesh cap of the handheld transmitter CCW and re-
move the wire-mesh cap from the transmitter.
2. Remove the windscreen (foam sheet) from the wire-mesh cap.
3. Wash the windscreen in mild soap suds.
4. As soon as the windscreen has dried, replace it in the wire-mesh cap
and screw the wire-mesh cap onto the transmitter CW.
5 Cleaning