


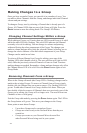


Aviom A-16II Personal Mixer User Guide
36
now includes the effect. You do not hear the effect in the
monitors.
Monitor with the effect:
• Remove the cable from the In jack of the Input module.
• Plug it into the input of the effect.
• Connect a cable from the output of the effect to the Input
module In jack.
• Leave the cable already connected to the Input module Thru
jack as it is. It completes the loop.
• To add the effect (such as a compressor) connect an insert Y
cable’s TRS plug to the Input module In jack
• Plug the Send cable on the other end of the Y cable to the
input of the effect processor.
• Plug the Return cable on the Y cable into the effect’s output.
This completes the loop.
You can wire much of the same functionality described above into a patch
bay for more permanent installations. Remember to use the same type of
cables and patch bays—balanced cables with balanced patch bays, unbal-
anced cables with unbalanced patch bays.
Note: This technique does not work with the AN-16/i Input Module.
Using a Patch Bay
The input module’s in and through connections can be wired into a patch
bay for flexible and repeatable connections day after day. This concept can
work for both studio applications and live performance.
You can use either balanced patch bays or unbalanced. One point worth
mentioning— use matched systems. That is, if you have a balanced patch
bay, use balanced audio cables for interconnections. If your patch bay is
unbalanced, use unbalanced cables.
In and Thru Patching
Not to be confused with patching the input module into a mixer’s insert
send/return loop, this is a simple wiring idea for having access to the input
module rear-panel In and Thru connections. It allows permanent installa-
tions to have access to the flexible patching options of the Input module as
needed.
In the studio this allows you to patch direct outputs to the Input module one