Assembling the Stand
E-25
3.
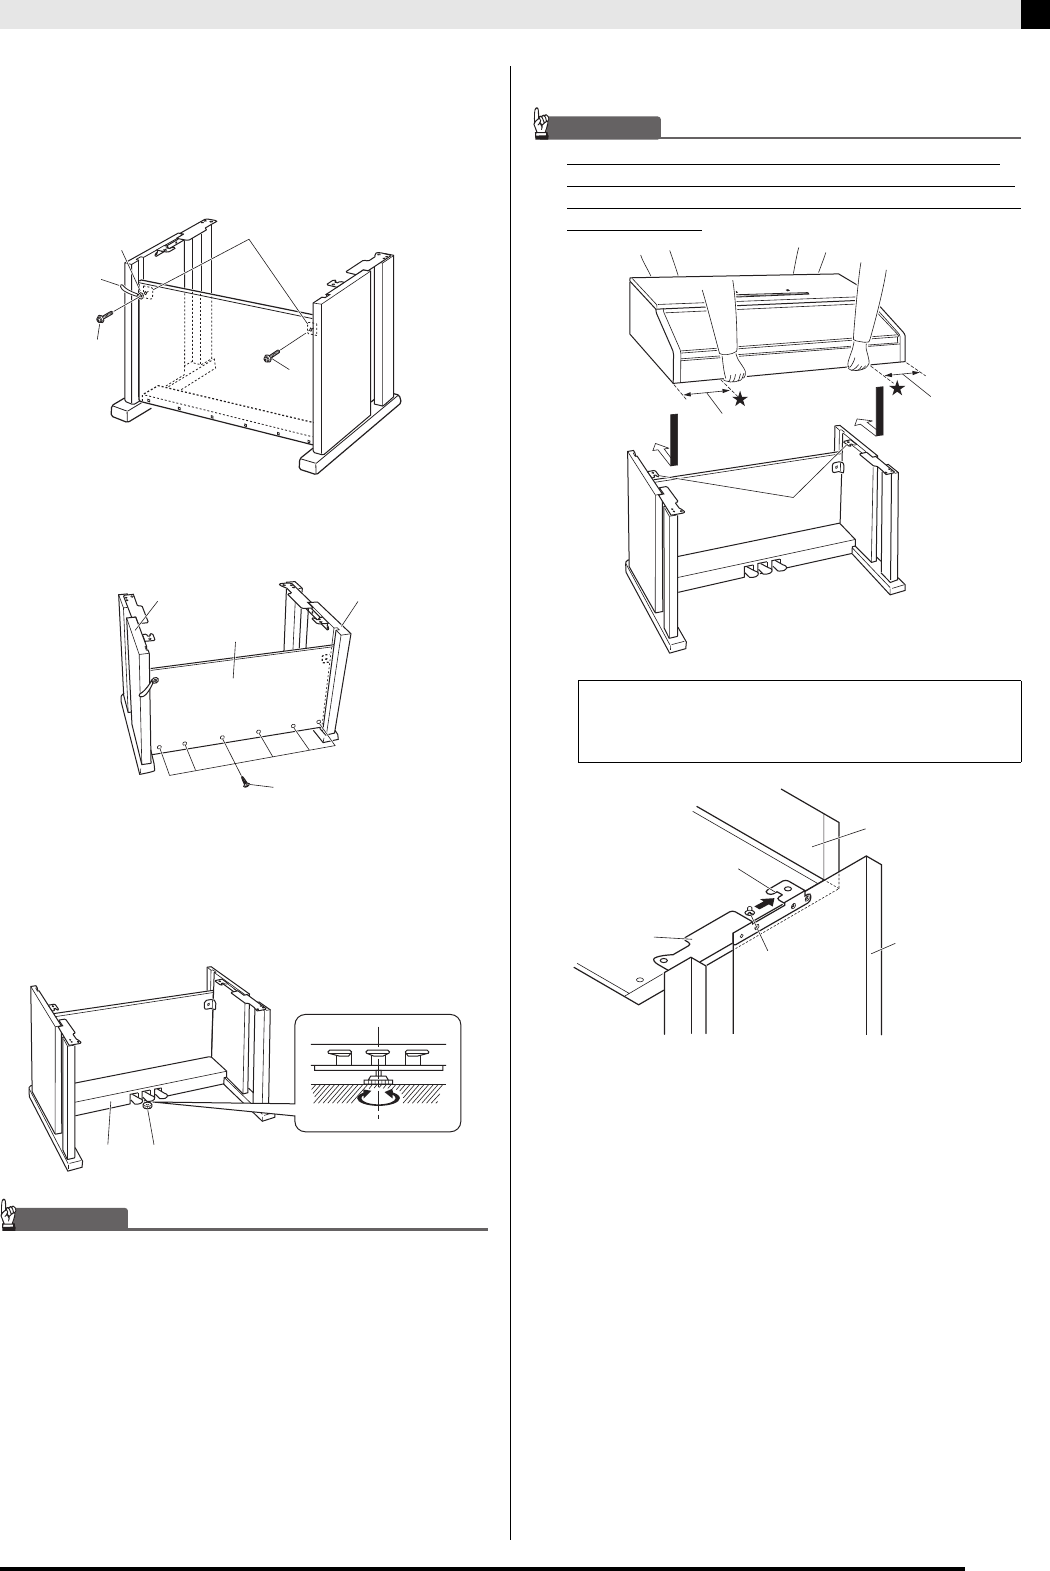
Use the two screws
I
to secure the top left
and right edges of the back panel
C
to the
brackets
5
of side panels
A
and
B
.
• At location
6
, slip the
G
clip onto to the
I
screw
before installing the screw.
4.
Next, secure the bottom of the back panel
C
with the six
F
screws.
5.
Adjust the height adjustment screw
7
to
provide support so crosspiece
D
does not
bow downwards when the pedals are
pressed.
IMPORTANT!
• Pressing the pedals without adjusting height adjustment
screw
7
can result in damage to crosspiece
D
. Always
make sure you adjust height adjustment screw
7
before
operating the pedals.
6.
Place the piano onto the stand.
IMPORTANT!
• In order to ensure you do not get your fingers pinched
between the piano and the stand, grasp the piano on its
sides (not its ends) at the locations marked with stars ()
in the illustration.
I
I
5
6
G
C
F
A
B
7D
• At this time the screws on the bottom of the piano
8
should hook into the cutouts in the stand
brackets
9
.
9
At least 10cm
At least 10cm
9
8
Bracket cutout
Back of piano
Stand side panel
AP400_e.book 25 ページ 2008年4月15日 火曜日 午後12時30分


