


Applying Effects to a Sound
E-36
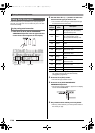
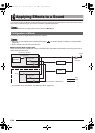
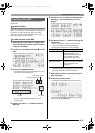
1.
While holding down the R-13 (FUNCTION)
button, press the C-5 (EFFECT) button to
display the effect setting screen.
• Check to make sure that the “DSP Disable” setting is
“oFF”. If it is “on”, change it to “oFF”.
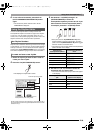
2.
Use the R-17 (t, y) buttons to move the thick
brackets (%) to “Chorus/DSP”.
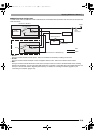
3.
Use the R-14 (–, +) buttons to select “DSP”.
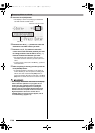
4.
Use the R-17 (t, y) buttons to move the thick
brackets (%) to the “DSP” setting.
• This causes the number and name of the currently
selected preset DSP to appear within the thick brackets
(%) on the display.
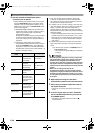
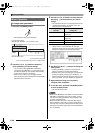
5.
Use the dial or R-14 (–, +) buttons to select the
preset DSP you want to use.
• DSPs with the leading numbers 001 through 100 (and
“ton”) are preset DSPs. See “Preset DSP List” on page
E-119 for information about preset DSP numbers and
names.
• DSP types with the leading numbers 101 through 200
are user DSPs. For details, see “Creating a User DSP”
(page E-37).
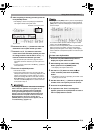
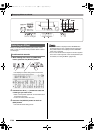
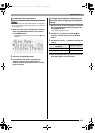
6.
Press the C-5 (EFFECT) button or the R-15
(EXIT) button.
• This exits the effect setting screen.
• A pointer indicator is displayed next to DSP when “DSP” is
selected for the “Chorus/DSP” setting.
• You also can adjust how a DSP is applied (DSP output
enabled/disabled, DSP output volume, DSP output pan,
etc.) For details, see “Using the Mixer” (page E-39).
To use a DSP
CTK6000_e.book 36 ページ 2010年7月12日 月曜日 午後12時50分