


E-57
Song Memory Function
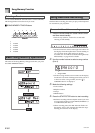
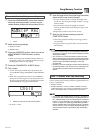
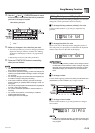
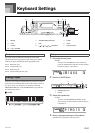
3. Specify a tone number.
• Pressing a TONE button or the DRAWBAR ORGAN
button displays the tone number and name on the
display. You can then use the number buttons, or the
[
+
] (increase) and [–] (decrease) buttons to change the
tone.
• After changing the tone number, press any keyboard
key to clear the tone number and name screen, and
return to the note input screen.
4. Use the keyboard keys to input notes, or the [0]
button to input rests.
• At this time, the display shows the keyboard pressure
(velocity). Use the [
+
] (increase) and [–] (decrease)
buttons to change the velocity.
• You can also input a chord.
5. Use the number buttons to input the length of the
note or rest (page E-54).
6. Repeat steps 4 and 5 to input more notes.
7. Press the START/STOP button to end recording
when you are finished.
• Use the procedure under “Correcting Mistakes While Step
Recording” on page E-57 to correct input mistakes you make
during step recording.
• You can add on to a track that already contains recorded
data by selecting that track in step 2 of the above procedure.
Doing so automatically locates the step recording start point
at the first beat immediately following the previously
recorded data.
• Whenever you are recording to Tracks 2 through 6, the entire
keyboard functions as a melody keyboard, regardless of the
current MODE button setting.
• When playing back data recorded with Advanced Tones at
the beginning of multiple tracks, the keyboard uses the DSP
type of the Advanced Tone that is recorded in the track with
the largest track number.
• When playing back a track that was recorded with an
Advanced Tone selected, they may be a slight delay before
the first note of the track sounds. If this happens, try to insert
a very short rest at the beginning of the track.
In addition to notes and rests, the following data is also
recorded to the track during step recording. This data is
applied whenever the track is played back.
• Tone number
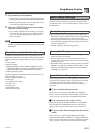
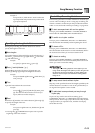
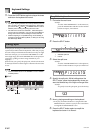
Channels 11 through 16 correspond to Tracks 1 through 6.
Whenever the keyboard is in record or edit (page E-58)
standby, the level meter display shows which tracks already
contain recorded data and which are still empty. Tracks with
four lit segments already contained recorded data, while
tracks with one lit segment are not yet recorded.
1
Recording track
2
Not recording track
Memory data can be thought of as a musical score that
progresses from left to right, with the input point normally at
the far right of the recorded data.
The procedure described here lets you move the input point
to the left in order to make changes in data you have already
input. Note, however, that moving the input point to the left
and changing data automatically deletes all of the data
recorded to the right of the input point.
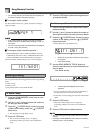
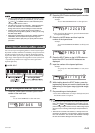
1. Without exiting step recording, use the [ ]
CURSOR button to move the input point to the left.
• The REC indicator disappears from the display, and
the STEP indicator flashes.
Track Contents After Step Recording
Level Meter Contents During Record/Edit
Standby
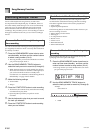
Correcting Mistakes While Step
Recording
To correct mistakes while step recording
1 2
NeC#4to
707A-E-059A