


E-59
Song Memory Function
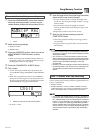
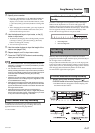
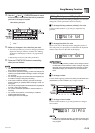
4. Use the [ ] and [ ] CURSOR buttons to move
to the location in track where the note or parameter
you want to change is located.
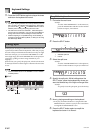
Note editing example
1
Velocity
2
Pitch
5. Make any changes in the value that you want.
• The actual procedures you use to change a parameter
depend on the type of data it contains. See “Editing
Techniques and Display Contents” on page E-59 for
details.
• Repeat steps 4 and 5 to edit other parameters.
6. Press the START/STOP button to end editing
when you are finished.
• The only parameters that can be editted for Tracks 2 through
6 are notes and tone numbers.
• In the case of real-time recording, you later can change tone
numbers you specified while recording to Tracks 1 through 6
is in progress.
• You can only change tone numbers that were originally set
for Tracks 2 through 6 using step recording.
• In the case of real-time recording, you later can change
rhythm numbers you specified while recording to Track 1 is
in progress.
• You can only change rhythm numbers that were originally set
for Track 1 using step recording.
• You cannot use the edit procedure to add more data to a
recording.
• You cannot move portions of a recording to a different
location within the recording.
• Note lengths cannot be changed.
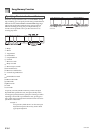
The following describes the editing techniques you can use to
change the various parameters stored in memory.
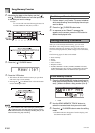
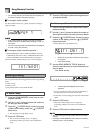
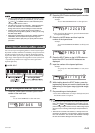
J To change the key pressure (velocity) of a note
Use the number buttons or [
+
] and [–] to adjust the key
pressure.
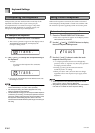
J To change the pitch of a note
Input a new note on the keyboard to change the pitch of a
note. The pitch you specify here is reflected in the keyboard
and the notes shown in the staff on the display.
• Whenever editing memory contents, never change a note so
it is identical to the note before or after it. Doing so may alter
the length of the changed note and the note before or after it.
Should this happen, you will have to re-record the entire
track.
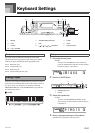
J To change a chord
Use the chord fingering method selected by the MODE button
(FINGERED, CASIO CHORD, etc.) to input a chord.
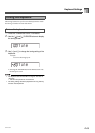
J To change a tone number
Use the number buttons or [
+
] and [–] buttons to change a
tone number.
• In the case of real-time recording, you later can change tone
numbers you specified while recording to Tracks 1 through 6
is in progress.
NeC4to
1 2
Editing Techniques and Display Contents
NeG4to
NeG4to
Crdoh
SGPnor.t
707A-E-061A