


44 KAWAI DIGITAL PIANO CE200
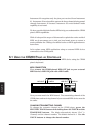
Using MIDI
EFFECTS REVERB REC
RECORDER
PLAY/STOP TEMPO
METRONOME
BEAT
VOLUME
Dual Balance
left right
DEMO
DEMO
CONCERT
MAGIC
max min
MASTER VOLUME
TOUCHTRANS-
POSE
PIANO
1
SONG 1 PART 1 2 2 3 4 5
PIANO
2
E.PIANOCHURCH
ORGAN
HARPSI-
CHORD
VIBRA-
PHONE
STRINGSCHOIR
VALUE
MIDI OUT LINE IN
LINE OUT
MIDI IN
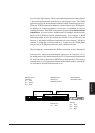
Instrument #2 recognizes only the piano part received from Instrument
#1. Instrument #3 receives all the parts on the three channels being passed
through Instrument #2 because Instrument #3’s multi-timbral mode
capability is activated.
We have provided this brief look at MIDI to help you understand the CE200
piano’s MIDI capabilities.
While it is beyond the scope of this manual to explain the entire world of
MIDI we do encourage you to visit your local music store or contact a
music publisher for a listing of available books on MIDI applications to
learn more.
Let’s explore some MIDI applications using an external MIDI device
connected to the CE200 piano.
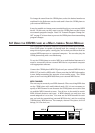
6.1 USING THE CE200 PIANO AS CONTROLLER
First let’s play sounds from an external MIDI device using the CE200
piano’s keyboard.
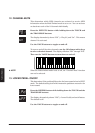
MIDI CONNECTION
First, connect the CE200 piano’s MIDI OUT jack to your external
MIDI device’s MIDI IN jack with a MIDI cable.
Next you must match the MIDI channel. The transmitting channel of the
CE200 piano and receiving channel of your external MIDI device must be
the same.
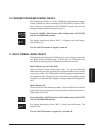
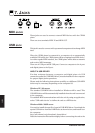
CHANGING TRANSMITTING CHANNEL
To change the transmit channel on the CE200 piano, press the
ELECTRIC PIANO button while holding down the TOUCH and the
TRANSPOSE buttons. The display alternatively shows “Chn” (=
Channel) and the channel number. The default channel is 1. Use the
VALUE buttons to change the channel number.