


D8B Manual • Chapter 4 • page 120
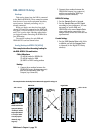
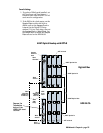
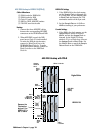
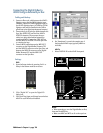
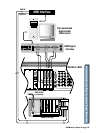
Connecting the Digital 8•Bus to
ADATs Using an External Sync Box
Cabling and Hookup
1. Connect a fiber optic cable between the ADAT’s
lightpipe output and the D8B’s lightpipe input.
Likewise, connect the D8B’s lightpipe output to
the ADAT’s lightpipe input. (A DIO•8 or OPT•8
lightpipe card must be installed in the D8B to
gain access to the digital tape inputs and outputs.)
2. Connect the 9-pin D-sub sync cables between the
Sync Box (SYNC OUT) and the first ADAT’s
SYNC IN connector. Then connect the sync
cables in a daisy-chain fashion between the
remaining ADATs. Connect the SYNC OUT on
the last ADAT to the SYNC IN on the Sync Box
to complete the loop.
3. Connect MIDI cables between the MIDI OUT
connector on the Digital 8•Bus’ Remote CPU
and the MIDI IN connector on the Sync Box, and
between the MIDI IN connector on the Digital
8•Bus’ Remote CPU and the MIDI OUT
connector on the Sync Box.
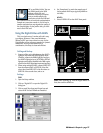
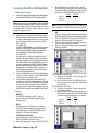
Settings
D8B
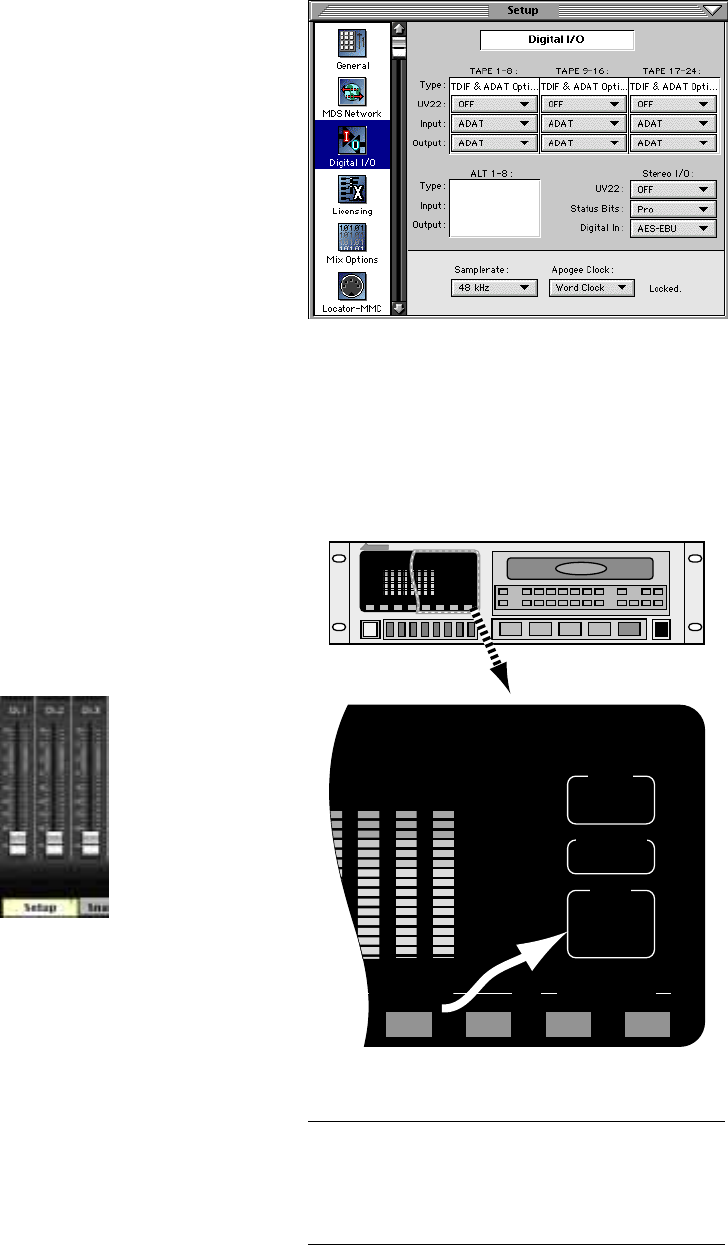
1. Open the Setup window by pressing Ctrl+1 or
Setup in the bottom menu bar on-screen.
2. Click “Digital I/O” to open the Digital I/O
dialog box.
3. Click each Tape Input and Output box and select
ADAT for each DIO•8 card installed.
4. Set “Samplerate” to match the sample rate of
the formatted ADAT tapes (typically 48kHz or
44.1kHz).
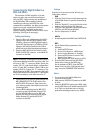
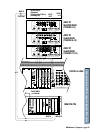
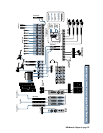
ADATs
1. Select DIGITAL IN on the ADAT front panel.
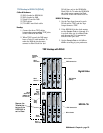
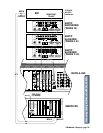
Modular Digital Multitrack
CLOCK
EXT
INPUT MON
INPUT
DIGITAL
48K
INPUT MONITORINPUT SELECT
AUTO
INPUT
ALL
INPUT
TRACK
COPY
DIGITAL
INPUT
Notes:
• When powering up, turn the Digital 8•Bus on first,
then turn the ADATs on.
• Make sure MMC and MTC are lit on the sync box.