8
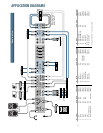
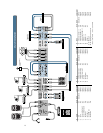
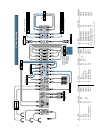
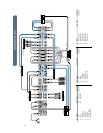
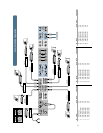
MAKE THE CONNECTIONS:
1. Make sure your amplifiers are turned off
before making any connections.
2. Connect speakers to your amplifier’s
outputs (unless, of course, you have
powered speakers, such as the Mackie
SRM 450 active monitors).
3. Plug all the sound system components into
suitable AC outlets; properly grounded and
capable of delivering adequate current. Use
power strips to minimize ground loops.
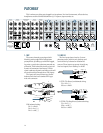
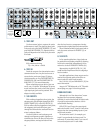
4. Using TRS or XLR cables, make connec-
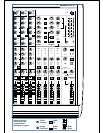
tions from the mixer’s MAIN OUTS (12),
(16) to your amplification system’s line
inputs.
5. Make connections from your microphones
and instruments to the mixer: Connect
balanced microphones to the mono
channel MIC (1) jacks. (For condenser
microphones, engage the PHANTOM (19)
switch.) Connect line-level instruments
(synthesizers, guitar effects devices, direct
boxes) to the mono or stereo channel LINE
IN (2) (4) TRS jacks.
6. Follow the procedure shown on page 6 to
zero the console. This will also MUTE (38)
each channel.
7. Turn on all the AC power switches, includ-
ing the mixer and all other equipment.
Leave the amplifier’s power switch for last.
This prevents power-up thumps which can
damage speakers.
8. Turn up the MAIN MIX FADER (72) to the
“U” label. You should hear nothing at this
point.
SET THE LEVELS:
1. Choose one of the microphones or instru-
ments you’ve connected. Make some noise.
If it’s a microphone, speak at your normal
singing volume. If it’s a synthesizer, play it
at its normal output level.
2. While making noise, engage that channel’s
SOLO (39) switch.
3. Turn up that channel’s TRIM (25) until the
METERS (54) peak near the “0” label.
4. Disengage that channel’s MUTE (38).
5. Turn up the CHANNEL FADER (42) to the
unity gain (“U” label). You should now be
hearing your noise in the phones or control
room (70).
6. If necessary, apply channel EQ (28-34)
changes. Resultant level changes can be
corrected by readjusting the TRIM (25).
7. Disengage that channel’s SOLO (39)
switch.
8. Repeat steps 1 through 7 for the remaining
active channels.
9. Stop making noise, start making music.
TWEAK THE MIX:
1. Engage MUTE (38) on all channels except
your rhythm section (drums & bass).
2. Adjust the rhythm section’s channel PANs
(37) and CHANNEL FADERs (42) to get a
good balance of levels.
3. Un-mute the other active channels and
adjust their pans and faders.
4. Tweak the fader, pan and EQ controls. Fine
tune your mix. Walk the room to see how it
sounds away from the mixer. Keep tweak-
ing.
5. Consider applying the proper EQ adjust-
ments by cutting certain frequencies,
rather than boosting. Compensate for EQ
cut by a slight boost in volume. For live
sound applications, this technique allows
for more gain before feedback, and gives
improved system reliability.
KNOW THESE THINGS:
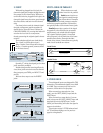
• Never listen to loud
music for prolonged
periods. See the safety
instructions on page 2.
• Never plug amplifier
outputs into anything except speakers.
• Never use guitar cables to connect amplifi-
ers to speakers.
• Before making connections to an amp or
reconfiguring an amp’s routing, turn the
amp’s power off, make the changes and
then turn the power back on.
• When you shut down your equipment, turn
off all the amplifiers first. When powering
up, turn on the amplifiers last. This
prevents power-up and power-down
thumps which can damage speakers.
• Save the shipping box and packing mate-
rial. You may need them someday.


