Mackie TT24 Digital Live Console Quickstart Guide Quickstart Tutorial
21
Route channel 1 to Main output, Group 1, and Aux 1
9. Press and hold the L/R button in the GROUP ASSIGN area (Figure 3-3)
and activate channel 1’s SELECT button.
All the channel SELECT buttons light, indicating that all channels are
routed to the Main output. You should hear your mic in the main speak-
ers via the master fader.
Now, let's route the mic through Group 1 instead of directly to L-R:
10. Press and hold the L/R button in the GROUP ASSIGN area and deacti-
vate channel 1’s SELECT button (so it is
not
lit).
Channel 1 no longer sends signal to L/R.
11. Press and hold the GRP1 button in the GROUP ASSIGN area and acti-
vate channel 1’s SELECT button.
The mic is now routed to Group 1.
12. Press and hold the L/R button in the GROUP ASSIGN area and activate
Group 1’s SELECT button.
Group 1 is now assigned to L/R.
Use the channel, Group, and Master fader to listen to the mic signal in
the L/R speakers.
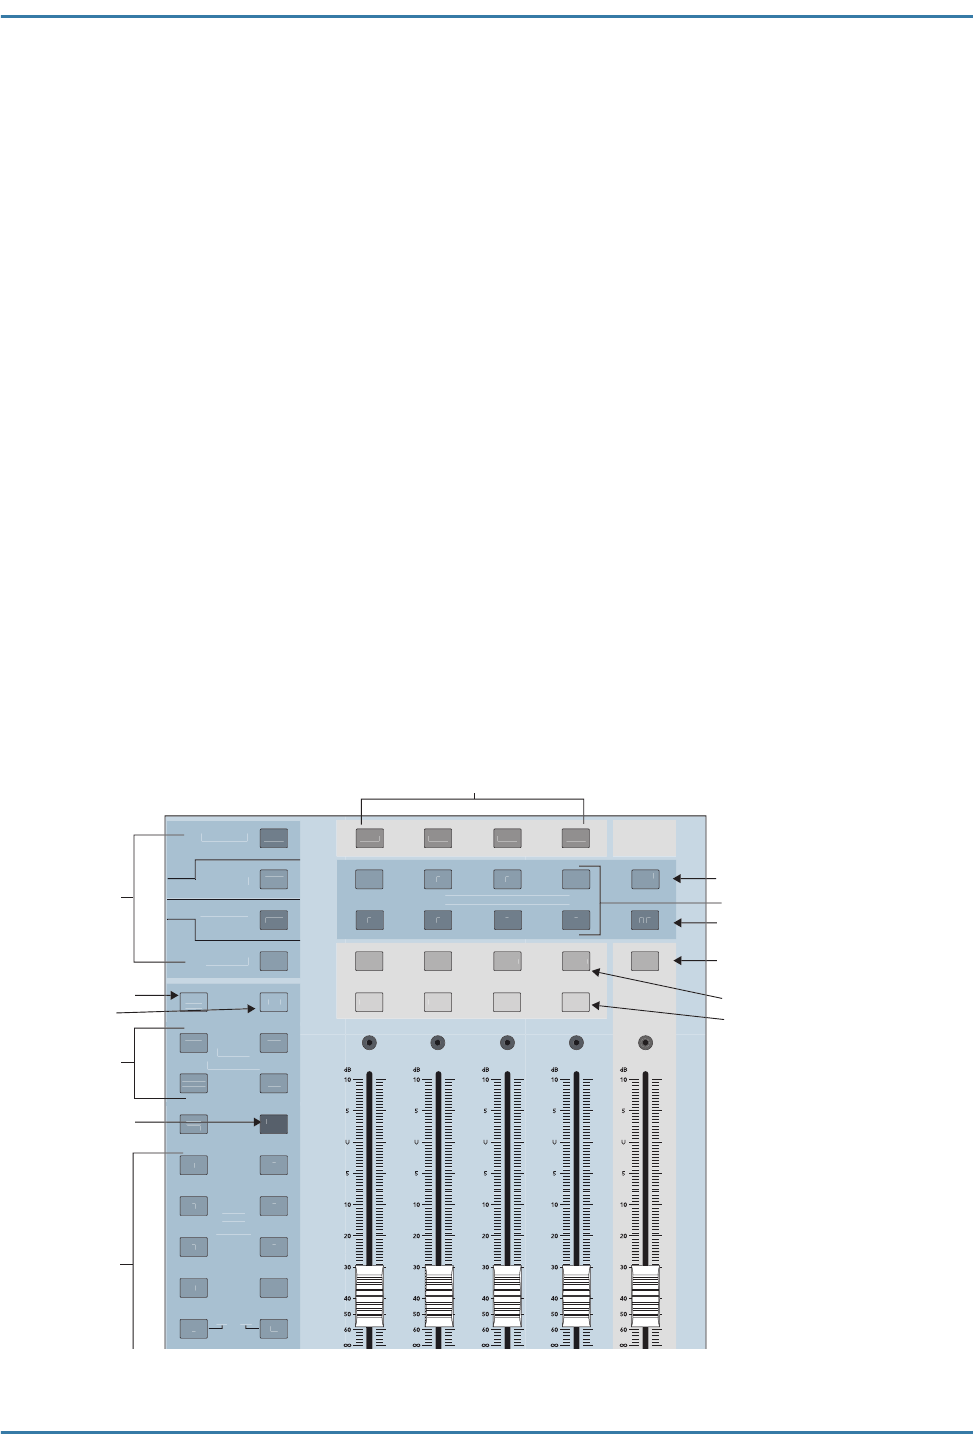
Figure 3-3 Aux, Group, and Master areas
ET
RN
MA
TE
ANAL
DI
ITA
GROUP ASSIGN
SELEC
MA
TE
V-P
NTR
A
END
ANL
M
T
D
T
RTN
M
T
ELE
L
M
T
ELE
T
L
M
T
ELE
L
M
T
ELE
L
CTR
M
N
ELE
A
M
D
1
LEA
L
METER
Group Assign/Select buttons
Master Center/Mono Assign button
Master Left/Right Assign button
Master Select button
Group Select buttons
V-Pot Control
Aux Sends
Bank Select
Clear Solo and
PFL buttons
Group Mute buttons
Group Solo buttons
Aux Mode


