


Various Settings (Function Mode)
Indication Value Explanation
USB Memory Mode
Changing the USB ash drive Setting (USB Memory Mode)
In some cases, when USB ash drive is connected to the USB memory port, it may take longer for data to be loaded, or data may fail to be loaded
successfully. If this occurs, you may be able to solve the problem by changing the USB ash drive setting.
When the unit left the factory, this was set to “Mode 2” Normally, there is no need to make this setting.
MEMO
This setting is automatically saved in the HP507.
Mode 1, Mode 2
Visual Control Mode
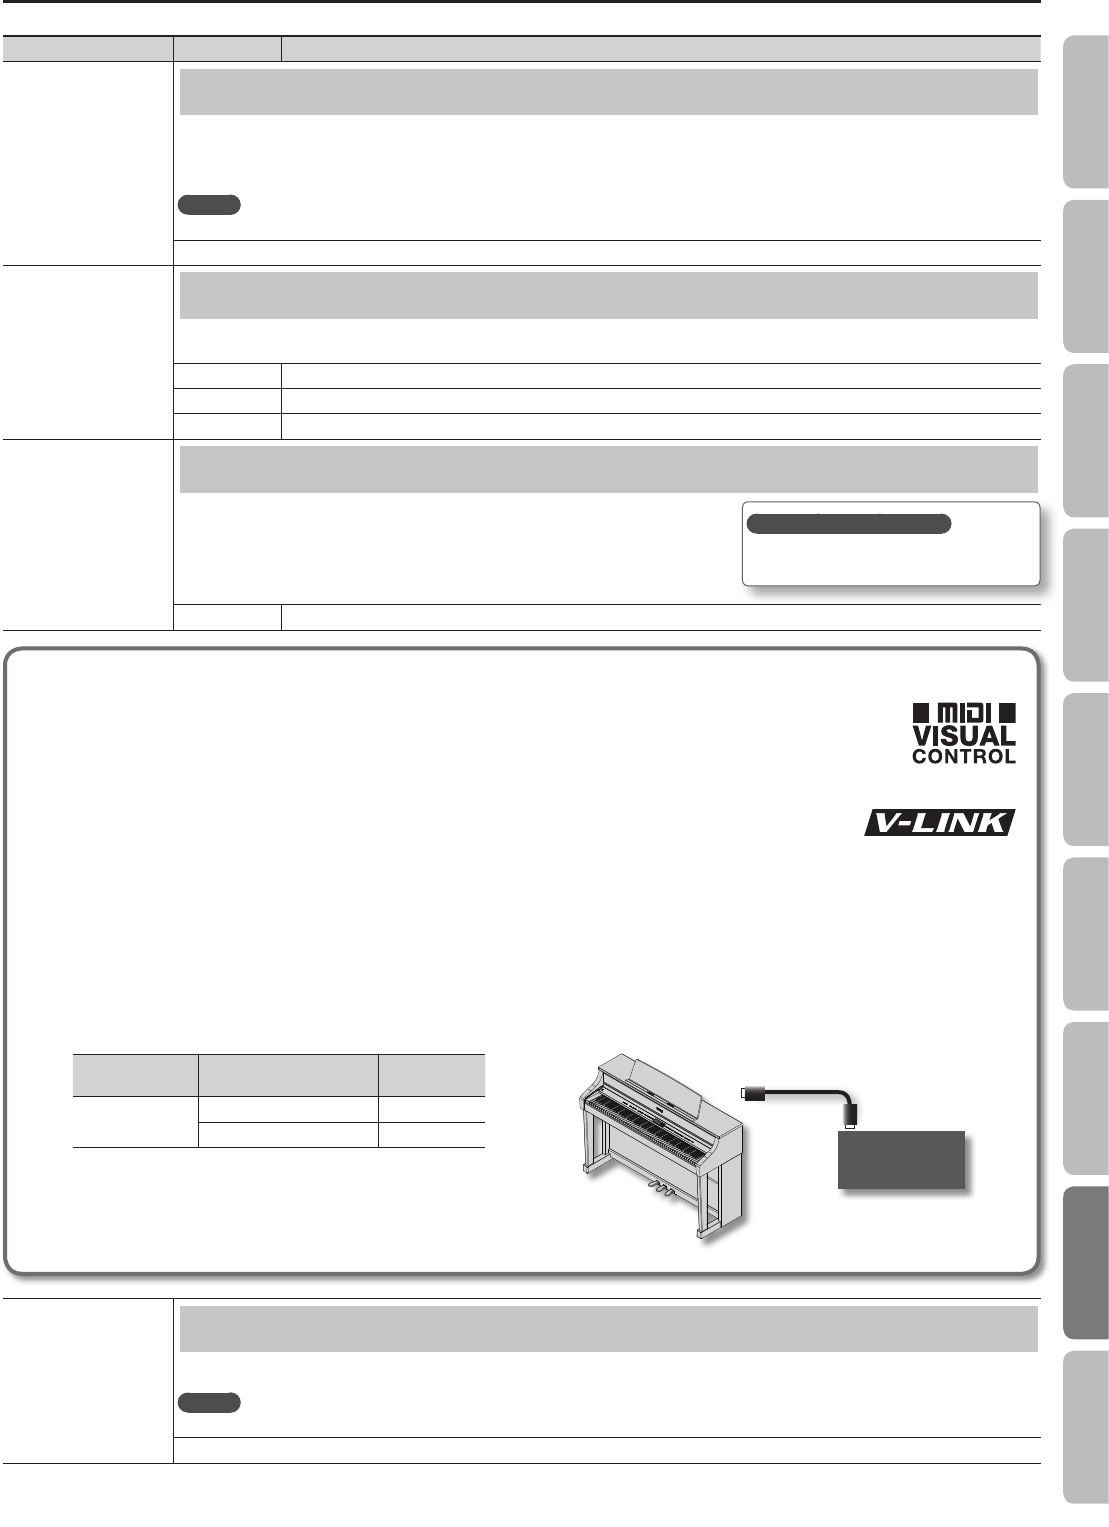
Controlling Video Equipment (Visual Control Mode)
Visual Control is a function that lets you control images along with your performance. If you’ve set Visual Control mode to MVC or V-LINK, playing
the keyboard of HP507 will control the images produced by the Visual Control device connected to HP507 using a MIDI cable.
O Visual Control is o.
MVC MIDI Visual Control mode is selected.
V-LINK V-LINK mode is selected.
Visual Control Channel
Specifying the Visual Control Channel (Visual Control Channel)
Here’s how to specify the channel on which messages used to control video will be sent.
(Visual Control Channel).
1–16 Species the MIDI channel used to transmit MIDI messages to the Visual Control device.
What is MIDI Visual Control?
MIDI Visual Control is an internationally-used recommended practice that was added to the MIDI specication so that visual
expression could be linked with musical performance. Video equipment that is compatible with MIDI Visual Control can be
connected to electronic musical instruments via MIDI in order to control video equipment in tandem with a performance.
What is V-LINK?
V-LINK is Roland’s proprietary specication that allows visual expression to be linked with musical performance.
Video equipment that is compatible with V-LINK can be connected to electronic musical instruments via their MIDI
ports, making it easy to enjoy a variety of visual eects that are linked with the performance.
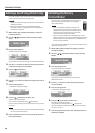
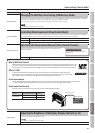
Connection examples
Connect a MIDI cable from this unit’s MIDI Out connector (p. 15) to the MIDI In connector of your Visual Control compatible device.
* You’ll need a MIDI cable (sold separately) in order to connect this unit to a device that supports Visual Control.
Visual control function chart
Playing the lowest 12 keys of this unit (A0–G#1) will transmit the following MIDI messages.
Visual Control
function
Transmitted MIDI message
HP507’s
operation
Switch images
CC 0 (Bank Select): 0–4 Play black keys
Program Change: 1–7 Play white keys
Visual Control
compatible video
equipment
MIDI In connector
MIDI Out connector
Display Contrast
Adjusting the Brightness of the Display (Display Contrast) (p. 44)
You can adjust the brightness of the HP507’s display.
MEMO
This setting is automatically saved in the HP507.
1–10
How to save your settings?
Save your settings as described in “Memory
Backup” (p. 44).
51
Operation Guide Panel Descriptions Before You Play Performing Practicing Piano Designer
Convenient Functions
Appendix
Function Mode