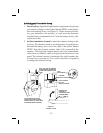
NOTE: If the system is in “lock-out”, ClearScan™ will not function.
7. Make sure the gain setting is muted or turned down on the mixer
or amp channel you will connect the wireless system to.
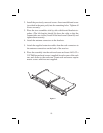
8. Plug the audio cable (not supplied) into the output connector.
NOTE: The 3-pin XLR-type connector output level is fixed, and
cannot be adjusted.
Now refer to details located in the FMR-10 User’s Guide on
how to set up the transmitter.
Once the Transmitter has been set-up, and turned on...
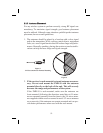
9. Speak or sing loudly into the microphone and observe the Audio
level meter on the receiver. Adjust the gain control on the trans-
mitter to prevent over or under modulation. The gain should be
adjusted so that the signal peaks are no more than -10dB and that
there is at least -20dB or audio level meter indication.
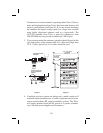
10. “Walk” the expected area of use to check for dropouts or interfer-
ence. To minimize the potential for dropouts or interference,
please observe good antenna placement. When the transmitter is
turned on, the RF meter on the receiver should be illuminated in
the green range to verify it is receiving a strong signal.
11.
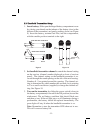
Adjust the squelch control if necessary. The squelch control on
the back of the receiver may be adjusted to effectively increase
range or to reduce interference. The factory setting is at a mid
-
point, which shouldbe suitable formost situations. Toeffectively
increase range, turn the control counter-clockwise until you hear
noise or interference, then, turn the squelch clockwise until the
noise is muted. To reduce interference, turn the control clock
-
wise.
NOTE: Ifthe squelch is being adjusted, the transmitter should be
turned off.
CAUTION! Increasing the range will make the system more
susceptible to outside interference! Reducing interference
will also effectively decrease the range, which will make the
system more susceptible to dropouts.
-6-


