


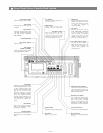


Before connecting other equipment to the Powered mixer,
check the impedance and level of both. If the impedances
and levels do not match, mixing will be very difficult and
the S/N ratio will also be adversely affected.
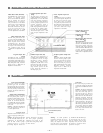
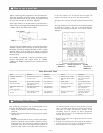
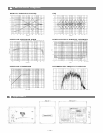
Each input channel of the MCX-106 is provided with a
TRIM control. Thorough understanding of the function of
a TRIM control will make mixing easier.
The function of the TRIM control is to control the negative
feedback volume of the head-amp so that the gain of the
head-amp can also be changed. Because of this, enough
dynamic range, even for high level signals is ensured.
Also, the S/N ratio will be better by decreasing the gain of
the head-amp.
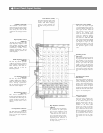
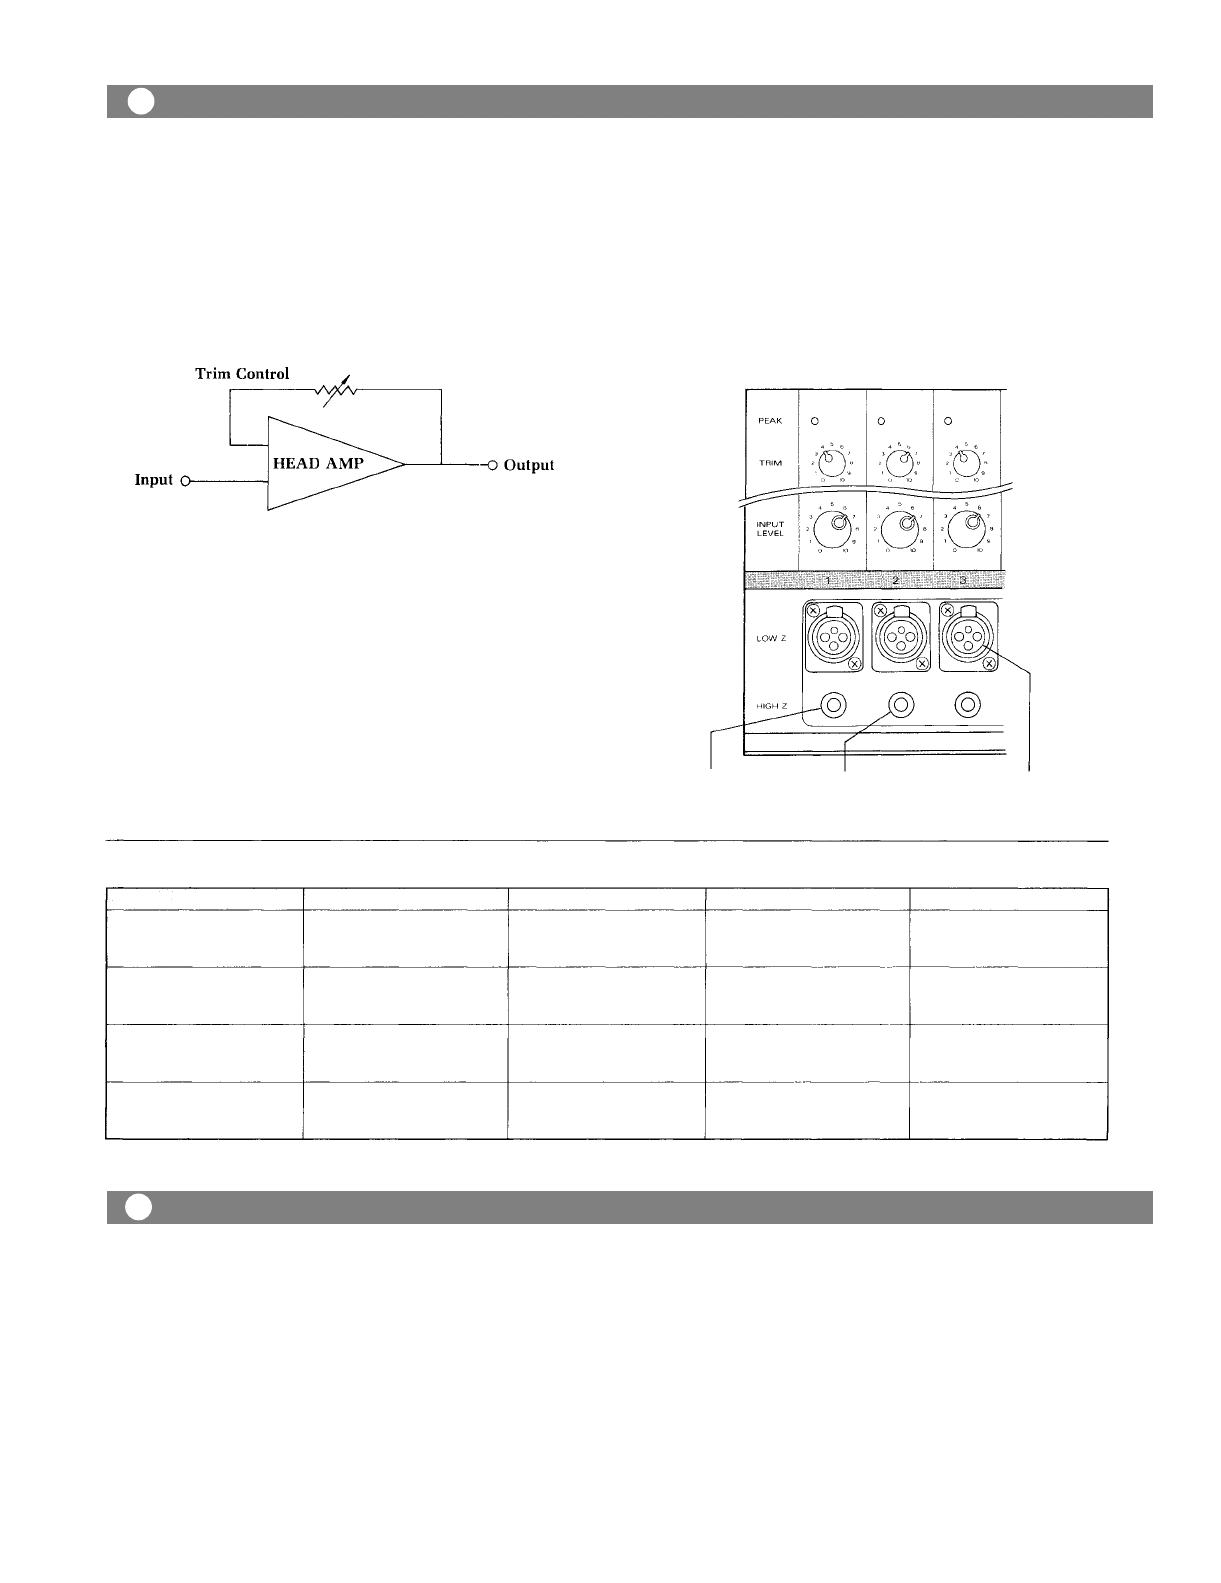
For example, a keyboard, a musical instrument and a
dynamic microphone with output levels of —l0dBm,
-20dBm and -40dBm respectively are connected to the
MCX-106.
If the trim control is set as shown in the left figure, the
input level controls can be set to the same position.
The input level controls are used in general between 6 and
8.
The peak indicator LED illuminates if the head amplifier
or equalizer is clipping. The gain of the head-amplifier
must be decreased by turning the trim control counter-
clockwise.
Key Board in Musical Instrument in Dynamic
—l0dBm level —20dBm level Microphone in
-40dBm level
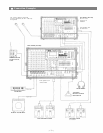
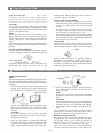
The following procedures are recommended for an
accurate and high-quality recording.
1. Place the level meter selection switch in the "Tape"
position.
2. Engage the noise reduction circuitry by pressing the
dbx switch.
NOTE:
Using the internal dbx circuitry will provide higher
quality recordings with excellent "signal-to-noise"
characteristics. You will notice a drastic reduction
in audible "tape hiss" and a significant increase in
dynamic range. However, the dbx noise reduction is
an "encode/decode" process, meaning that any tape
that is recorded with dbx must also be played back
with dbx, to obtain satisfactory results. If the
recording must be played on other equipment
without dbx circuitry, we recommend that the dbx
feature not be used.
3. Press the record button to place the deck in "record
pause" mode.
4. Adjust the L and R master recording level sliders to
a level just below the "red" in the bargraph meters.
5. Press PLAY button to begin recording.
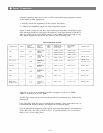
Fault
Excessive current due to
overloads.
Short circuits
(less than 0.4-ohm)
Temperature rise of heat
sink
(more than 105°C)
DC drift
Protection
Current limiter activates at
less than 1 ohm.
Current limiter activates,
input signal is lowered,
unit shuts down.
Input signal is lowered.
Unit shuts down.
Input signal is lowered.
Unit shuts down.
Indication
Compressor
LED illuminates.
Amp protection
LED illuminates.
Amp protection
LED illuminates.
Amp protection
LED illuminates.
Action
Remove excessive lords.
Minimum speaker loads 2-
ohm.
Check speaker
lines/systems for shorts.
Check for adequate
ventilation.
Refer to qualified service
personnel.
Restoration
Automatic restoration
after normal loads are
obtained.
Turn off power switch.
Turn on into operational
loads.
Automatic restoration
after temperature
lowers (to 75° - 95°C)
Automatic restoration
after normal bias is
regained.
Fault Protection Table
— 9 —
How to get a good mix
Recording Level Setting