


This can cause an artifact which has become a creative effect occasionally (incorrectly)
referred to as the “Cher Effect.”
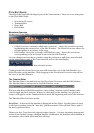
Ratio: Here, you determine how strongly to apply the correction. Ratio defines how tight
the correction should be, over then entire timeline of the correction. The default of 100%
will maintain the speed and note transition values as they are in the original track. Lower
values will morph the correction curve towards the detected pitch curve and a ratio of 0%
will effectively bypass the correction. Think of it as a “More Correction/Less Correction”
control.
Once you have manipulated all of the above controls to your liking, your song should be
in good shape. In fact, you may be finished with the job. However, there likely remain
some problem areas of the track which need more attention. For surgical fine-tuning and
detailed vibrato corrections, Tune offers a complete set of tools to control each nuance of
the pitch curve.
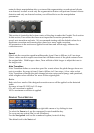
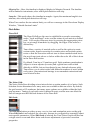
Part 4: Surgical Graphic Curve Editing
One size doesn’t always fit all, so Tune allows you to make meticulous local modifications
to all parameters. Select a note or a segment and modify the curve to meet your needs.
Tune remembers the parameters applied to each segment.
The best tools for perfecting your track are your ears and your experience with sound.
Since Tune synchronizes perfectly with the host timeline, you can play all the elements of
your mix while making adjustments to the pitch correction. You can play or loop the
smallest of sections and make adjustments in real time. It’s no harder than adjusting an
EQ.
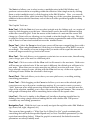
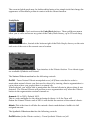
First, identify a section which requires further work and define a loop around that area.
You can create the loop in the host application, or you can define a loop within the Tune
plug-in. Most will find it easier to set-up the loop within Tune, thus avoiding leaving and
re-entering the plug-in. Dragging the cursor over Tune’s Timeline ruler will define a loop
playback section. Pressing Play will start a looped playback. While your loop is playing,
the default Note tool allows you to select specific notes which require further correction.
Zoom in on the suspect notes by holding the Command (Apple Mac) or Control
(Windows PC) while dragging around the suspect area.
By zooming in closely, you should be able to locate the offensive event and start
correcting it. Only selected segments will be affected by your adjustments, leaving the
rest of the curve unaltered. This includes Segmentation as well as Correction parameters.
Certain manipulations with the graphic editing tools (such as the Glue or Slice tools) will
alter your selection in a logical manner. Until you get used to this, pay attention to the
resulting selections.
Let’s say that you identify an incorrect note. The singer got out of key enough so that
Tune assumed the singer sang the next semitone, but actually should have gone to the full
tone. Here, the first step would be to grab the note and drag it to the correct target note.
Similarly, imagine the singer tried, unsuccessfully, to sing the same note twice. If Tune
interpreted the second of the notes to be a different pitch, you can click on the note before
the “stray “ with the Glue tool to merge them into one note segment, thus eliminating
the note transition between them.