


PSR-2100/1100
16
Setting Up the PSR-2100/1100
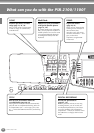
1
Make sure that the PSR-2100/1100’s STANDBY/ON
switch is at the STANDBY (off) position.
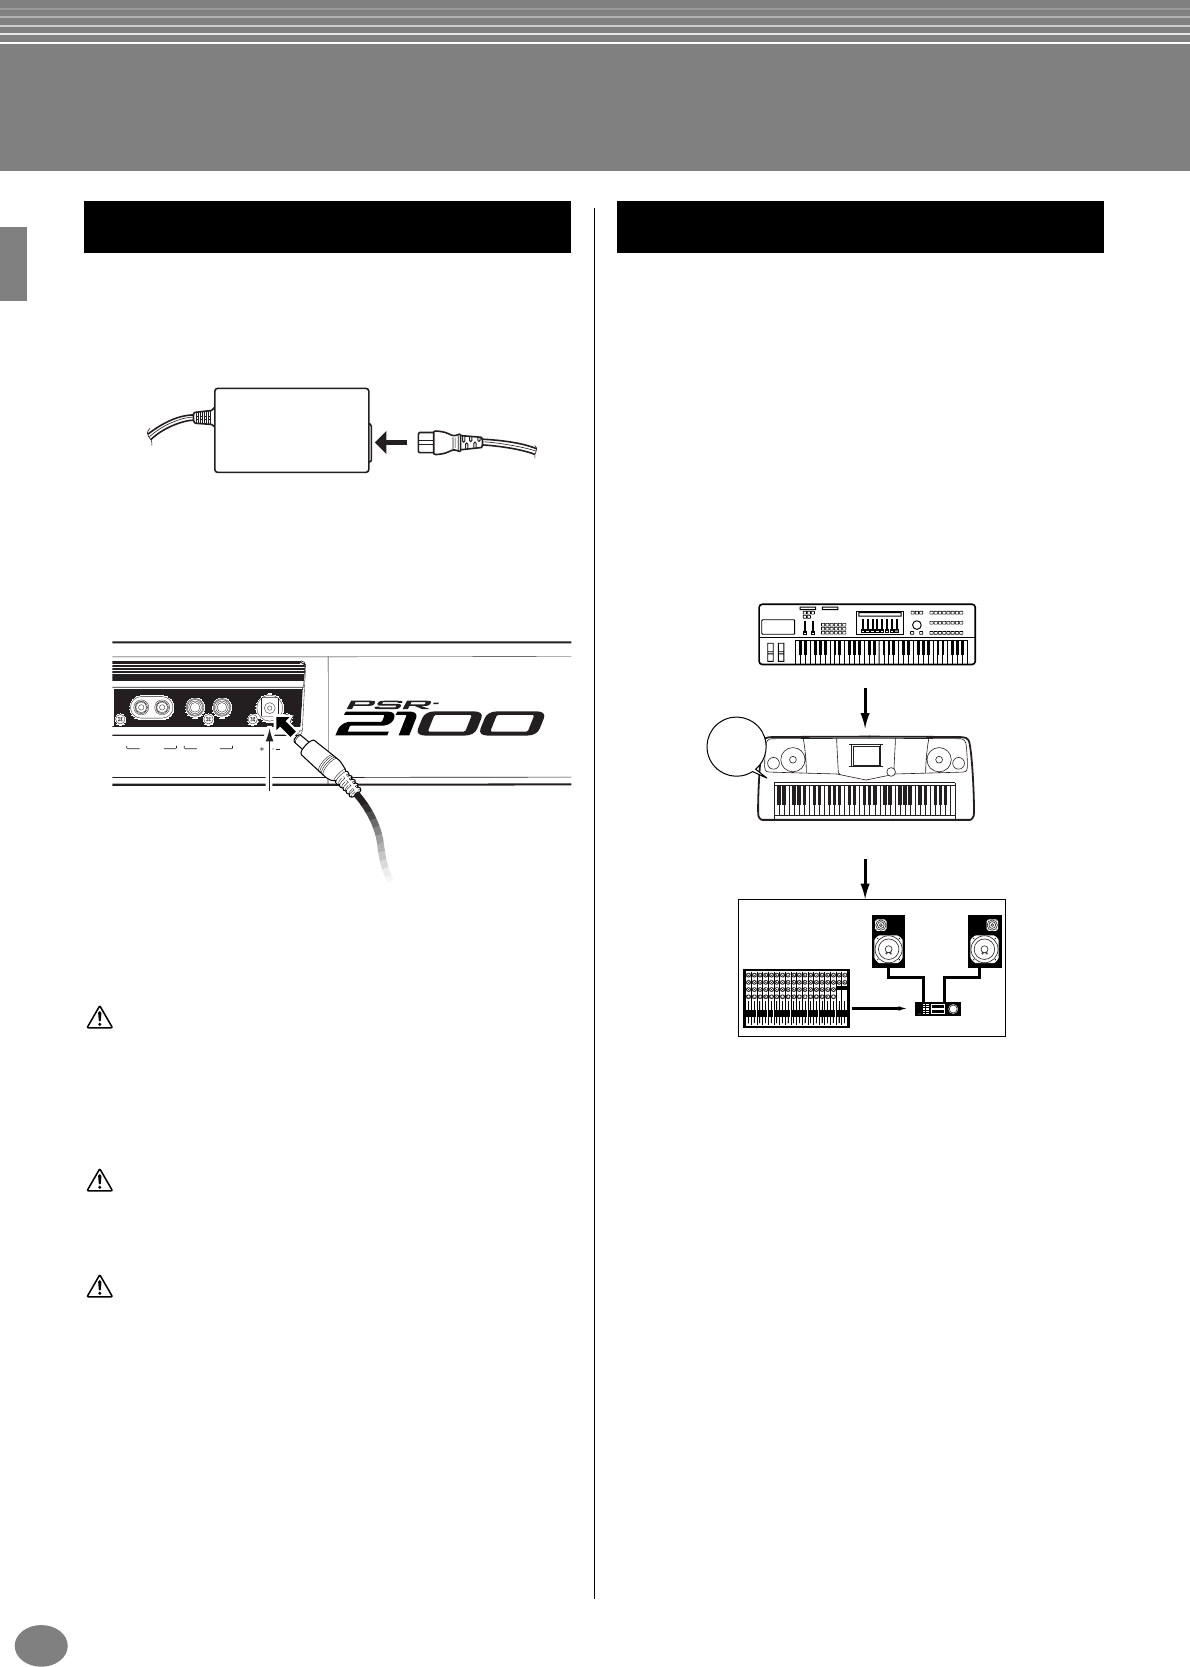
2
Connect one end of the AC cable to the PA-300.
3
Connect the PA-300’s DC plug to the PSR-2100/
1100’s DC IN terminal on the instrument’s rear
panel.
4
Connect the other end (normal AC plug) to the
nearest electrical outlet.
WARNING
Do not attempt to use an AC adaptor other than the Yamaha PA-
300 or an equivalent recommended by Yamaha. The use of an
incompatible adaptor may cause irreparable damage to the PSR-
2100/1100, and may even pose a serious shock hazard! ALWAYS
UNPLUG THE AC ADAPTOR FROM THE AC POWER OUTLET
WHEN THE PSR-2100/1100 IS NOT IN USE.
CAUTION
Never interrupt the power supply (e.g. unplug the AC adaptor)
during any PSR-2100/1100 record operation! Doing so can result
in a loss of data.
CAUTION
Even when the switch is in the “STANDBY” position, electricity
is still flowing to the instrument at a minimum level. When not
using the PSR-2100/1100 for an extended period of time, be sure
to unplug the AC power adaptor from the wall AC outlet.
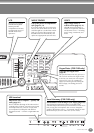
When you have made all the necessary connections
(page 155) between your PSR-2100/1100 and any other
devices, make sure that all volume settings are turned
down all the way to zero. Then turn on every device in
your setup in the order of MIDI masters (senders), MIDI
slaves (receivers), then the audio equipment (mixers,
amplifiers, speakers, etc.). This ensures smooth MIDI
operation and prevents speaker damage.
When powering down the setup, first turn down the
volume for each audio device, then switch off each
device in the reverse order (first audio devices, then
MIDI).
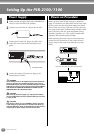
Power Supply
DC IN 16V
LRRL/L+R
AUX OUT
(LEVEL FIXED)
OUTPUT
DC IN
To electrical outlet
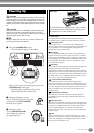
Power-on Procedure
MIDI master (transmitting device)
Audio equipment (first mixer, then amplifier)
12345678910111213141516LR
PSR-2100/1100 as MIDI slave (MIDI receiving device)
POWER
ON!!