


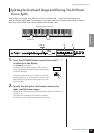
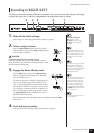


Recording Your Performance
P-140 Owner’s Manual
ENGLISH
29
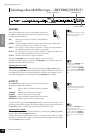
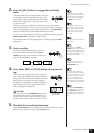
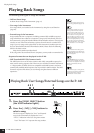
2. Press the [REC] button to engage Record Ready
mode.
This automatically selects an empty number (U01-U03)
for recording and makes the RIGHT part active. If all
song numbers contain recorded data, Song U01 will be
selected. This simply enables recording; to start record-
ing, go on to step 3.
The amount of memory available for recording is shown on the display in
approximate kilobytes. You can record up to a maximum of about 11,000 notes
on the P-140 depending on pedal usage and other factors. The [PLAY/PAUSE]
indicator will flash at the current METRONOME tempo setting.
You can turn on the metronome in this step, and adjust the tempo by using the
[TEMPO/FUNCTION –, +] buttons. (Range: 32-280)
Record Ready mode can be disengaged before recording by pressing the
[REC]
button again.
3. Start recording.
Recording will begin automatically as soon as you
play a note on the keyboard or press the [PLAY/
PAUSE]
button. The current measure’s number will
appear on the display while recording.
4. Press either [REC] or [STOP] button to stop record-
ing.
When recording is stopped, dashes appear in the dis-
play in succession to indicate that the recorded data is
being saved to the instrument automatically. After the
data is saved, the song name (U01-U03) appears in
the display. The recorded part’s indicator will light in
green to indicate that it now contains data. (Record
mode is disengaged automatically.)
CAUTION
Never attempt to turn the [STANDBY/ON] switch OFF
while flashing dashes appear in the display (these indi-
cate data is being written to internal memory). Turning
the power off in this state results in loss of all user data.
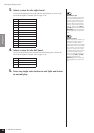
5. Play back the recorded performance.
Press the [PLAY/PAUSE] button to play back the recorded performance. To stop
playback in the middle of a song, press the [STOP] button.
If you have selected the LEFT
part previously in the same song,
the LEFT part will automatically
be made active when pressing
the [REC] button in step 2.
If the metronome was on when
you started recording, you’ll be
able to keep time with the metro-
nome while recording, but the
metronome sound will not be
recorded.
For more recording information,
see page 32.
The function of the [PLAY/
PAUSE] button can be assigned
to the AUX pedal (pages 37, 43).
This allows you to start recording
by pressing the Footswitch con-
nected to the AUX jack.
Song recording can not be
paused, even by pressing the
[PLAY/PAUSE] button.
The record part indicator will
begin to flash when the recorder
memory is almost full. If the mem-
ory becomes full during record-
ing, “Fu£” will appear on the
display and recording will stop
automatically. (All recorded data
up to that point will be retained.)
Pressing the [PLAY/PAUSE] but-
ton to start recording, then press-
ing the [STOP] button to stop
recording will erase all previously
recorded data on the selected
part.
NOTE
NOTE
NOTE
NOTE
NOTE
NOTE
NOTE
The song name
(U01 to U03)