E-30
733A-E-032A
Changing the Parameters of a Channel
Use the following procedure to change the parameters of each indi-
vidual channel.
PREPARATION
• Turn off the Synthesizer, Song Sequencer, or Pattern Sequencer if any
of them are turned on.
To change channel parameters
1.
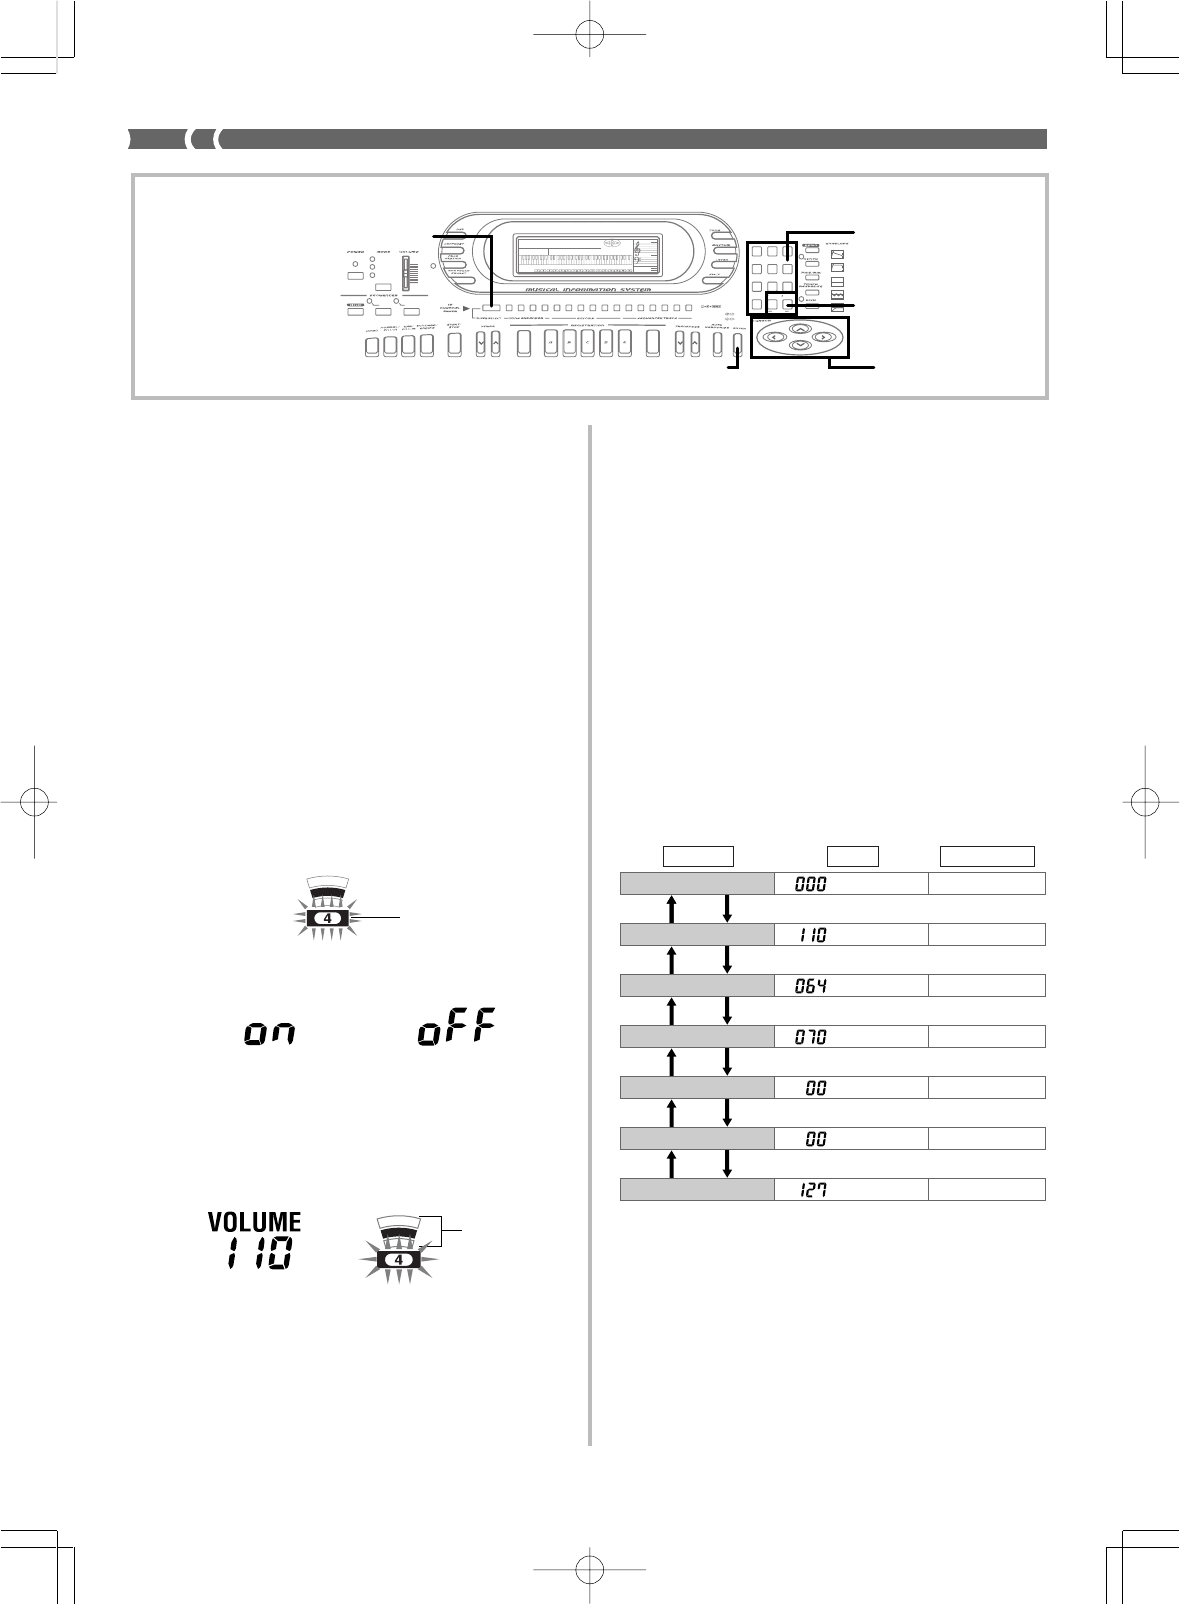
Press the MIXER SELECT button to select the Mixer
mode you want to use.
• Select the internal mode to make layer, split, Auto Accompa-
niment, or Song Sequencer settings.
• Select the External Mode to make MIDI settings.
• You can also make settings using the External/Solo or Exter-
nal/Play Modes, but we recommend using the External
Mode.
2.
Use the [̇] and [̈] cursor keys to select the channel
whose parameters you want to change.
• See page E-28 for details on layer, split, Auto Accompani-
ment, and Song Sequencer channel assignments.
• The frame around the currently selected channel (the cur-
rent channel) flashes, to indicate that it is selected.
• The on/off status of the current channel is indicated in the
measure number area of the display (item 11 on page E-10).
On .........
Off .........
3.
Change the current channel’s tone and volume pa-
rameters while a channel number frame is flashing, if
you want.
• Use the number keys or [+] and [–] keys to change the tone.
• Use [̆] and [̄] to change the volume. The current volume
setting is shown as a value in the metronome area of the dis-
play (item 15 on page E-10), and by the level indicator.
3-segment level
indicator shows
volume level of
each channel.
and
5.
After making additional settings in step 4, press the
ENTER button.
• If you do not perform any operation for about five seconds
while a channel number frame is flashing, the display re-
turns to that in step 1 of the above procedure automatically.
❚
NOTES
❚
• Internal Mode and External Mode settings you make with the above
procedure are stored separately.
• You can change the parameters of a channel regardless of whether the
channel is on or off.
• Changing a Mixer internal mode channel setting causes the MIDI mes-
sage that corresponds to the change to be output through the MIDI OUT
terminal.
To make additional channel parameter settings
When making channel parameter settings, press the ENTER button
to display the first additional channel parameter screen.
Use the [̆] and [̄] cursor keys to scroll through the setting screens
shown below.
While any setting screen is on the display, use the number keys or [+]
and [–] to change the parameter to the value you want.
4.
To make additional settings for the current channel,
press the ENTER button while a channel number frame
is flashing.
• See “To make additional channel parameter settings” for
details on making additional channel parameters.
000
–
–
▲
▼
▲
▼
▲
▼
▲
▼
▲
▼
▲
▼
Parameter Screen Setting Range
Program Change Number
Volume
Pan
Effect
Send
Fine Tune
Coarse Tune
Expression
See the following section titled “Additional Channel Mode Parame-
ters” on page E-31 for details on what each of these parameters con-
trols.
❚
NOTES
❚
• The first screen is normally the pan screen. If you used the additional
channel parameter screens since turning on power, the last setting you
used appears first.
• You can use the [̇] and [̈] cursor keys to change the current channel
while an additional channel parameter screen is on the display.
• Channel 10 is reserved for drum sounds, so only tone number 192 to
199 can be selected.
Channel number frame
AMPENVELOPE
00 FLAT
01-17 VIBRATO
18-45 OTHERS
DECAY
SUSTAIN
PITCHENVELOPE
MIN
MAX
FULL RANGE
CHORD
CASIO CHORD
SONG
FINGERED
PATTERN
EXTERNAL
INTERNAL
UPPER1
CH 1
UPPER2
CH 2
LOWER1
CH 3
LOWER2
STOREBANK
CH 4
ACC VOL.
CH 5
CHORD1
CH 6
CHORD2
CH 7
CHORD3
CH 8
BASS
CH 9
RHYTHM
CH 10
TR1
CH 11
TR2
CH 12
TR3
CH 13
TR4
CH 14
TR5
CH 15
TR6
CH 16
789
456
1
0
23
PARAMETER RESET:
DELETE
/YESS/NO
MAIN MANU/
CHANNEL VOLUME:
SUB MANU/
CHANNEL SELECT:
–]
WK-1800/1600(E)-28~31 03.7.31, 5:21 PMPage 30 Adobe PageMaker 6.5J/PPC


