


-8-
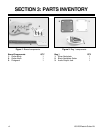
H3123 Electric Guitar Kit
The majority of the wooden components in this kit
are fully machined from the factory and are ready
for assembly. A small amount of drilling, sanding
and light machining will need to be performed to
complete the guitar.
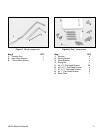
Recommended Tools & Supplies:
—Phillips Screwdriver
—Needle-Nose Pliers
—Electric Drill
—Drill Bit Set
—Soldering Iron & Solder
—#180, #240, and #320 Aluminum-Oxide
Sanding Paper
—Sanding Block
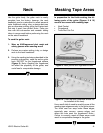
—Masking Tape
—Painting/Finishing Supplies
—Coat Hanger
—C-Clamp
—5MM Allen Wrench (Supplied)
—1.5MM Allen Wrench (Supplied)
—Tack Cloth
—Coping, Jig, or Scroll Saw (Optional)
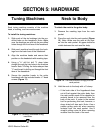
The guitar body has been machined and rough
sanded at the factory; however, no finish has
been applied.
To sand the guitar body:
1. Wear an ANSI-approved dust mask and
safety glasses when sanding wood!
2. Using either an electric palm sander or a
sanding block, sand the guitar body
(EXCEPT the guitar neck notch and other
recessed areas) with #180 grit aluminum-
oxide sanding paper until there is a consis-
tent scratch pattern on the entire surface.
3. Sand the guitar body with a #240 grit sand-
ing paper until there is a consistent scratch
pattern on the entire surface.
4. Sand the guitar body with a #320 grit sand-
ing paper until there is a consistent scratch
pattern on the entire surface.
5. Wipe the guitar body with a damp cloth.
Wiping the workpiece with a damp cloth
before the final sanding helps to “raise” the
wood grain; thus, allowing the “raised” grain
to be sanded smooth.
6. Once the guitar body is dry, repeat step 4.
7. Wipe the guitar body with a tack cloth to
remove all remaining sanding dust.
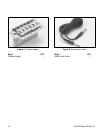
Guitar BodySupplies/Tools
SECTION 4: SANDING/FINISHING