22
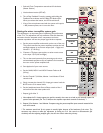
e. Re-adjust the channel gain control so that when the channel fader is at 0 (full up)‚ the level from the mic is
loud or until a ringing sound is heard on the end of words. Decrease the gain until ringing is no longer heard.
f. Adjust the compressor threshold, if desired, so that the red CMP LED lights only during loud speech. It
should NOT light at normal speech levels. This feature will help control the volume of loud speech.
g. If this mic needs to be included in the Monitor 1 speaker mix, adjust the Monitor 1 send control for
necessary volume through those speakers.
h. If this mic needs to be included in the monitor 2 speaker mix, adjust the Monitor 2 send control for
necessary volume through those speakers.
i. MUTE the channel and repeat steps b–h for the remaining automix channels 2–4.
The mic channels have now all been set.
Setting the stereo line inputs
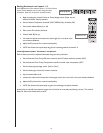
a. While playing a tape, CD or other line source, adjust the channel “GAIN” control for appropriate level
with the fader set to 0.
b. Set the channel selector switch to the Stereo position for stereo program sources.
c. Set the monitor blend control to the mid position.
d. Adjust monitor sends as needed.
Note: When split track sources are played (recordings with vocals recorded on one track and accompaniment
on the other), the input selector switch selects which track goes through the main sound system. While the
Monitor Source control is normally left in the center position, for split tracks this control can be used to blend
some of the recorded vocals with the accompaniment to aid the singers.
Wrapping it up
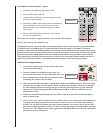
Having spent the time adjusting the S-14 and optimizing its controls, it is a good time to make note of the settings
so that they can be returned to their current positions. Important controls such as Automix gain, EQ and monitor
send levels can be marked on the front surface using stick-on arrows like those available from Peavey. It is also a
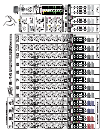
good idea to make a copy of the mixer front panel as found on pages 27–28 and mark the knob settings on the
copy. Make a copy with the settings marked to keep at the mix console and keep the original somewhere safe.
Although the following controls can be roughly set in advance, the remaining Controls are best set adjusted while
the system is in use so they are included in the operation section.
Group Noise Reduction · Group Compression · Reverb · Vocal Enhancement · Ambience Mic (if used)
Operation Instructions
NOTE: You may want to copy this section and place it at the mix console for operator reference. You may also
want to copy the Final setup and Adjustment section.
The most important thing to remember is that a sound system that is well setup and operated will be completely
transparent to the listeners. If they never think about the sound system, then you have achieved your goal. Operation
and adjustments made on the S-14 should be made in a slow deliberate fashion so they do not attract attention.
Operation mistakes will be made‚ however, they can be hidden. Fading up a mic late may be less noticeable than
turning it on mid word. The S-14 can be used without an operator by presetting the controls and letting it do the
work. However, no mater how sophisticated the mixer system, a good operator can make it sound better. In many
cases‚ once the mixer is setup and adjusted, much of the work is simply un-muting, and muting microphone
channels when needed.
If someone is going to be operating the mixer during the service, their first job will likely be muting and un-muting
wireless mics. This may be obvious, but make sure the channel is on before the person starts speaking, and be sure


