


15
En
English
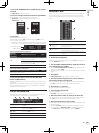
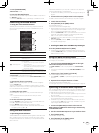
1 Press [LIVE SAMPLER (UTILITY, WAKE UP)] for at least
1 seconds.
The [USER SETUP] screen is displayed.
2 Press the settings item button and select [QUANTIZE].
The QUANTIZE function’s setting screen is displayed.
! [QUANTIZE] is added to the settings item button on the
[USER SET UP] screen.
3 Press [ON].
The QUANTIZE function turns on.
The QUANTIZE indicator ([QTZ]) and GRID indicator ([GRID]) on the
main unit display light or flash.
! Depending on the status of the DJ player (off air, scratching, reverse
playing, etc.), it may not be possible to receive the GRID information.
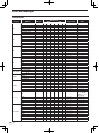
QUANTIZE indicator
GRID indicator
About the QUANTIZE indicator’s lighting status
[USER SET
UP] screen >
[QUANTIZE]
QUANTIZE function status [QTZ]
[ON]
QUANTIZE function activated (effects
synchronized to track’s tempo).
Lit
QUANTIZE function not activated (effects
not synchronized to track’s tempo, or BPM
measurement mode set to TAP).
Flashes
[OFF] Off
About the GRID indicator’s lighting status
Status of reception of grid information from DJ player [GRID]
GRID information being received. Lit
GRID information not being received. Off
4 Press the beat button, then press the [ON/ OFF]
button of [BEAT EFFECT].
The effect is added to the sound on beat with the tempo of the currently
playing track.
The beat positions and BPMs of tracks being played on Pioneer DJ play-
ers supporting the beat sync function (e.g. CDJ-2000nexus, CDJ-2000,
CDJ-900) can be synchronized.
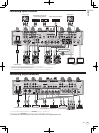
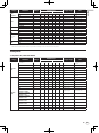
STATUS INFORMATION
The display of the status of DJ players connected to the different chan-
nels and the beat sync information is concentrated here.
1 2 3 4 5
1
FS
Indicates channels for which the fader start function
is enabled.
2
LINK
Indicates channels for which DJ players are properly
connected to the [LINK] terminal.
3
SYNC
Indicates the sync function status of the DJ player con-
nected to the [LINK] terminal.
4
MASTER
Indicates the current beat sync master.
5
MASTER BPM
Indicates the current master BPM.
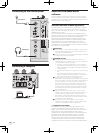
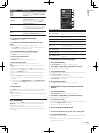
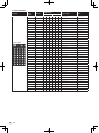
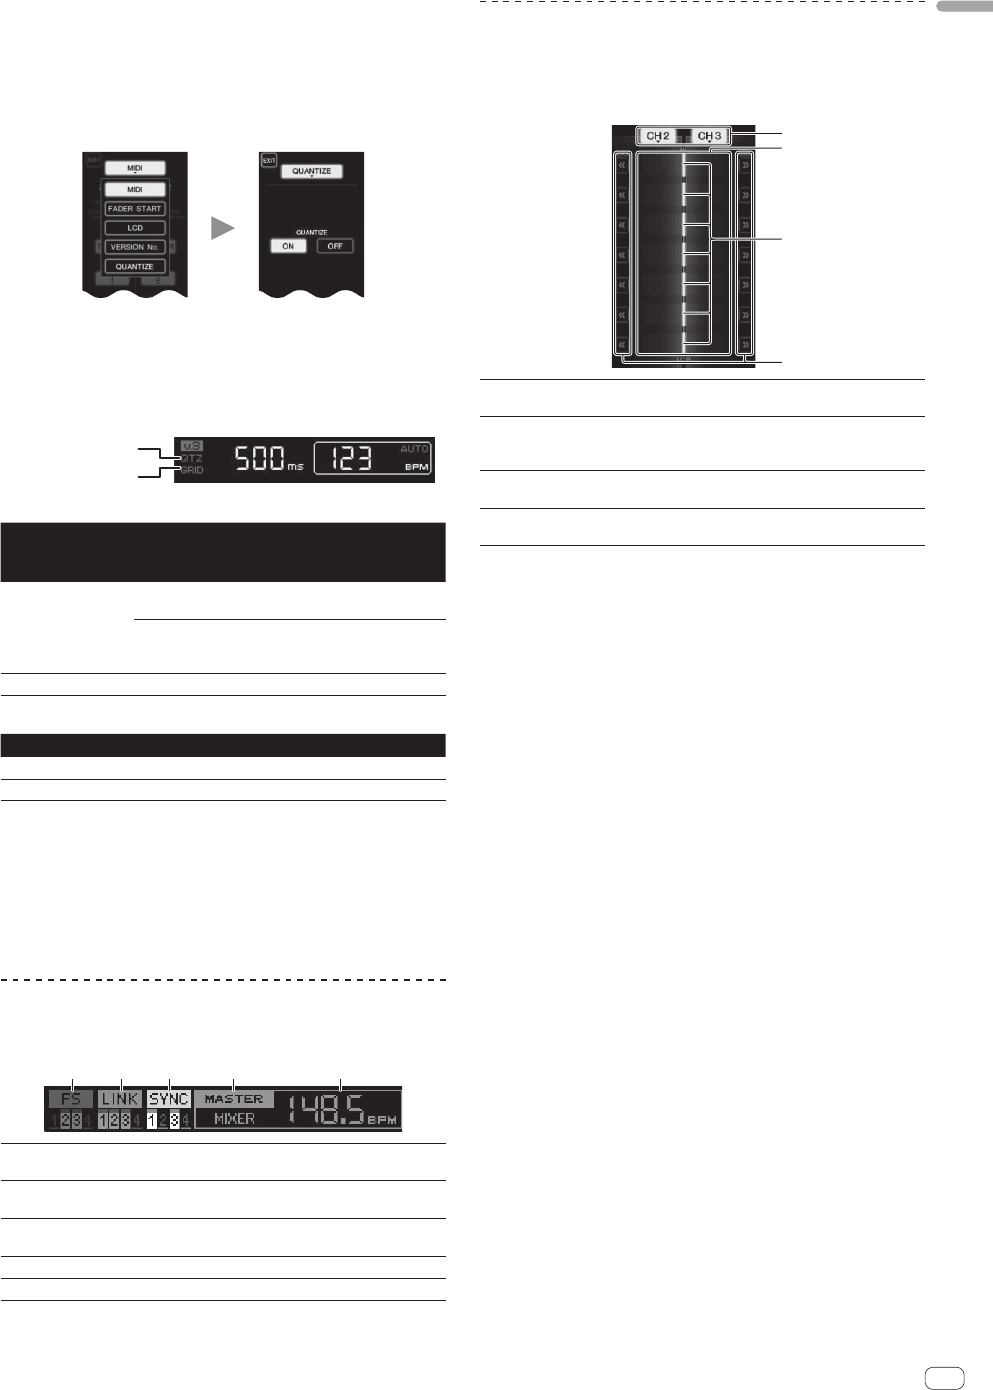
FREQUENCY MIX
The currently playing sound is divided into seven frequency bands that
are displayed graphically. Fader control on the touch panel makes it
easier to grasp the details and mix two channels or swap instruments
(parts).
3
4
1
2
1
Channel assign
buttons
These select the channels to be mixed.
2
Volume level
display
The input volume level to this function is displayed in a
light color, the output volume level from this function is
displayed in a dark color.
3
Touch fader
These adjust the volume balance of the channels to be
mixed for the separate frequency bands.
4
<< >>
These move the touch fader immediately to the left or
right edge.
To mix [CH2] and [CH3]:
Prepare this unit in advance so that the sound of [CH3] is being output
from the [MASTER] terminals.
1 Set the [CROSS FADER ASSIGN (A, THRU, B)] switches
for [CH2] and [CH 3] to [THRU].
! Set the [CROSS FADER ASSIGN (A, THRU, B)] switches of the chan-
nels to be mixed to [THRU].
! When using the crossfader, it is recommended to set it to the center
position.
2 Press [MIX].
The [FREQUENCY MIX] screen appears on the touch panel.
3 Press the channel assign buttons to select [CH2] for
the left side, [CH3] for the right side.
The volume levels for the individual frequency bands of the sound play-
ing in [CH3] are displayed on the right half of the touch panel.
4 Press all the [ >> ] buttons.
All the touch faders move to the right edge.
5 Press the [ON/ OFF] button.
This turns the effect on.
The [ON/ OFF] button flashes when the effect is on.
6 Move the channel fader for [CH2] to the back side.
The volume levels for the individual frequency bands of the sound play-
ing in [CH2] are displayed on the left half of the touch panel.
7 Move the touch fader to the left side.
The sound of the frequency bands whose crossfaders have been moved
is mixed and output.
! When the [ON/ OFF] button is pressed again, the effect turns off.
! To switch from the [FREQUENCY MIX] to the REMIX function, first
press [ON/OFF] to turn the effect off, then press [REMIX].