


17
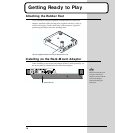
Getting Ready to Play
Quick Start
5
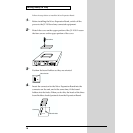
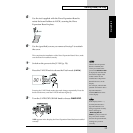
Use the tool supplied with the Wave Expansion Board to
rotate the board holders to LOCK, securing the Wave
Expansion Board in place.
fig.1-03d.e
6
Use the (specified) screws you removed in step 2 to reattach
the cover.
This completes the installation of the Wave Expansion Board. Next, make
sure the board is installed correctly.
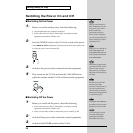
1
Switch on the power to the JV-1010 (p. 20).
2
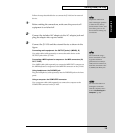
Press the VALUE knob to choose the Patch mode (PATCH).
fig.1-04
Pressing the VALUE knob makes the mode change sequentially. Press the
knob several times, until the PATCH indicator lights up.
3
Turn the CATEGORY/BANK knob to choose WAVE-EXP.
fig.1-05
If 001 appears in the display, the Wave Expansion Board has been installed
correctly.
LOCK
When a Wave Expansion
Board is installed, then
when you switch on the
power first roland Jv-1010
is displayed, and after that
the final two digits of the
model number for the
installed Wave Expansion
Board flash twice on the
display.
For example, when the SR-
J
V80-02 “Orchestral” Wave
Expansion Board is
installed, 02 flashes twice
on the display.
If the display shows - - -,
it’s likely that the Wave
Expansion Board is not
b
eing recognized correctly.
Follow the steps in
“Switching Off the
Power” (p. 20) to switch off
the power, then reinstall
the Wave Expansion Board,
making sure you do it
correctly.