


119
Chapter 7 Creating and Editing Songs
Chapter 7
2.
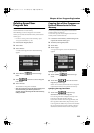
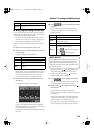
In the Rec Mode screen (p. 117), select <Loop>.
Press the [Exit] button to return to the menu screen.
The recording method changes to loop recording.
3.
Press the [ (Rec)] button.
4.
Press the Track button for the track to be recorded.
The KR is put in recording standby.
5.
Press the [ (Play/Stop)] button to begin
recording.
Recording starts from Marker A.
When the song reaches Marker B, it then returns to
Marker A, where recording continues.
Each time the recording is looped, the newest sounds are
layered over previously recorded sounds.
6.
When you press the [ (Play/Stop)] button,
recording stops.
* After you have finished with loop recording, return to the
usual replace recording mode (p. 117).
■
Re-Recording Part of Your
Performance (Punch-in Recording)
You can re-record part of a passage as you listen to a
recorded performance. This recording method is called
“Punch-in Recording.” This convenient function lets you
record over a specified points in a part as you listen to a
prerecorded performance in another section.
User Punch-In Recording by the following two methods:
Recording the Region Defined by Markers A and B
(Auto Punch-In/Out)
Before you start recording, place markers A and B to
define the passage you want to re-record. Make the
setting for punch-in recording, and re-record just the
passage between markers A and B.
Recording From the Point at Which the Pedal or
Buttons Are Pressed (Manual Punch-In/Out)
You can play back a performance and depress the pedal
at the desired place to start re-recording. Depressing the
pedal a second time cancels recording and returns you to
playback.
Instead of pressing the pedal, you can press a
performance pad or the[ (Rec)] button to start and
cancel recording.
What is Blank Recording?
Blank Recording is recording a number of silent
measures with no content.
1. Set the basic tempo and beat of the song.
2. Hold down the [ (Rec)] button and press the
[ (Play/Stop)] button.
The indicators for the [ (Rec)] and [ (Play/
Stop)] buttons both light up, then after two
measures of the count sound, recording begins.
3. Without performing anything, record only the
required number of measures, then press the
[ (Play/Stop)] button.
The indicators for the [ (Rec)] and [ (Play/
Stop)] buttons both go out, and recording stops.
Loop Recording Shortcut
You can also use the method described below to set Loop
Recording.
1. Place A and B markers at the beginning and end of
the passage you want to record.
Take a look at “Setting Markers for Repeated
Practice (Marker)” (p. 85).
If you haven’t recorded anything yet, then perform
“Blank Recording” for the necessary number of
measures before placing the markers.
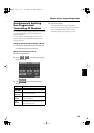
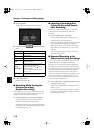
2. Touch the <Repeat> icon in the Marker screen
(p. 86).
This sets the loop recording mode.
Start a recording.
* After you have finished with loop recording, touch the
<Repeat> icon in the “Marker screen” once more to
return to the usual replace recording mode.
KR107_e.book 119ページ 2005年8月3日 水曜日 午前9時36分